Business details and what each location prints
Related guides
- Bring in your locationsSettings and integrations · 6 min
- Add terms to quotes and ordersPayments and signatures · 4 min
- Download and print quote and order PDFsPayments and signatures · 5 min
- Set up your brand kitBranding · 6 min
- Print and brand POS receiptsShowroom (POS) · 5 min
Set the company details your documents use, then add the information each showroom or warehouse needs to print. A location can have its own contact details, wire instructions, terms, logo and fallback product image.
Check the location's information when a document shows an unexpected address or phone number. Empty fields can use company or Shopify location details instead.
Before you start
Are the locations available?
Bring in your locations before editing their document details. Locations come from Shopify.
Can you change these settings?
You need Manage shop settings. A view-only role can inspect details without saving changes.
Are you changing the shop's branding?
Use Edit in Branding for the shop logo and colors. Your brand kit covers those shared visual settings.
| Document field | When the location's field is empty |
|---|---|
| Brand name | Uses Company name. |
| Address | Uses the Shopify location's address, city and country. |
| Phone | Uses the Shopify location's phone. |
| Uses Support email. | |
| Domain | No fallback. |
| Wire instructions | No fallback. |
| Order note | No fallback. |
A blank field counts as missing. The location's own value takes priority when one is set, so updating Company name does not replace a filled location brand name.
Set your company details
Step 1: Open Business details
Go to SettingsBusiness & locationsBusiness details. The store card shows its name, Shopify domain and Connected to Shopify, with Edit in Branding and Open in Shopify.
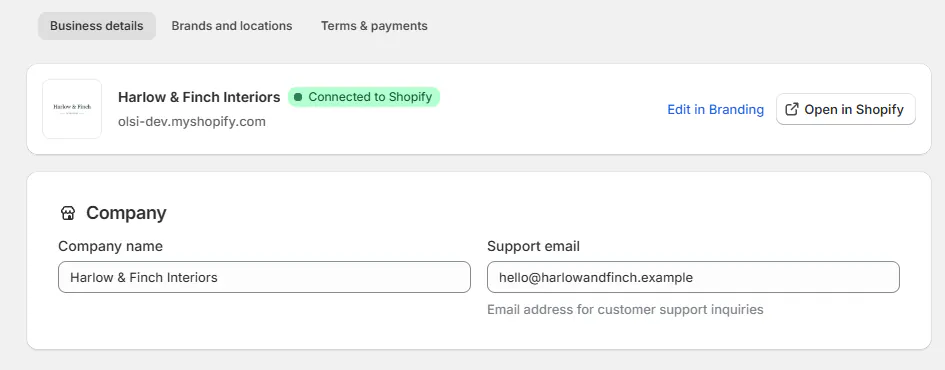
Business details identifies the Shopify store and holds your company defaults. Step 2: Enter the company information
In Company, enter Company name and Support email. For Harlow & Finch Interiors, use "Harlow & Finch Interiors" and "support@harlowandfinch.example". The save bar appears when the values change.
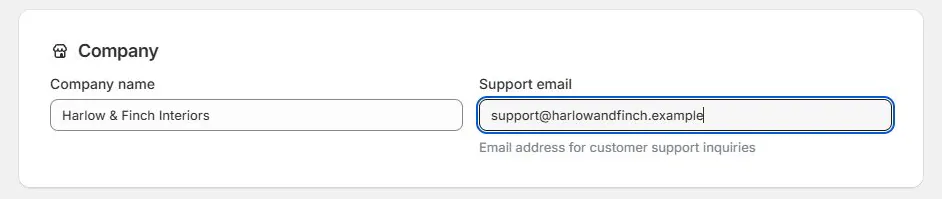
Company name and Support email provide defaults for empty location fields. Step 3: Save the company details
Click Save in the save bar. The company values become the defaults for location document fields that are empty.
Set what each location prints
Step 1: Open the location's display information
Open the locations tab and choose Edit display info from the row menu. Under Terms & payments, the same editor opens through Edit wire instructions & order note.
Step 2: Enter the printed contact details
Enter Brand name, Address, Phone, Email and Domain where the location needs its own values. Leave a field empty only when its fallback is what you want printed. The editor holds the location's new details until you save.
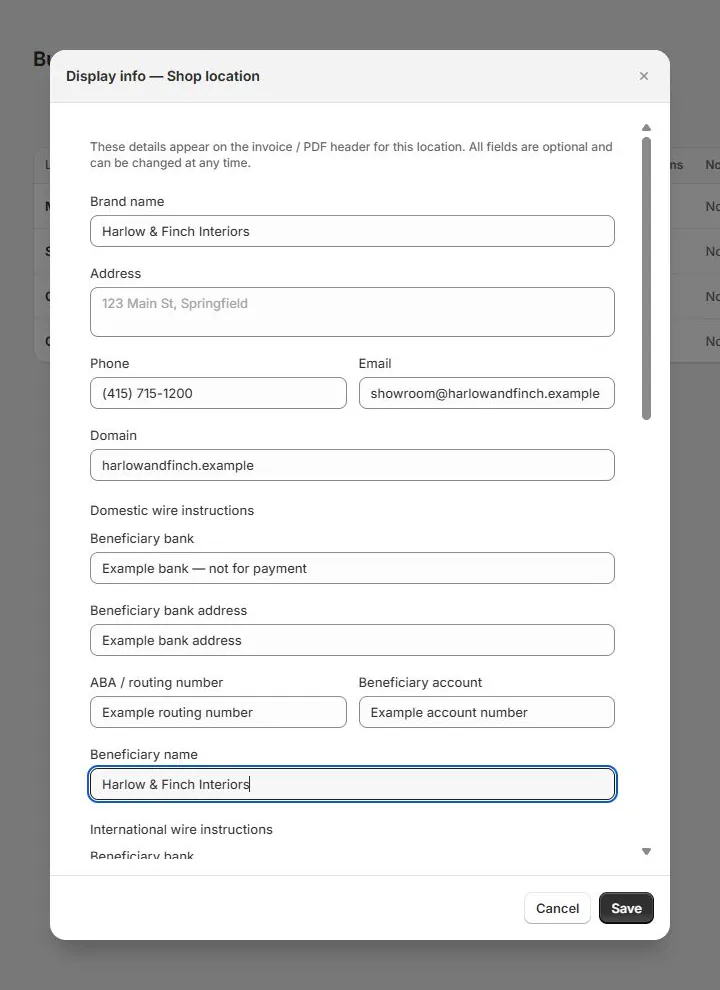
Set the contact details this location uses on documents. Step 3: Add wire instructions
Fill Domestic wire instructions, International wire instructions, or both, using your business's confirmed banking details. These fields have no company fallback, so the selected location needs its own information.
Domestic International Beneficiary bank Beneficiary bank Beneficiary bank address Beneficiary bank address ABA / routing number SWIFT / BIC code Beneficiary account Beneficiary account Beneficiary name Beneficiary name 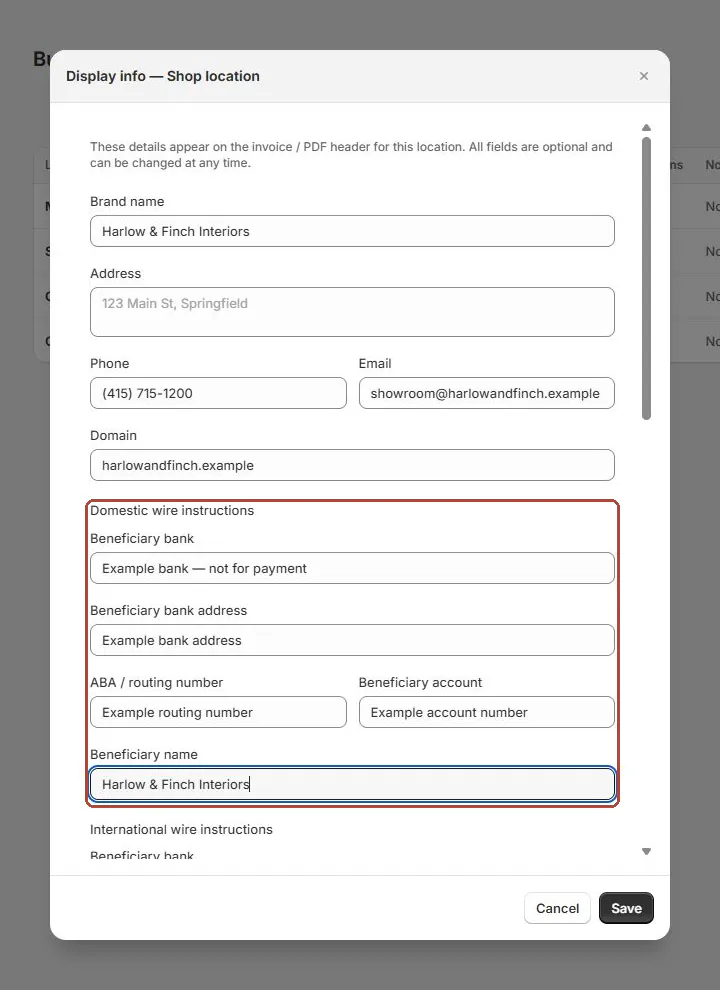
Domestic and international wire instructions are saved separately for each location. Step 4: Add the order note and save
Under Order note, enter Note shown before the client signature if your store needs it. Click Save to save the location's display information.
Step 5: Choose and frame the location logo
Click the location's Logo cell and upload or choose an image. In Reframe, choose Document header (4 : 1) or Square, then drag and zoom to place the logo. Left, Centre and Right set its alignment in the frame.
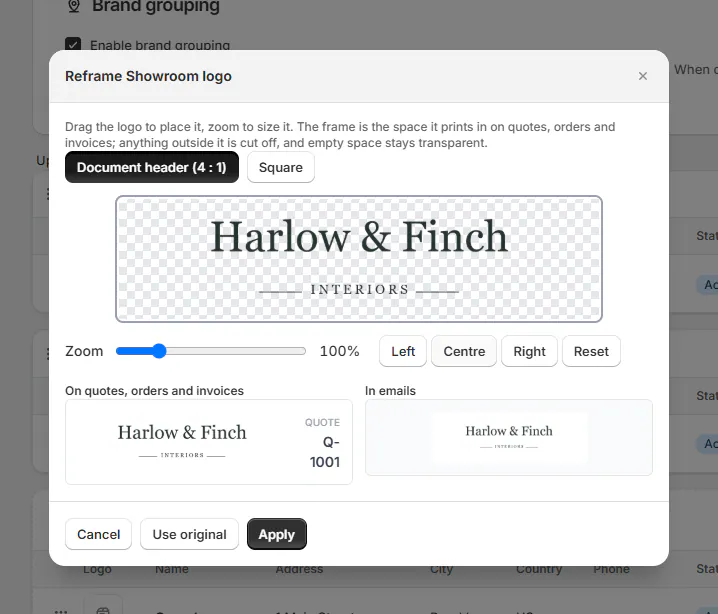
Keep the full logo inside the frame; anything outside it is cut off. Step 6: Apply the logo
Click Apply to save the framed image, or Use original to keep the original file. Look for Logo updated for followed by the location's name.
Step 7: Set a fallback product image
In the location's row menu, choose Add default product image or Change default product image. Upload or choose an image. Default product image updated for confirms which location received it.
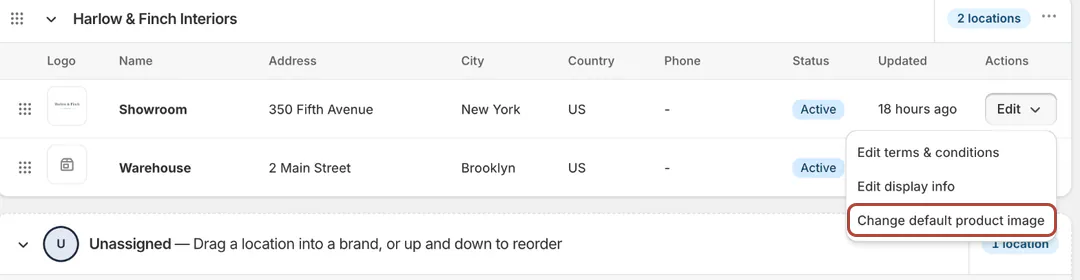
A default product image fills in when a product has no image.
How the images are used
The fallback product image can appear in pickers, POS, PDFs, emails and the signing page when the product has no image. It does not replace a product's existing image.
Apply saves a PNG of the chosen frame. Use original keeps the original file, including an SVG; use it when you want that file unchanged.
Write a location's terms
Step 1: Find the location's terms
Go to SettingsBusiness & locationsTerms & payments. Find the location and choose Edit terms & conditions from its row menu. The editor opens for that location only.
Step 2: Enter the full and receipt terms
Write the location's full terms in the editor. Add Receipt terms (short) for the bottom of an 80 mm receipt; the character count lets you check the 600-character limit.
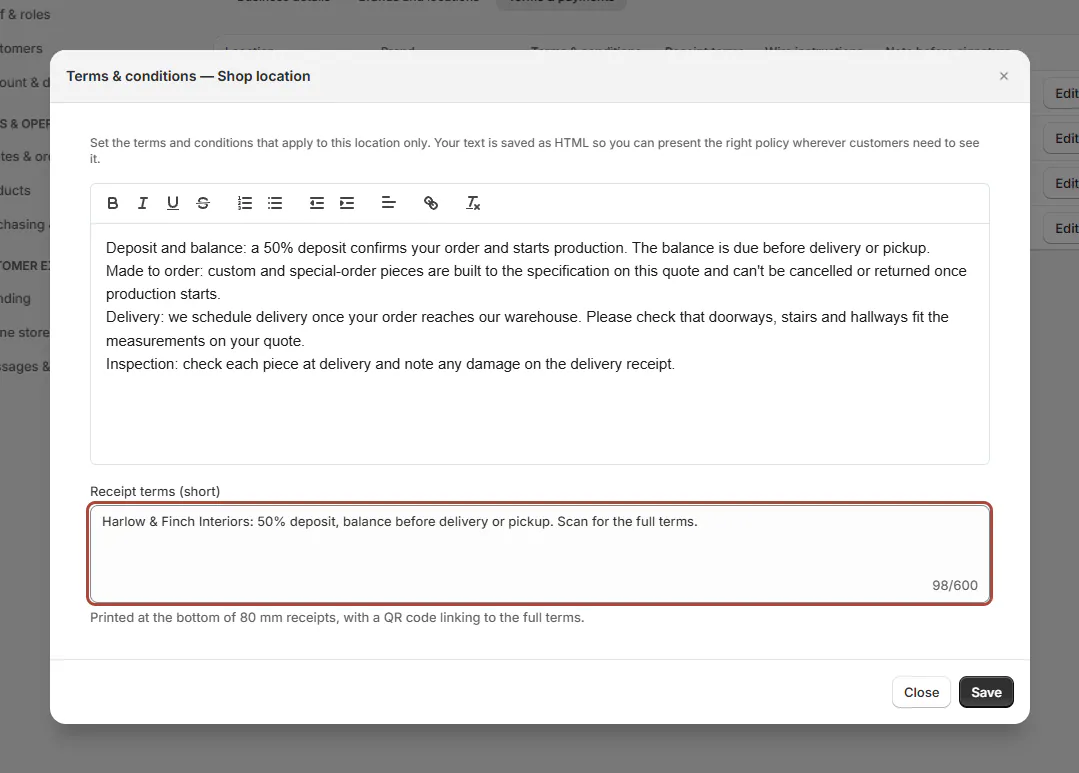
Full terms apply to the location; the receipt version is limited to 600 characters. Step 3: Save and check the summary
Click Save. Back in Terms & payments, check Terms & conditions, Receipt terms, Wire instructions and Note before signature for that location.
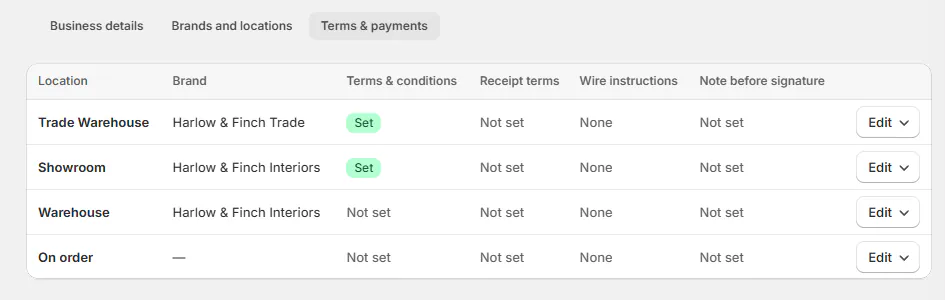
The summary shows which locations still need terms or payment details.
What the customer receives
The short receipt terms print with a QR code linking to the full terms. See Print and brand POS receipts for receipt setup.
Signed orders keep the terms they were signed with. Editing a location's current terms does not rewrite that signed agreement; Add terms to quotes and orders explains the other terms a document can include.
What happens next
New documents use the updated location details, subject to their document layout. Changes are recorded in the location's Activity.
Check a quote or order PDF for the intended location before reusing the setup elsewhere. Compare its contact details, image framing and terms with what you entered.
Example: the Harlow & Finch showroom
Example · Harlow & Finch Interiors
Prepare the showroom's paperwork
Nora Ellis sets up Harlow & Finch Interiors' Showroom.
- Set Company name to Harlow & Finch Interiors and Support email to support@harlowandfinch.example.
- Set the showroom's printed brand name, (415) 715-1200 and showroom@harlowandfinch.example.
- Add the business's confirmed domestic wire details for this location.
- Enter the store's approved 50% deposit terms and a short receipt version.
- Frame the approved logo at 4:1 and choose the Sage Velvet swatch as the fallback product image.
- Check a new showroom document against those values.
The deposit wording is this example store's policy. Writing it in the terms does not itself configure payment requirements.
If something goes wrong
The PDF shows the wrong address or phone
An empty display field falls back to Shopify's location details. Check the location chosen for the document and its display information.
The logo is cut off
Reopen Reframe and keep the logo inside the printed frame, then apply it again.
This image can't be reframed here appears
Use the original, or upload the image file before trying again.
Could not save the reframed logo appears
Try again and confirm the location's logo after saving.
Failed to upload location logo appears
Retry the image selection or upload and check for the success message.
Failed to update default product image appears
Choose the image again and confirm which location was updated.
No wire instructions appear
Check that instructions are set for this location and that the document layout includes the wire block.
Products show a placeholder
A product without its own image uses the location's fallback image. Check that location's default product image.
The Wire instructions column shows Domestic, international, Domestic, International or None. The Logo cell also opens image selection on the brands board.
Was this guide helpful?
Thanks. Tell us what was missing at support@meetorderpilot.com.