Create purchase orders in the PO Workbench
Related guides
- How purchase orders workPurchasing · 5 min
- Split or attach one order's purchase linesPurchasing · 5 min
- Buy for stockPurchasing · 5 min
- How stock on hand and tracked options shape purchase ordersPurchasing · 4 min
- Send a purchase order to your vendorPurchasing · 6 min
Create draft purchase orders for several vendors from the customer orders you choose. The PO Workbench keeps every line linked to its customer and order.
Review the receiving location, stock and quantities before confirming. Saving a vendor card prepares the workbench; Create POs creates the numbered drafts.
Before you start
Are the orders eligible?
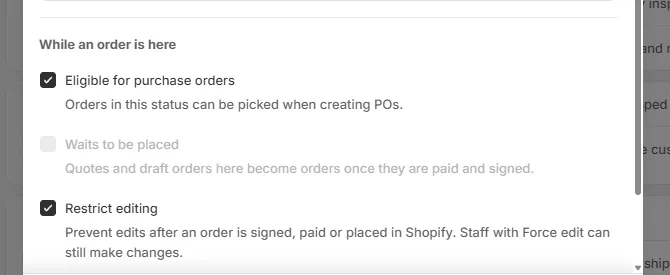
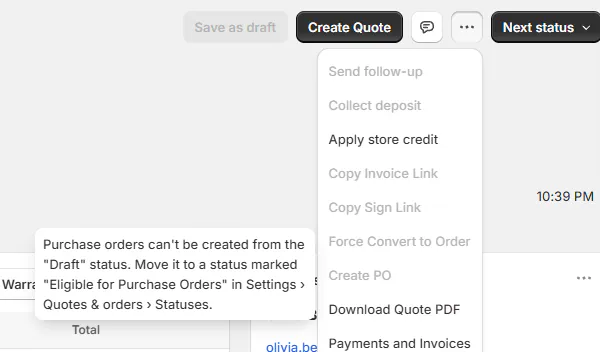
Each order must be in a status marked Eligible for purchase orders. Read how POs work.
Are vendors assigned?
Set a real vendor on each physical line. Choose line vendors before purchasing.
Do you have access?
You need Prepare purchase orders for the locations involved. Enter costs and charges is also needed to set Unit Cost.
Where will goods arrive?
Choose a subscribed physical location where your team receives the delivery.
Make a status eligible for purchasing
Step 1: Open the status
Go to SettingsQuotes & ordersStatuses and open the status you want to use for purchasing.
New stores start with Quote, Order, Partially Sent to Vendor and Reorder needed eligible. Your store can use its own status names.
Step 2: Enable purchasing and save
Tick Eligible for purchase orders, then save. Orders in that status can now be selected when creating POs.
Changing this setting needs Manage order and quote settings. An order with missing vendors cannot move into an eligible status; assign its vendors first.
Use status setup for the rest of the status's behavior.
Choose orders and the receiving location
Step 1: Open the PO Workbench
Open Purchase Orders, then click Create PO. The PO Workbench opens.
For a single customer's sale, you can start with that order's Create PO. See purchase orders from one order for splitting and attaching its lines.
Step 2: Choose Fulfillment Location
In Filters, choose Fulfillment Location. This is where the PO is delivered and received, and where the workbench checks stock.
The delivery address starts from that location. A made-to-order destination holds commitments; it cannot be used for physical PO receiving.
Step 3: Select the customer orders
Under Choose the orders to buy for, tick the orders you need. Select all orders selects the available list, up to 100 orders.
Read PO Status before selecting: All in PO, Partially in PO or No PO. View PO summary shows what is allocated and what remains.
Nothing is preselected unless only 1 eligible order exists or you opened the workbench from an order. Opened from an order's Create PO, the workbench shows that order's card (1 vendor · one PO · every line keeps its customer and order) with Show order in place of the list.
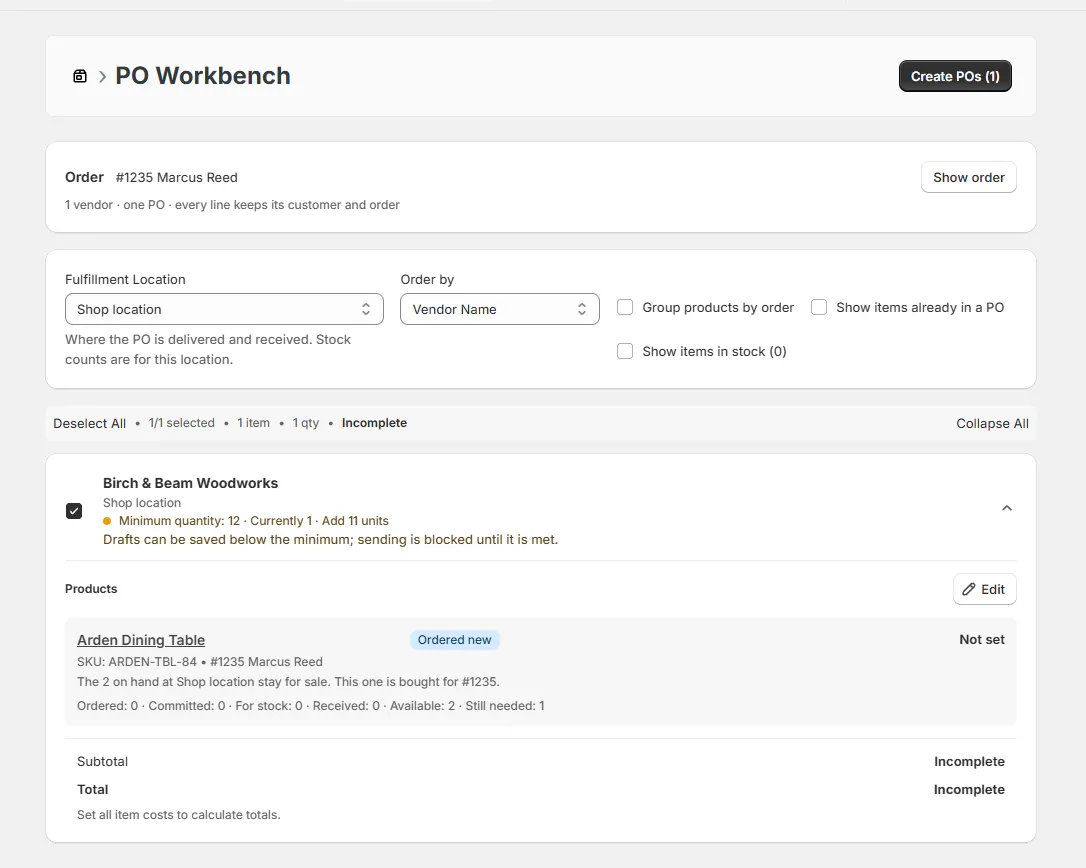
Opened from an order, the workbench buys for that order only. Step 4: Finish the selection
Click Done to fold the order list. The summary shows the vendor count and explains that each line keeps its customer and order.
Use Change orders to reopen the list. Check stock coverage if a line you expected is absent.
The other filters
Order by sorts vendor cards by Vendor Name, Order Date or Total Amount. Group products by order changes their organization.
Show items already in a PO exposes existing allocations. Show items in stock brings back lines covered by stock at the chosen location.
Review vendor cards and create drafts
Step 1: Expand and inspect each card
Expand a vendor card or use Expand All. Check each line's customer, quantity and stock badge.
Quantity details distinguish Ordered, Committed, For stock, Received, Available and Still needed. A No Vendor card cannot be selected for creation.
If a total says Incomplete, at least one cost is unset. Review it with someone who can enter costs.
Step 2: Edit the vendor's purchasing details
Click Edit on the card. Check Quantity, Unit Cost, Item-specific labels, Vendor Notes and Requested Delivery Date.
Check Delivery Address, Tax, Ship and Hide Pricing. Internal Notes are for your team. Side Label appears on the PO page only.
The address follows the location until you type an override. A typed address is kept when the destination changes.
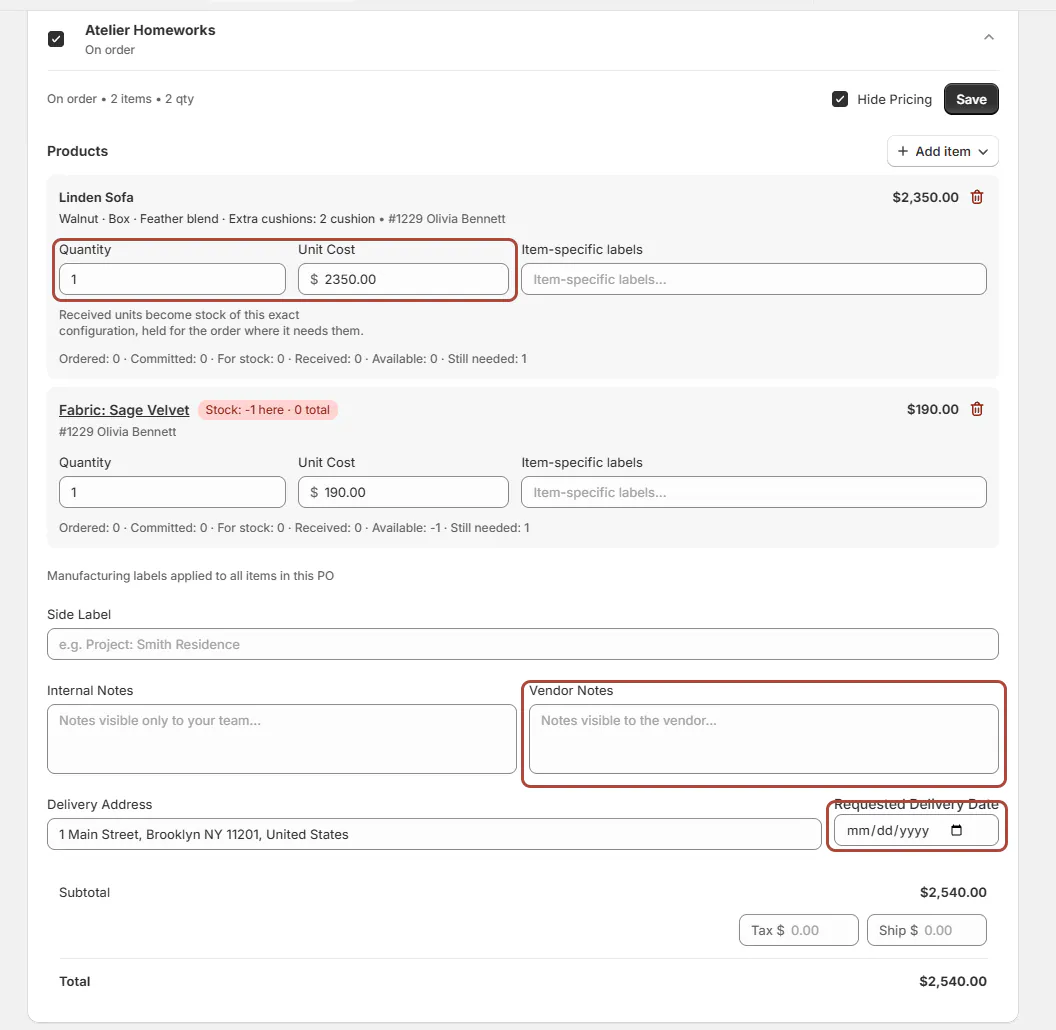
Review quantities and the delivery details before creating. Step 3: Save the card's preparation
Click Save to close the card form. Your preparation stays in the workbench; no purchase order exists yet.
For extra stock, use buy for stock. For line exclusions or an existing PO, use one-order purchasing.
Step 4: Select the vendors
Tick the vendor cards you want, or use Select All. Check the selected count against the cards.
You can create up to 50 POs in one run. Each PO can link up to 100 customer orders and contain up to 300 lines.
Step 5: Confirm Create POs
Click Create POs, then confirm Create draft POs. The dialog explains that each draft gets a permanent PO number and remains editable.
If Some items have a quantity of 0 appears, choose Review items and correct the quantities before continuing.
After confirmation, you return to your previous page while OrderPilot creates the drafts.
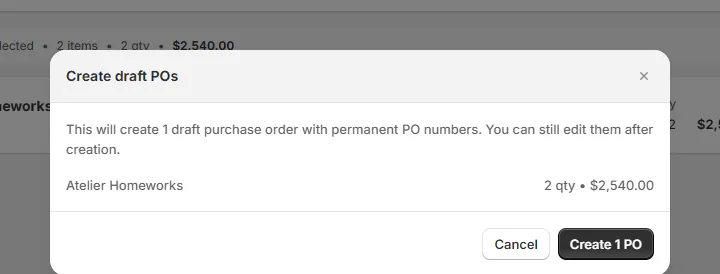
Creating drafts assigns permanent PO numbers.
What happens next
The Purchase Orders list shows Creating purchase orders and X of N done to the person who started the run. New POs appear under Draft.
Order lines gain their PO references. Nothing goes to a vendor until you send each draft.
If some drafts fail, the banner names each vendor and reason. Correct that cause, then use Retry failed rather than creating all the drafts again.
Example: sofas and chairs for 2 customers
Example · Harlow & Finch Interiors
Two vendors, two draft POs
Jo Park buys for Olivia Bennett and Marcus Reed.
- Choose their orders and Warehouse as Fulfillment Location.
- Review both Linden Sofas under Atelier Homeworks.
- Review the Mira Dining Chairs under Birch & Beam Woodworks.
- Select both vendor cards and confirm Create POs.
- Find PO-10001 and PO-10002 in Draft, each with its customer links intact.
If something goes wrong
Create PO is unavailable
Hover over it. Check status eligibility, saved changes, missing vendors, existing allocations and exclusions. An order containing only services has nothing to buy.
No eligible orders appear
Check the location and order statuses. Use a standalone PO only when buying stock without customer orders.
Create POs is greyed out
Select an order and vendor, or bring covered lines back with Show items in stock.
Some POs were not created
Read the vendor-specific reason and use Retry failed. Failed runs remain available for 24 hours.
The progress banner stops updating
Refresh the list to check the result before trying again.
Purchase order could not be processed
Read the reason. Use Open Billing when location coverage is missing; select a subscribed physical destination.
Screen reference
Was this guide helpful?
Thanks. Tell us what was missing at support@meetorderpilot.com.