Create options and values
Related guides
- How the catalog fits togetherCatalog · 6 min
- Group options into bundlesCatalog · 6 min
- Show or narrow options with rulesCatalog · 4 min
- Set option prices and track separate stockCatalog · 5 min
- Set up a Dimensions option for custom sizesCatalog · 4 min
An option is a choice or input used to configure a product, such as its size, fabric or finish. A value is one available selection within that option: Size might offer Small, Medium and Large.
Options can offer predefined values or accept measurements, quantities or text. Each choice can have its own price, cost and lead time.
Create options once and reuse them across product templates. Each template can offer the values it needs, set its own prices and control how those choices appear to customers.
Before you start
Check catalog access
Creating and managing options needs Manage the catalog. Existing selling prices need Change catalog selling prices; costs need Enter costs and charges.
Choose a unique name
Options, order fields and archived options share one name list. Capitalization does not make a name different.
Choose the right level
Options describe a product line. Use order fields for information entered once across the whole sale.
Staff who can create and edit quotes can add values, subject to price and cost permissions. Other option settings can remain view-only.
Choose an option type
| Type | Use it for |
|---|---|
| Dropdown | A named choice such as Walnut or Ebony. |
| Swatch | A choice with a color or image, such as fabric. |
| Number | A measured quantity, with per-unit pricing. |
| Dimensions | A size with 2 or 3 measurement parts. |
| Text or Text area | Customer-entered wording with a flat price. |
| Image | A legacy type; use Text or Swatch for new options. |
For measured pricing, see Option pricing and stock. For size entry, see Dimensions.
Create the option
Step 1: Open Add option
Go to SettingsProductsOptions. Choose Active, then click Add option.
The creation dialog opens. Add option is not shown while viewing archived options.
Step 2: Name the option
Enter Internal name, such as Fabric. It can contain up to 75 characters.
Use Shown to customers for a different label, up to 50 characters. Leave it blank to reuse the internal name.
The dialog shows the name staff will manage and the label customers will see.
Step 3: Choose its type
Choose Type. The initial choice comes from Product defaults, so check it before creating the option.
For Fabric, choose Swatch. Leave Track inventory for this option off unless each value is stocked and purchased separately.
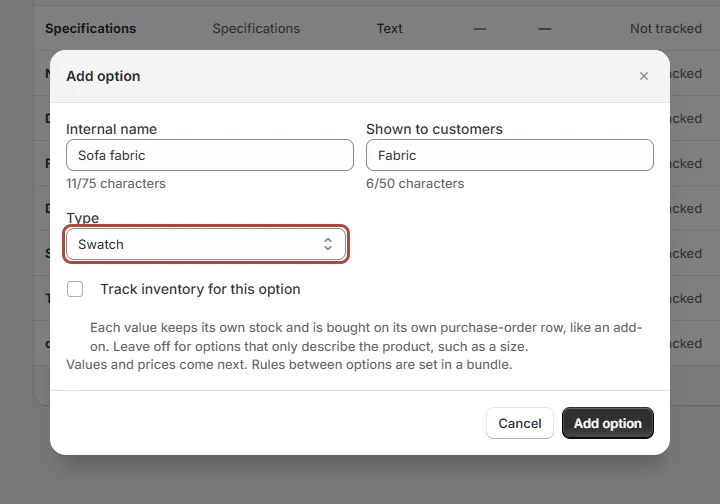
Add option dialog with Fabric, Swatch type Step 4: Create the record
Click Add option. Option created confirms the save, and the option page opens.
Values and prices come next. Rules between choices belong in a bundle, rather than the shared option itself.
Add values and presentation
The figures you enter here are shared defaults. Each template can override a value’s price, cost or lead time without changing that shared default. Templates without an override continue to use the shared figure.
Step 1: Add the choices
Click Add value and enter Sage Velvet. Add Oat Linen as another value.
Set Default price, Default cost and Lead time where needed. A zero price reads Included; a zero cost reads Free.
An empty cost is unknown. A new value starts at a lead time of Same day (0 days); enter the extra days the choice adds.
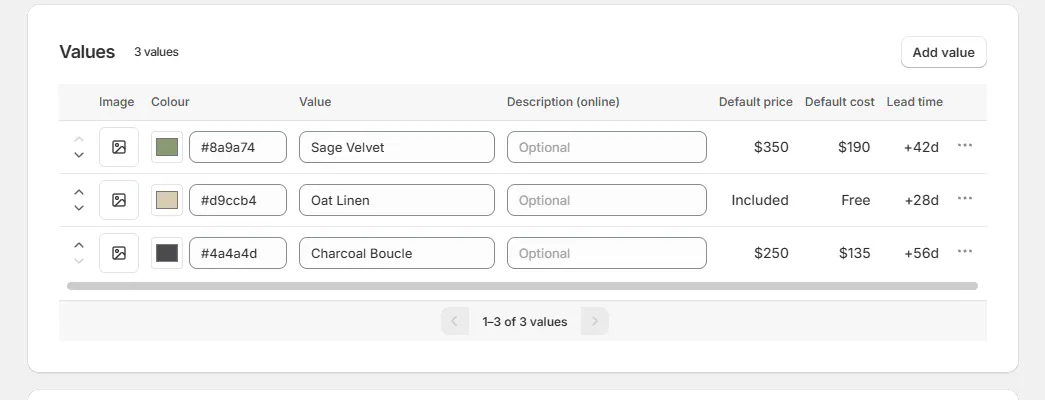
Fabric values table with images, prices, costs and lead times For lead-time calculations and template overrides, read Set up lead times. Templates can override these shared starting values.
Step 2: Add an image or color
Choose Upload image for a value, or choose its Colour for a Swatch option. PNG, JPG and WebP images can be up to 5 MB.
Use Replace image or Remove image when needed. The value row shows its selected image or color.
Add Description (online) when a choice needs explanation on the storefront. Keep it within 160 characters.
Step 3: Tidy the value list
Use Move up or Move down to change the order. Clear Search values before reordering.
Open a value's menu for Rename for customer, Use the value name again or Delete value. The last remaining value cannot be deleted.
Search appears after 10 values, and the table shows 10 rows per page. Each option can hold up to 500 values.
Step 4: Review the option page
Check What the customer sees, including Customer label and Help text under the field. Review In these bundles and Used by for existing connections.
Default look online is covered in Fine-tune options online. Class name supports styling the options block.
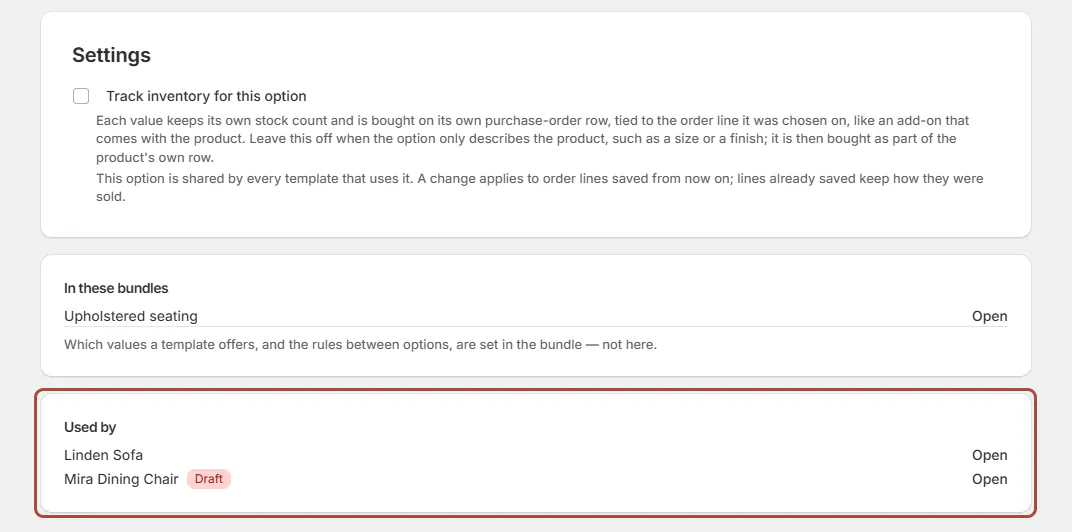
Fabric option settings beside In these bundles and Used by Step 5: Save the option
Click Save. The app confirms Option saved.
Number, Dimensions and Text options have one settings row instead of selectable values. Their dedicated guides explain the fields for those types.
Warning
Changing a Dropdown or Swatch to another type removes its values and the rules and prices pointing at them when saved. Placed orders keep their records.
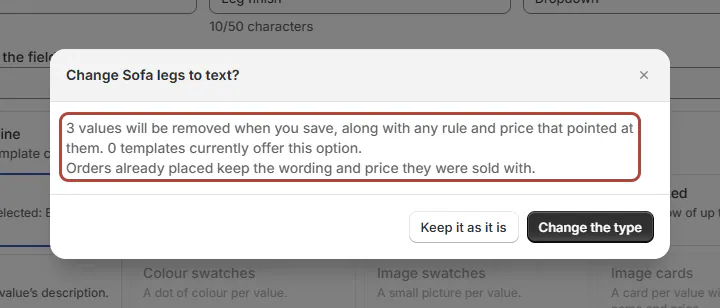
Change the type confirmation saying how many values will be removed The confirmation says how many values will be removed and how many templates offer the option. Choose Change the type or Keep it as it is.
Archive or restore an option
Step 1: Archive the option
Save or discard current changes. Open More actions, choose Archive option, and read the affected bundle and template counts.
Click Archive when ready. The option stops appearing on new orders and products and remains in the list as Archived.
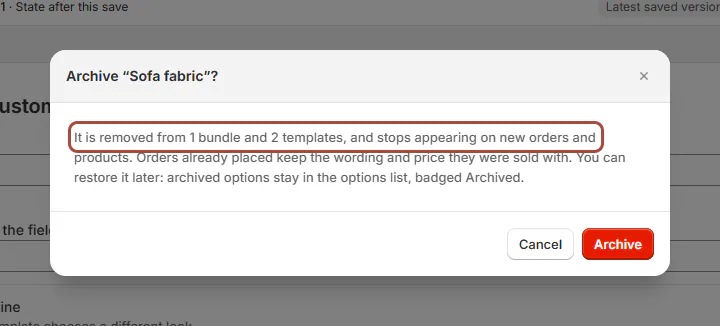
Archive confirmation for an option used by two templates Step 2: Restore the option
Return to Options, choose Archived, and open the option. Choose More actions > Restore option.
The option returns where it was used. Archiving does not delete its template attachments, and there is no permanent delete control.
What happens next
Put the option into a bundle or attach it while creating a template. A shared option alone does not automatically reach a template.
New values follow each template's rule: Offered straight away or Added but not offered. Review that rule before expanding a widely used option.
Saved order lines keep their sold values and prices. A warranty exception backed by an archived option becomes named whole-product coverage; see Coverage exceptions.
Example: fabric and leg finish
Example · Harlow & Finch Interiors
Create shared sofa choices
Nora Ellis prepares options for Harlow & Finch Interiors.
- Create Fabric as a Swatch with Sage Velvet and Oat Linen.
- Give Oat Linen a zero additional price so it reads Included.
- Rename its customer-facing value to Oatmeal Linen.
- Create Leg finish as a Dropdown with Natural oak, Walnut and Black steel.
- Save both options and add them to the seating bundle.
The team can reuse the same choices across its sofa templates.
If something goes wrong
Internal name must be unique
Check active options, archived options and order fields. Use a distinct internal name and the customer label you need.
Add value is greyed out
Hover for its reason. An option can have 500 values.
An image is refused
Check it is PNG, JPG or WebP and no larger than 5 MB.
The last value cannot be deleted
Add a replacement before removing it.
Pricing fields are view-only
Check your selling-price and cost permissions. Costs hidden means you lack View costs.
You cannot leave the page
Save or discard the unsaved option changes.
Was this guide helpful?
Thanks. Tell us what was missing at support@meetorderpilot.com.