Choose pickup or delivery and hand items over
Where are you working?
Related guides
- Create a quote or orderQuotes and orders · 6 min
- Take some items home and deliver the restQuotes and orders · 5 min
- Read and change an order's delivery promiseQuotes and orders · 5 min
- Choose options and a vendor for each lineQuotes and orders · 6 min
- Add fees, shipping and discountsQuotes and orders · 5 min
Choose Delivery or Store pickup for each physical item, then record when the goods leave. Receiving goods and handing them to the customer are separate events.
Shopify fulfillment follows the handover of individual units. Check payment and readiness before marking anything collected or delivered.
Before you start
Set the destination
Pickup needs a location; delivery needs an address.
Check permissions
Changing the method needs Create and edit quotes and orders. Handover needs Change order status.
Check payment and arrival
Items can leave only when paid in full. Goods still on order must arrive before handover.
New admin orders start as controls the app default under SettingsQuotes & ordersDefaultsDelivery & stock. It starts at Delivery.
On POS, a catalog product at the store starts as Store pickup, while a template starts as Delivery.
Choose how each item leaves
Step 1: Choose the app line's method
Open the line's ••• menu. Choose Change to delivery or Change to store pickup.
A badge appears when the line differs from the default. The location-and-delivery summary updates to show the destination or pickup location.
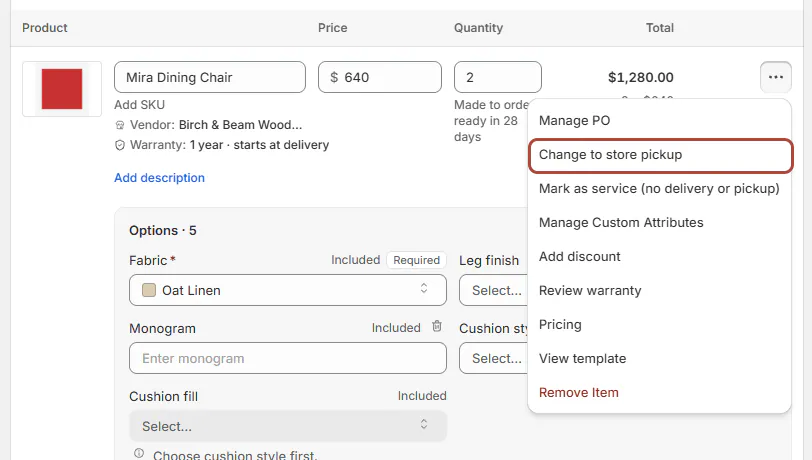
Choose the method for this line. Step 2: Choose the POS item's method
Before Shopify placement, open Fulfillment details and use Change beside the item. Choose its pickup or delivery method.
The item shows the selected method. Changing the method at a locked status also needs Force Edit access.
Step 3: Review a mixed sale
When creating a sale with both methods, read Delivery and store pickup in one order. Check which items appear on each side before confirming.
The customer still sees one sale and total. Split orders explains cases where different tax treatment requires separate parts.
Service lines need neither pickup nor delivery. Options and vendors on a line explains how services are identified.
A pickup line skips the store-to-customer delivery days in the delivery promise. Check that change before discussing the date.
Hand items over in the app
Step 1: Find the waiting goods
On Orders, choose Awaiting pickup and read Waiting. This view includes paid or arrived items that have not left.
The column shows Today or the number of days since the oldest waiting item became available. Waits beyond 14 days are highlighted.
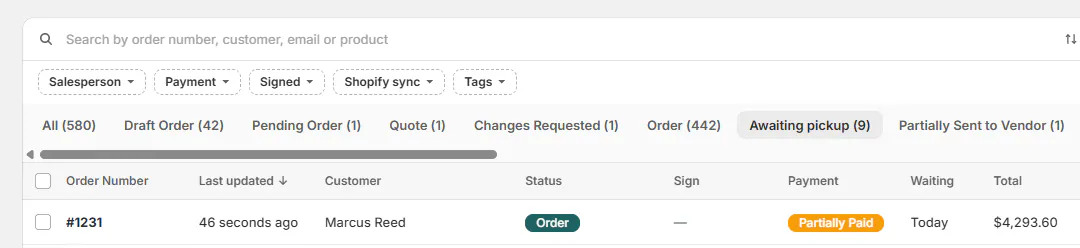
Waiting highlights how long the oldest item has been ready. Step 2: Open the ready group
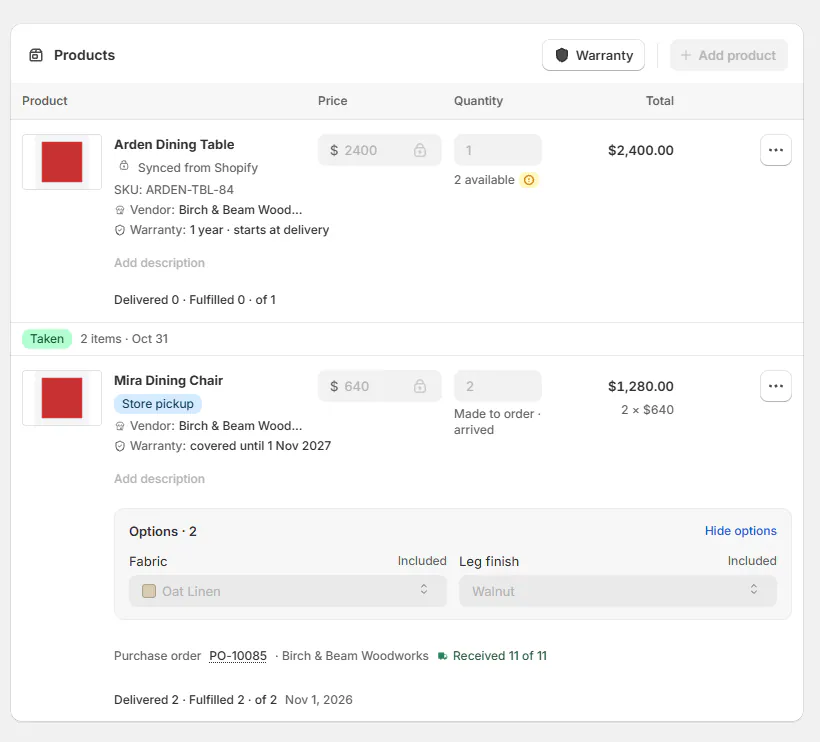
Open the order. Under Products, find Waiting for pickup or Waiting for delivery.
Click Mark collected or Mark delivered for the relevant group. The selection dialog opens for the items that can leave.
Step 3: Record the units leaving
Tick the items, set How many when a line has more than one unit, and check How they left (Delivered or Collected in store). Record only the units being handed over.
Confirm the action. The completed units move into Taken, while outstanding units stay in their appropriate group.
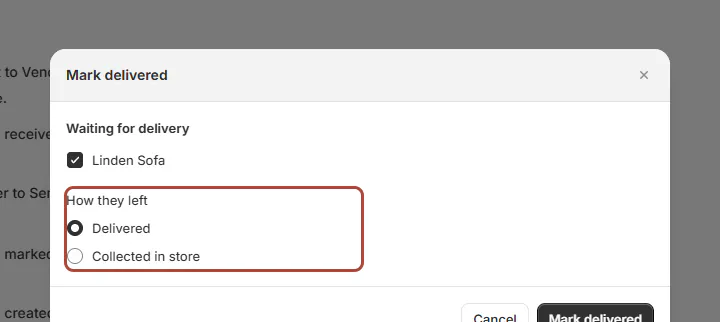
Record the quantity actually leaving the store.
Hand items over on POS
Step 1: Open fulfillment details
Open the order and read its readiness badges, such as Waiting on, All arrived or Ready for pickup.
Tap Fulfillment details. The screen shows Items, Updates and Serial numbers, with the fulfilled count and outstanding items.
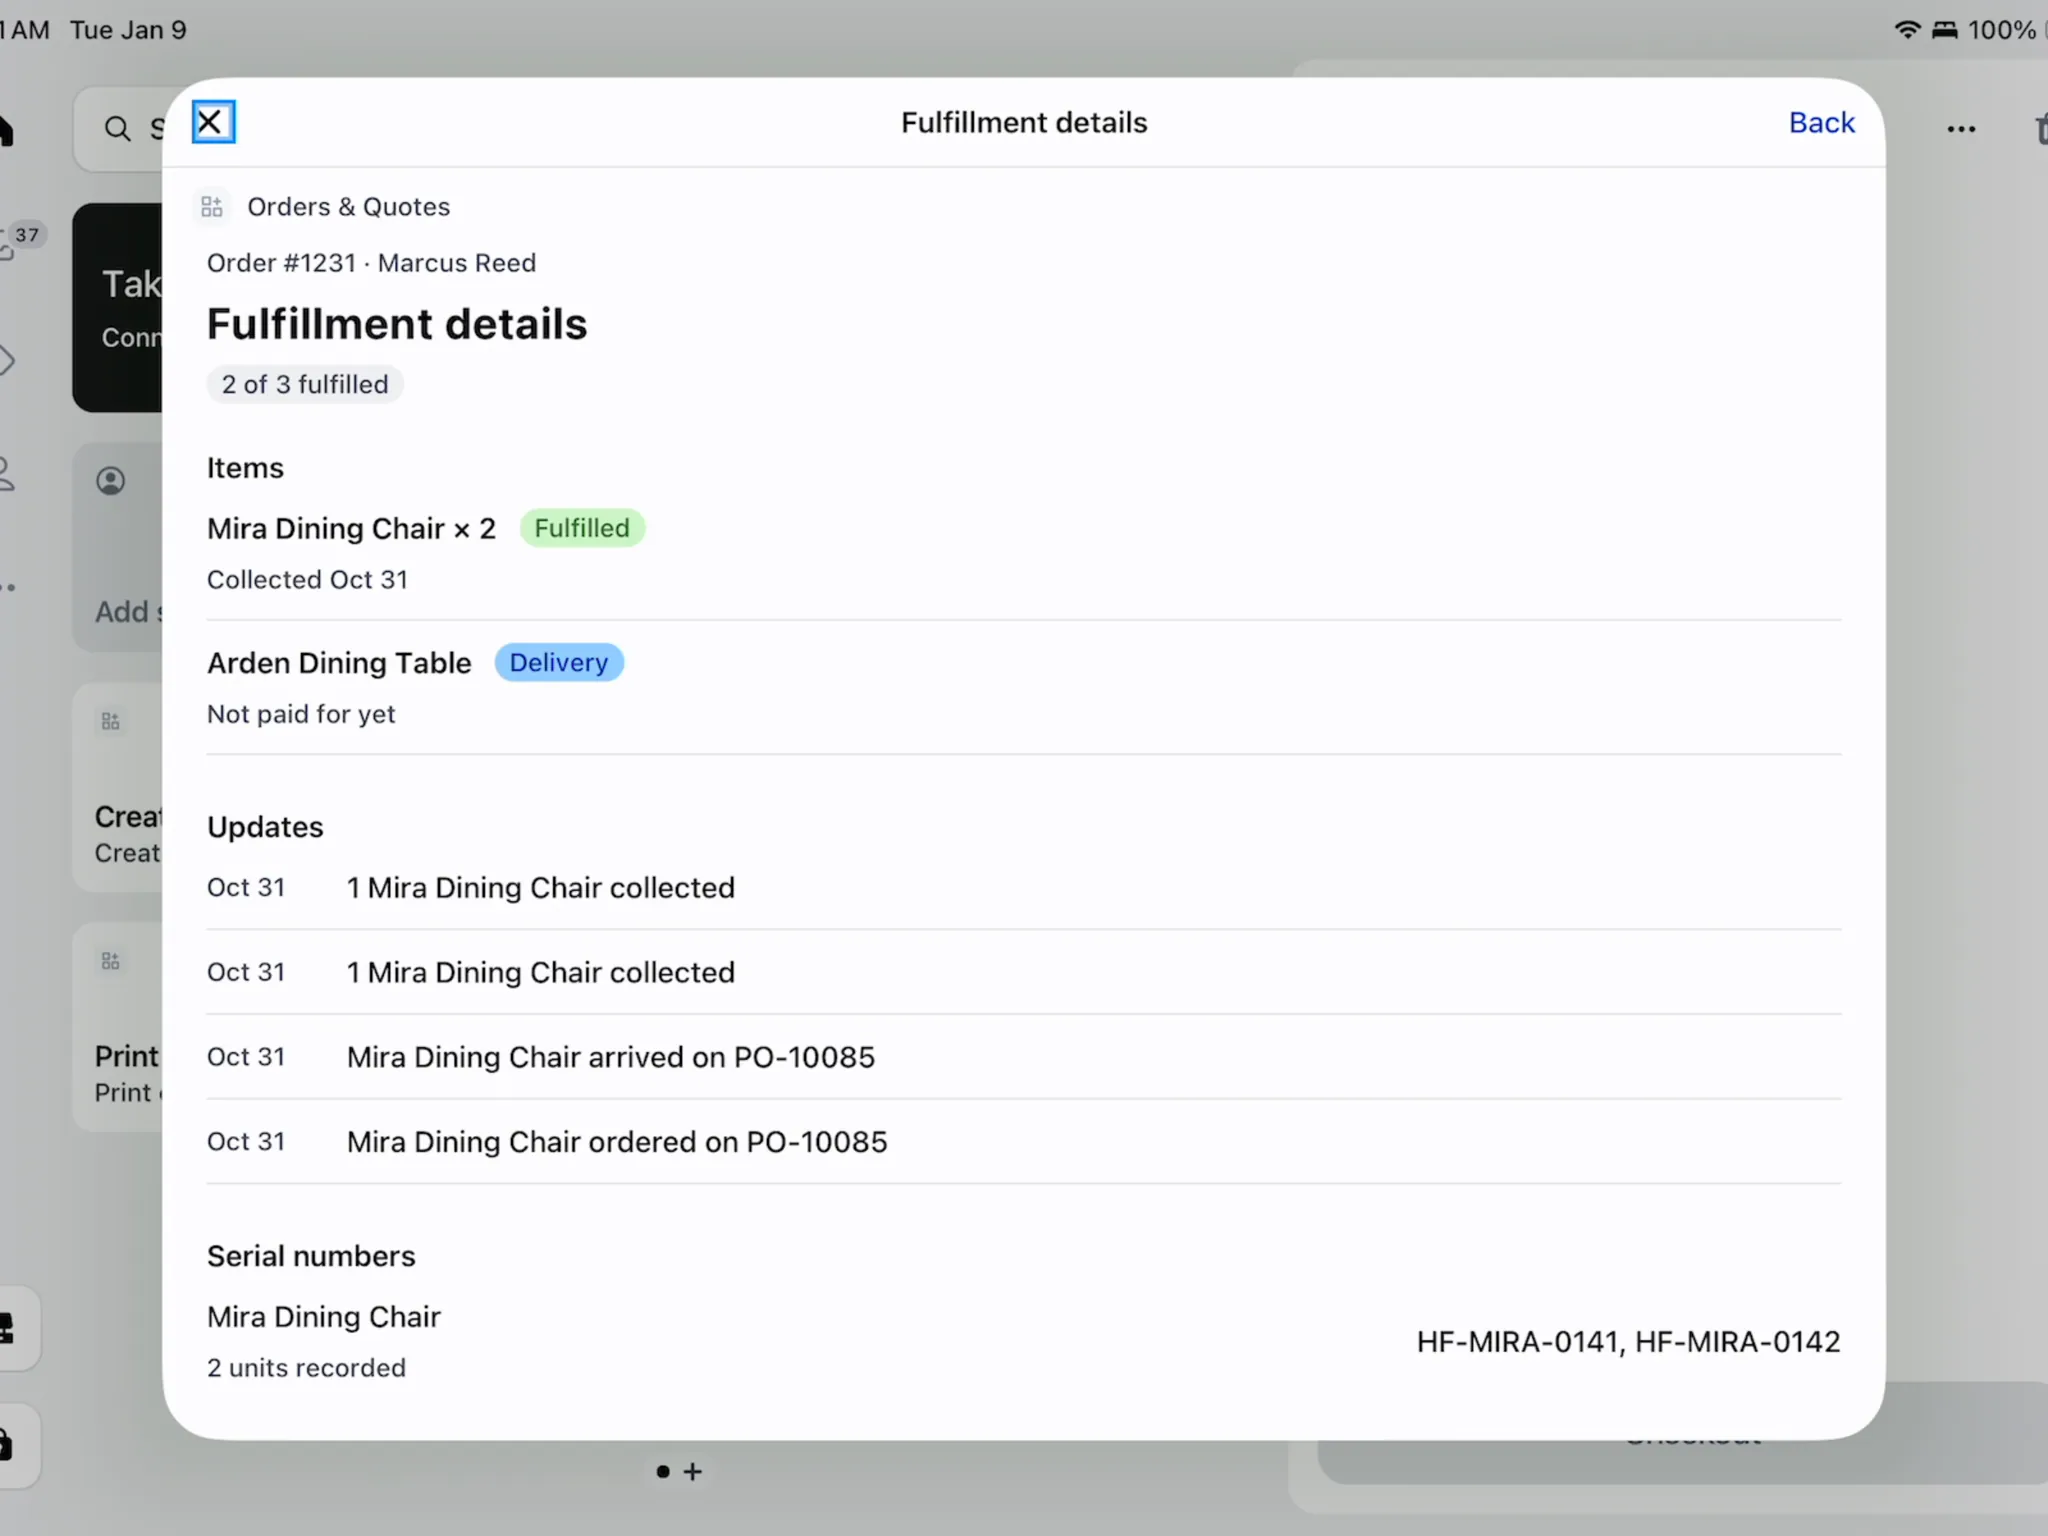
Check arrived, waiting and collected units together. Step 2: Record the handover
For an eligible waiting item, tap Mark collected and choose the actual handover method.
Complete the quantity and confirmation shown. The recorded event appears in Updates.
Step 3: Resolve missing serial numbers
If the item shows Serial needed, arrange entry in the app using Serial numbers.
Serial numbers are read-only on POS. Return to the item's fulfillment details after the required information is recorded.
What happens next
Handed-over units move to Taken, and Shopify fulfills those lines. The order status can advance according to the store's workflow.
For mixed sales, documents and signing pages show separate Delivering and Store pickup tables. Single-method sales use one table without that split heading.
Receiving from a vendor does not itself record customer delivery. Use Receive a delivery first, then record the actual handover.
Example: Marcus's chairs and table
Example · Harlow & Finch Interiors
Let each part leave at the right time
Marcus Reed takes Mira Dining Chairs from the showroom and waits for an Arden Dining Table from Birch & Beam Woodworks.
- Sam Ortiz sets the chairs to Store pickup and the table to Delivery.
- Sam confirms the mixed sale and checks whether it is taxed in separate parts.
- After the required payment, Sam marks the chairs collected.
- Jo Park receives the table against PO-10001 when it arrives.
- After the delivery payment and actual handover, Jo marks the table delivered.
Important notes and tips
The old In-store Sale switch has been replaced by each line's delivery method. Check the lines instead of looking for that switch.
At POS payment, Pickup or Delivery? determines what leaves today. Review that screen separately from the earlier planned method.
If something goes wrong
Delivery has no address
Add the destination before requesting payment.
Pickup has no location
Choose the location where the customer will collect.
Items are not fully paid
Use Collect a payment for the displayed outstanding amount before handover.
No items are selected
Tick at least 1 eligible item and enter the quantity leaving.
Mark collected is greyed out
Check status-change permission and read the stated blocker.
The item is still On order
Record its vendor receipt before customer handover.
Was this guide helpful?
Thanks. Tell us what was missing at support@meetorderpilot.com.