Sign in the showroom: on the iPad, by QR code or on paper
Related guides
- Get a quote signedPayments and signatures · 5 min
- How customers sign and pay onlineCustomers and portal · 5 min
- Set signature and minimum-deposit requirementsPayments and signatures · 5 min
- Collect a paymentPayments and signatures · 6 min
- OrderPilot on Shopify POSShowroom (POS) · 6 min
Let the customer sign while they are in the showroom, or send the agreement for later. Use the iPad, the customer's phone, email or a printed copy.
Start from a saved, created sale with the customer attached. A draft saved only in OrderPilot has no customer-signature action.
Before you start
Check the agreement
Save the intended customer-facing details. Opening the signature screen saves unsaved edits first.
Check access
Unavailable signing methods are omitted, with a notice explaining the restriction.
Check the location
Signing QR codes and printing require the order's location to be billed.
Prepare paper signing
Print to Sign needs a supported register and a printer connected to Shopify POS.
Get a quote signed covers the app's email route. This guide starts from the showroom register.
Choose the signing method
Step 1: Open Customer signature
Tap Get Customer Signature on the quote or order. Read why the record requires signing.
Customer signature shows the QR code and available methods. Check the customer's name and record number before handing over the device.
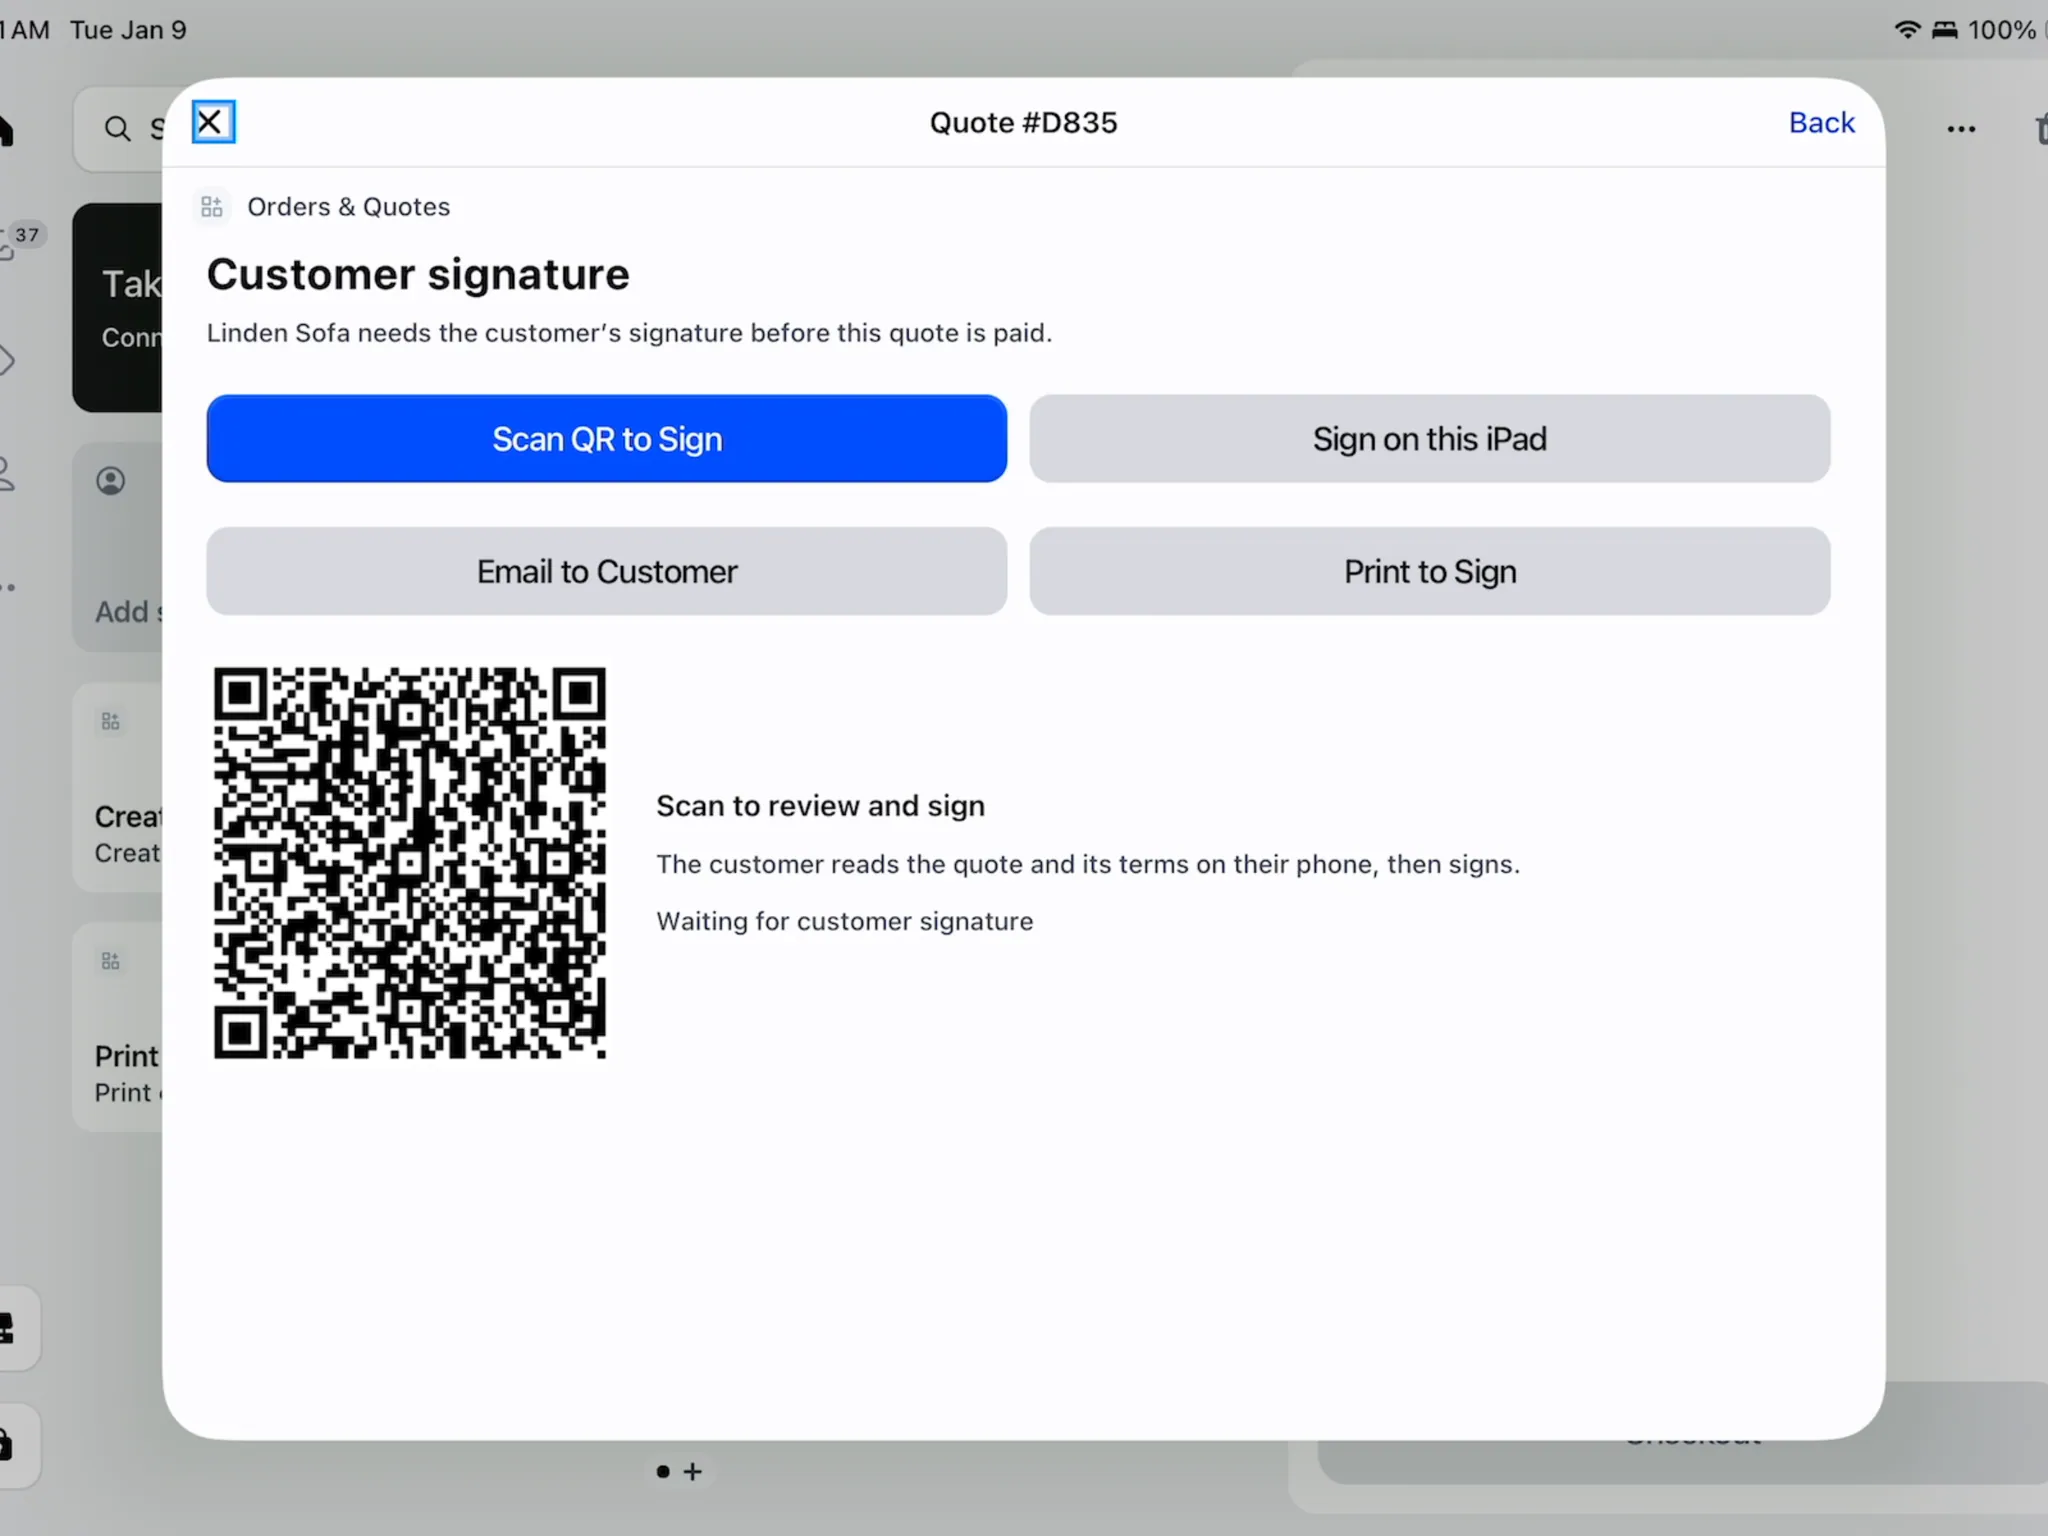
Choose the signing route that suits the customer. Method Use it when Sign on this iPad The customer wants to sign on the showroom device Scan QR to Sign The customer wants to use their own phone Email to Customer The customer will review and sign later Print to Sign The customer wants to sign the printed agreement Showing the QR for an online request still being priced ends the pricing stage. Check the quote before exposing its signing route.
Sign on the iPad
Step 1: Hand over the review
Tap Sign on this iPad and give the device to the customer. They read the document and agreement.
The customer ticks the agreement and taps the signing action naming the quote. The signature-style screen opens.
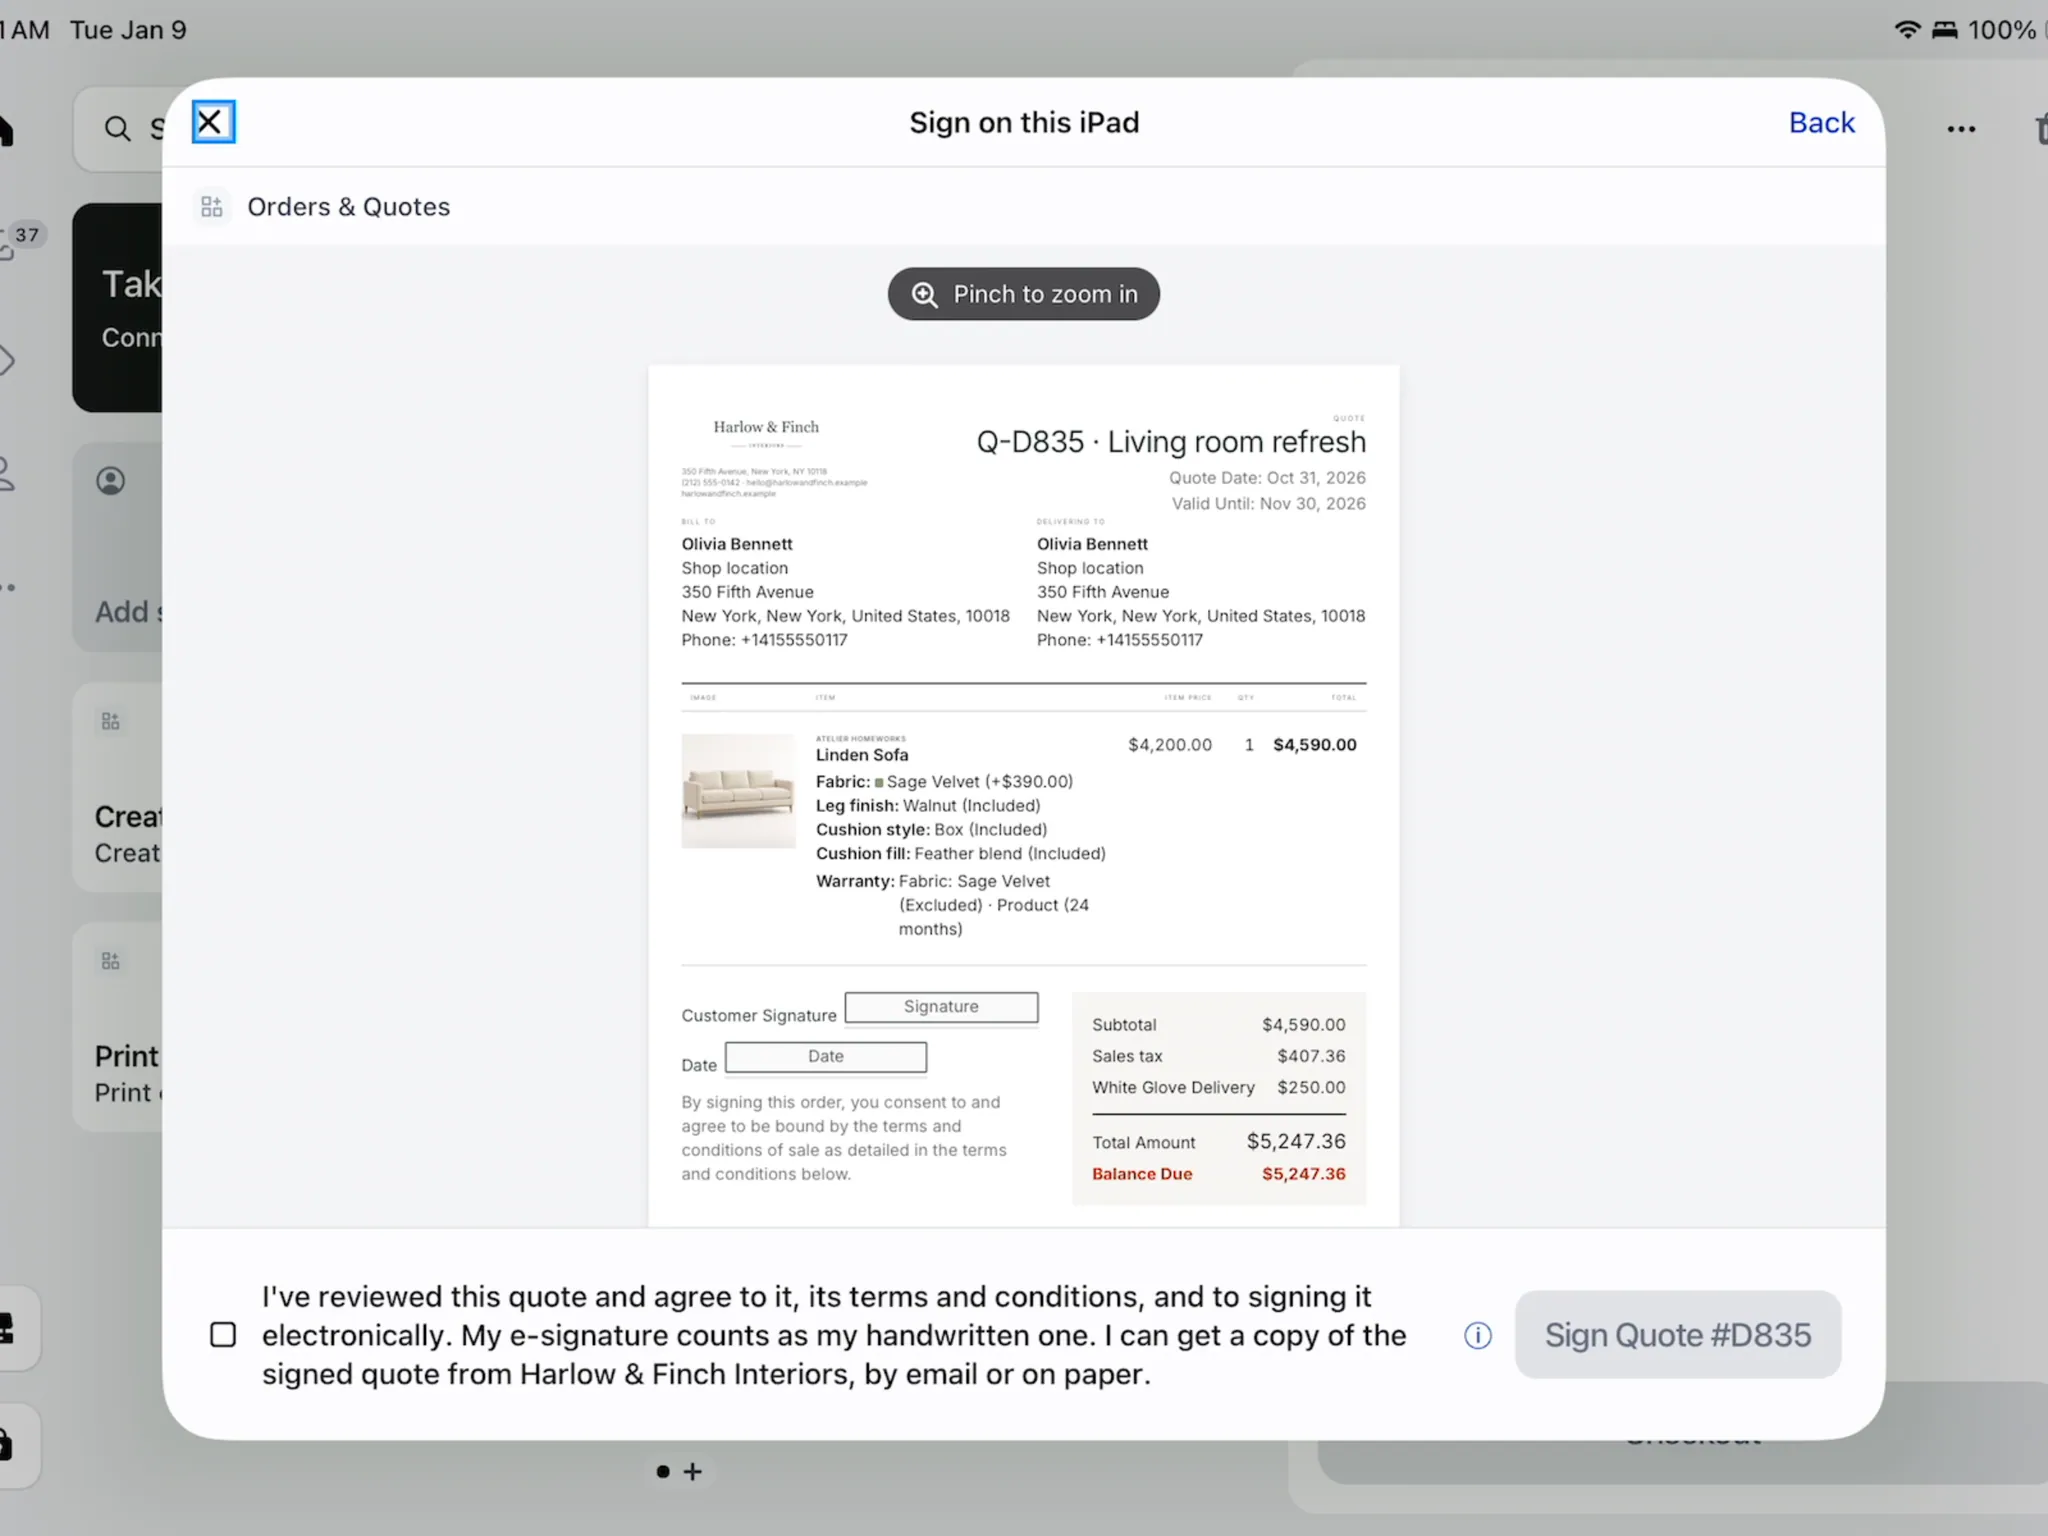
The customer reviews the document before choosing a signature. Step 2: Let the customer choose
The customer chooses Script, Classic or Handwritten. They check Signing as with their name and the showroom location.
They tap Use this signature and sign to complete the signature. The confirmation identifies the signed record.
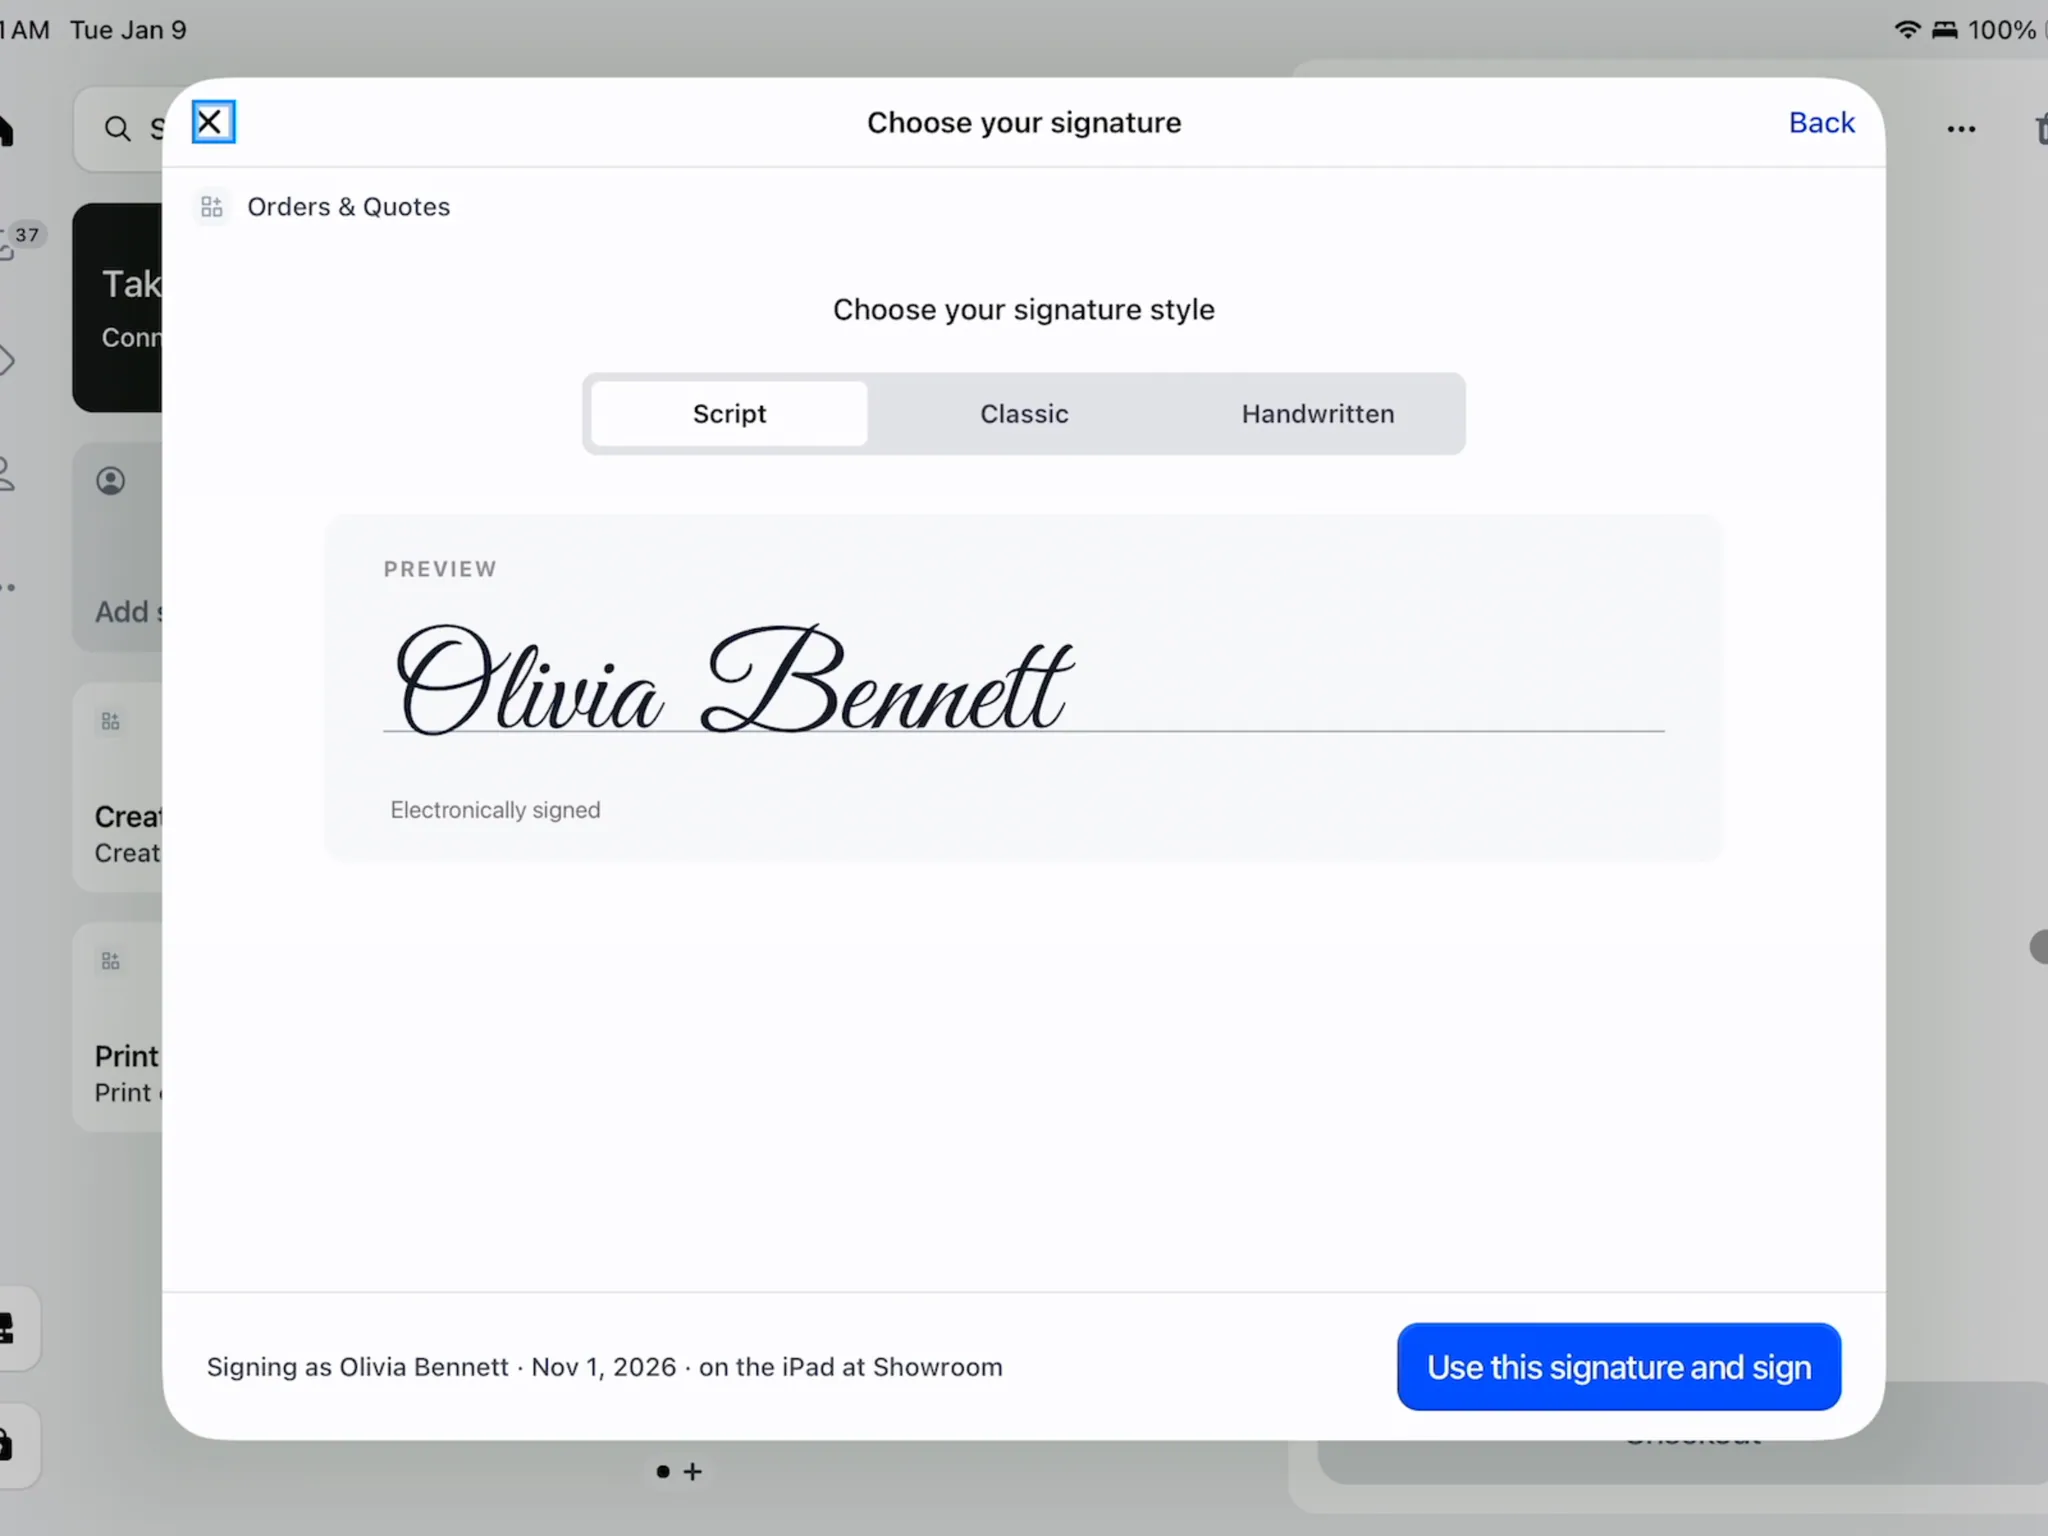
The customer confirms their identity and signature style. Step 3: Take back the device
The completed screen asks the customer to hand the iPad back to the staff member. Check Signed by, then tap Done.
The order offers View Signed Quote or View Signed Order. That action opens the signed document at the signature.
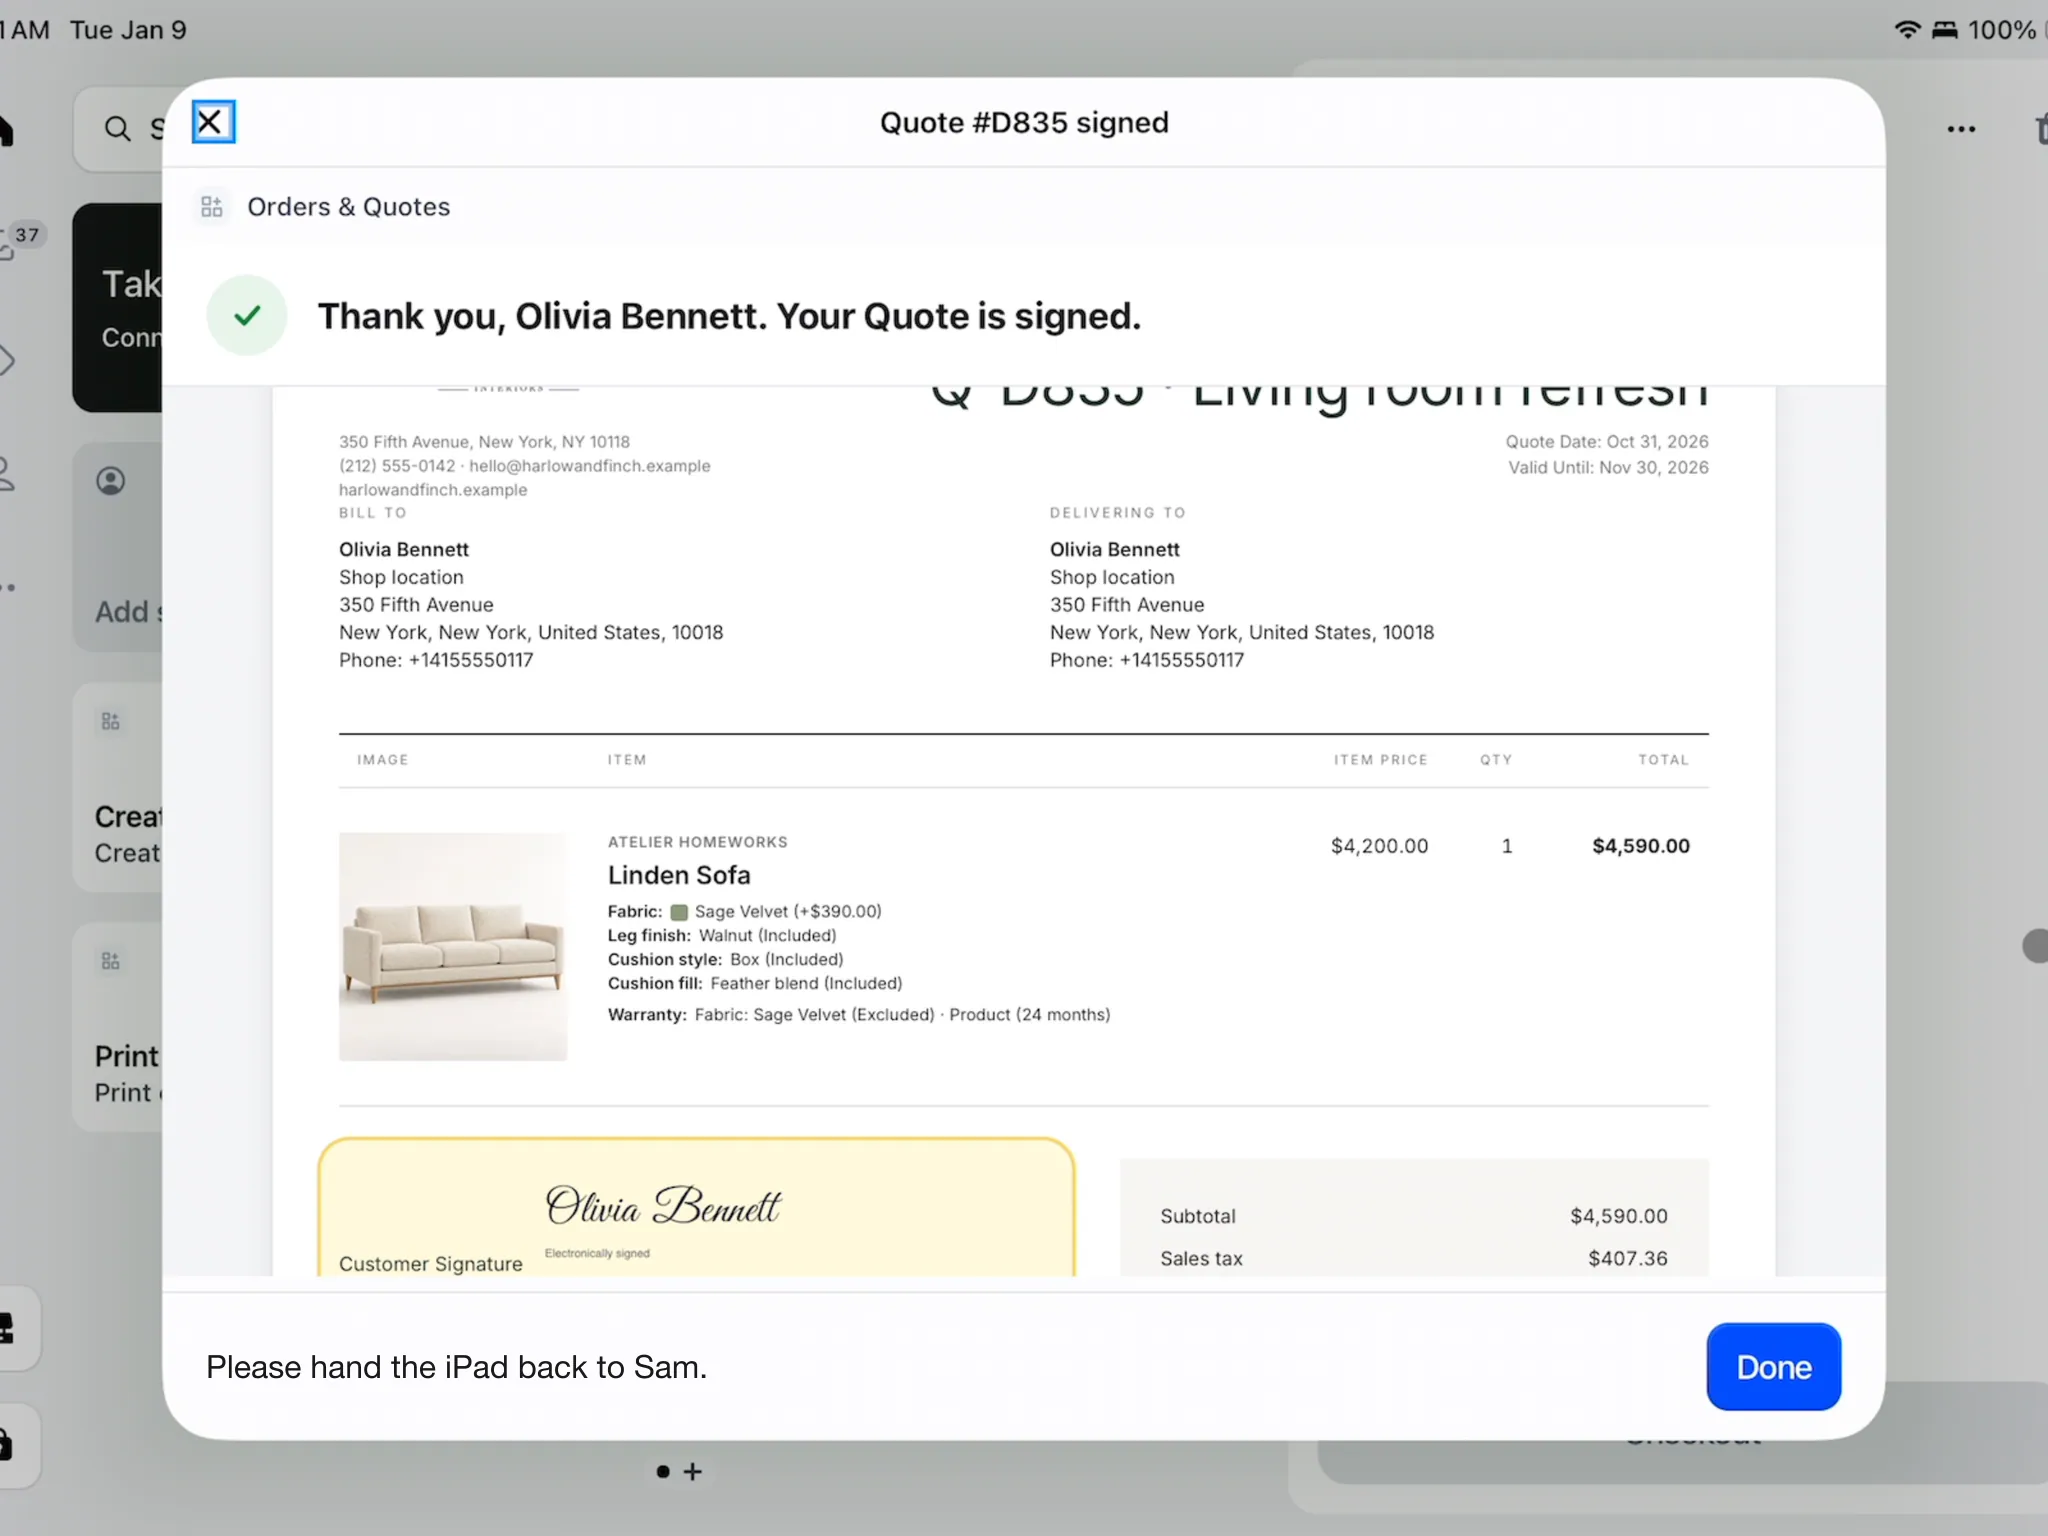
Take back the iPad after the signed confirmation. The iPad signing session lasts 30 minutes. If the quote changes during review, the customer must review the updated version before signing.
Sign by QR code
Step 1: Let the customer scan
Show the QR under Scan to review and sign. The customer scans it with their phone and follows the online signing steps.
The link uses the shop's primary domain. Keep the correct record open while waiting for the result.
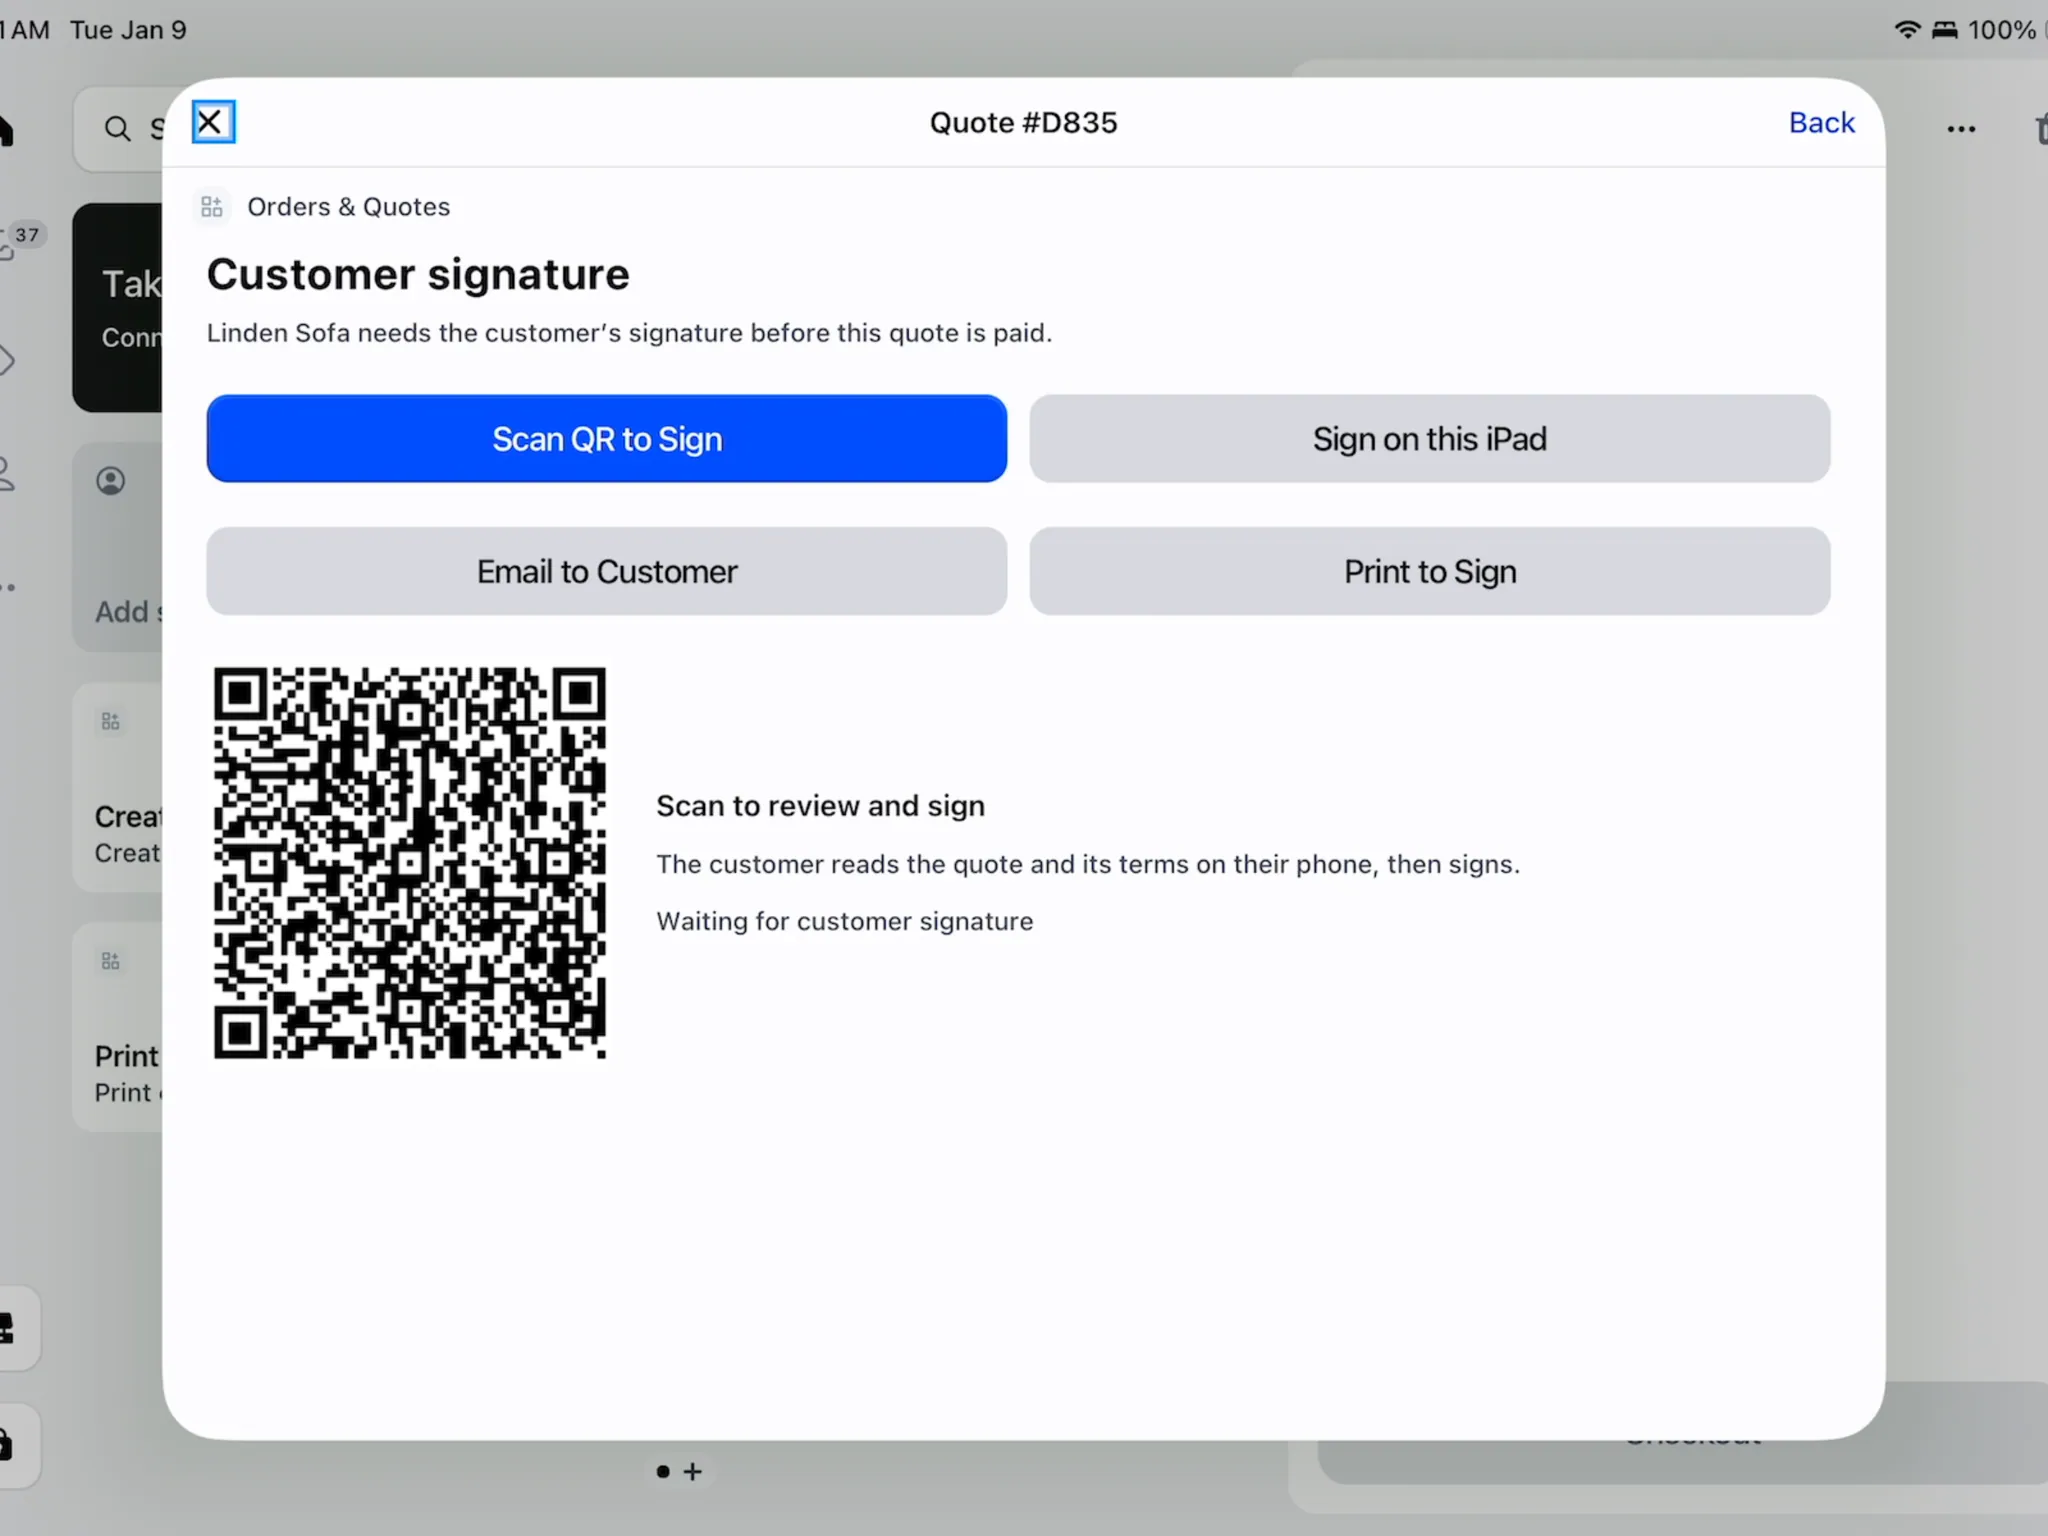
Keep the signature screen open while the customer signs. Step 2: Check the completed signature
The iPad checks every few seconds and updates when the customer signs. Check Signed by and the method.
If it stops checking after 10 minutes, tap Back and reopen Customer signature. Activity identifies this route as signing from the customer's phone.
Email the agreement for later
Step 1: Check the send address
Tap Email to Customer. In Email Quote to Customer or the order equivalent, check Customer's email.
Changing this address affects this send only. It does not edit the saved customer profile.
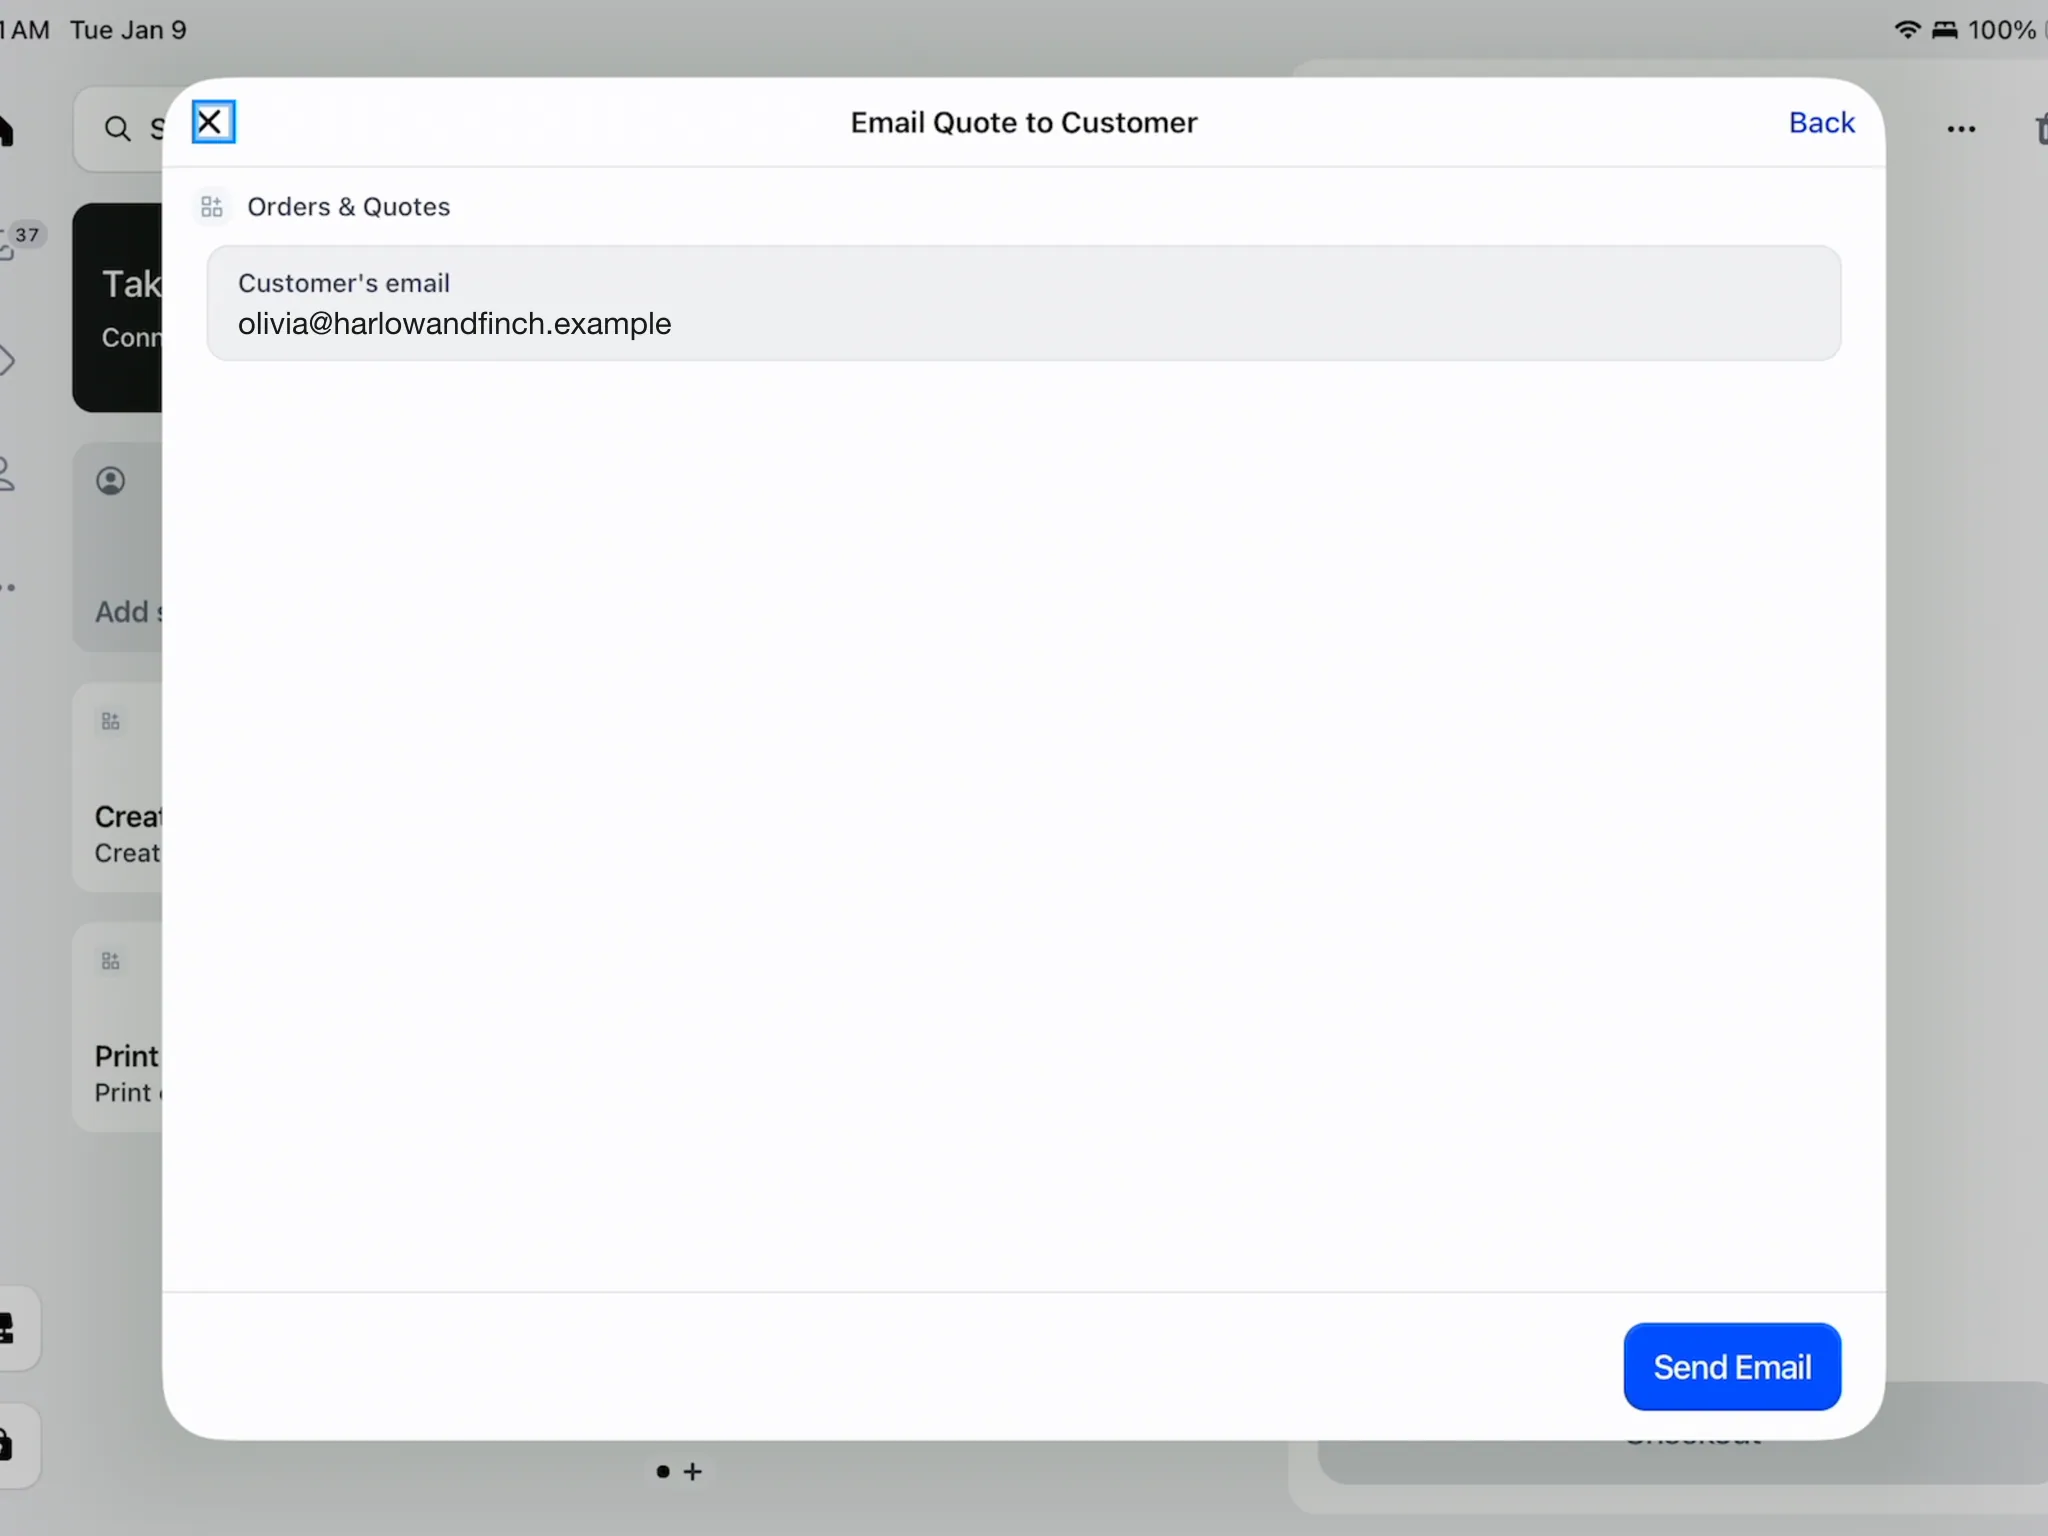
The address entered here is used for this send only. Step 2: Send and review the notice
Tap Send Email when ready. The confirmation identifies the quote and recipient.
The message uses the signature-request email and copies the salesperson. A later visit shows Already emailed and Send Again.
Record a printed signature
Step 1: Print the current agreement
Tap Print to Sign and give the printed copy to the customer. On Signed on paper?, ask them to sign that copy.
If the quote changes after printing, print a new copy. The recorded signature belongs to the printed version.
Step 2: Confirm the actual paper signature
After the customer signs, tick the statement confirming that they signed the printed quote. Tap Mark as Signed.
The record shows Signed on paper with the customer, date and recording staff member. This route sends no automatic signed-copy email.
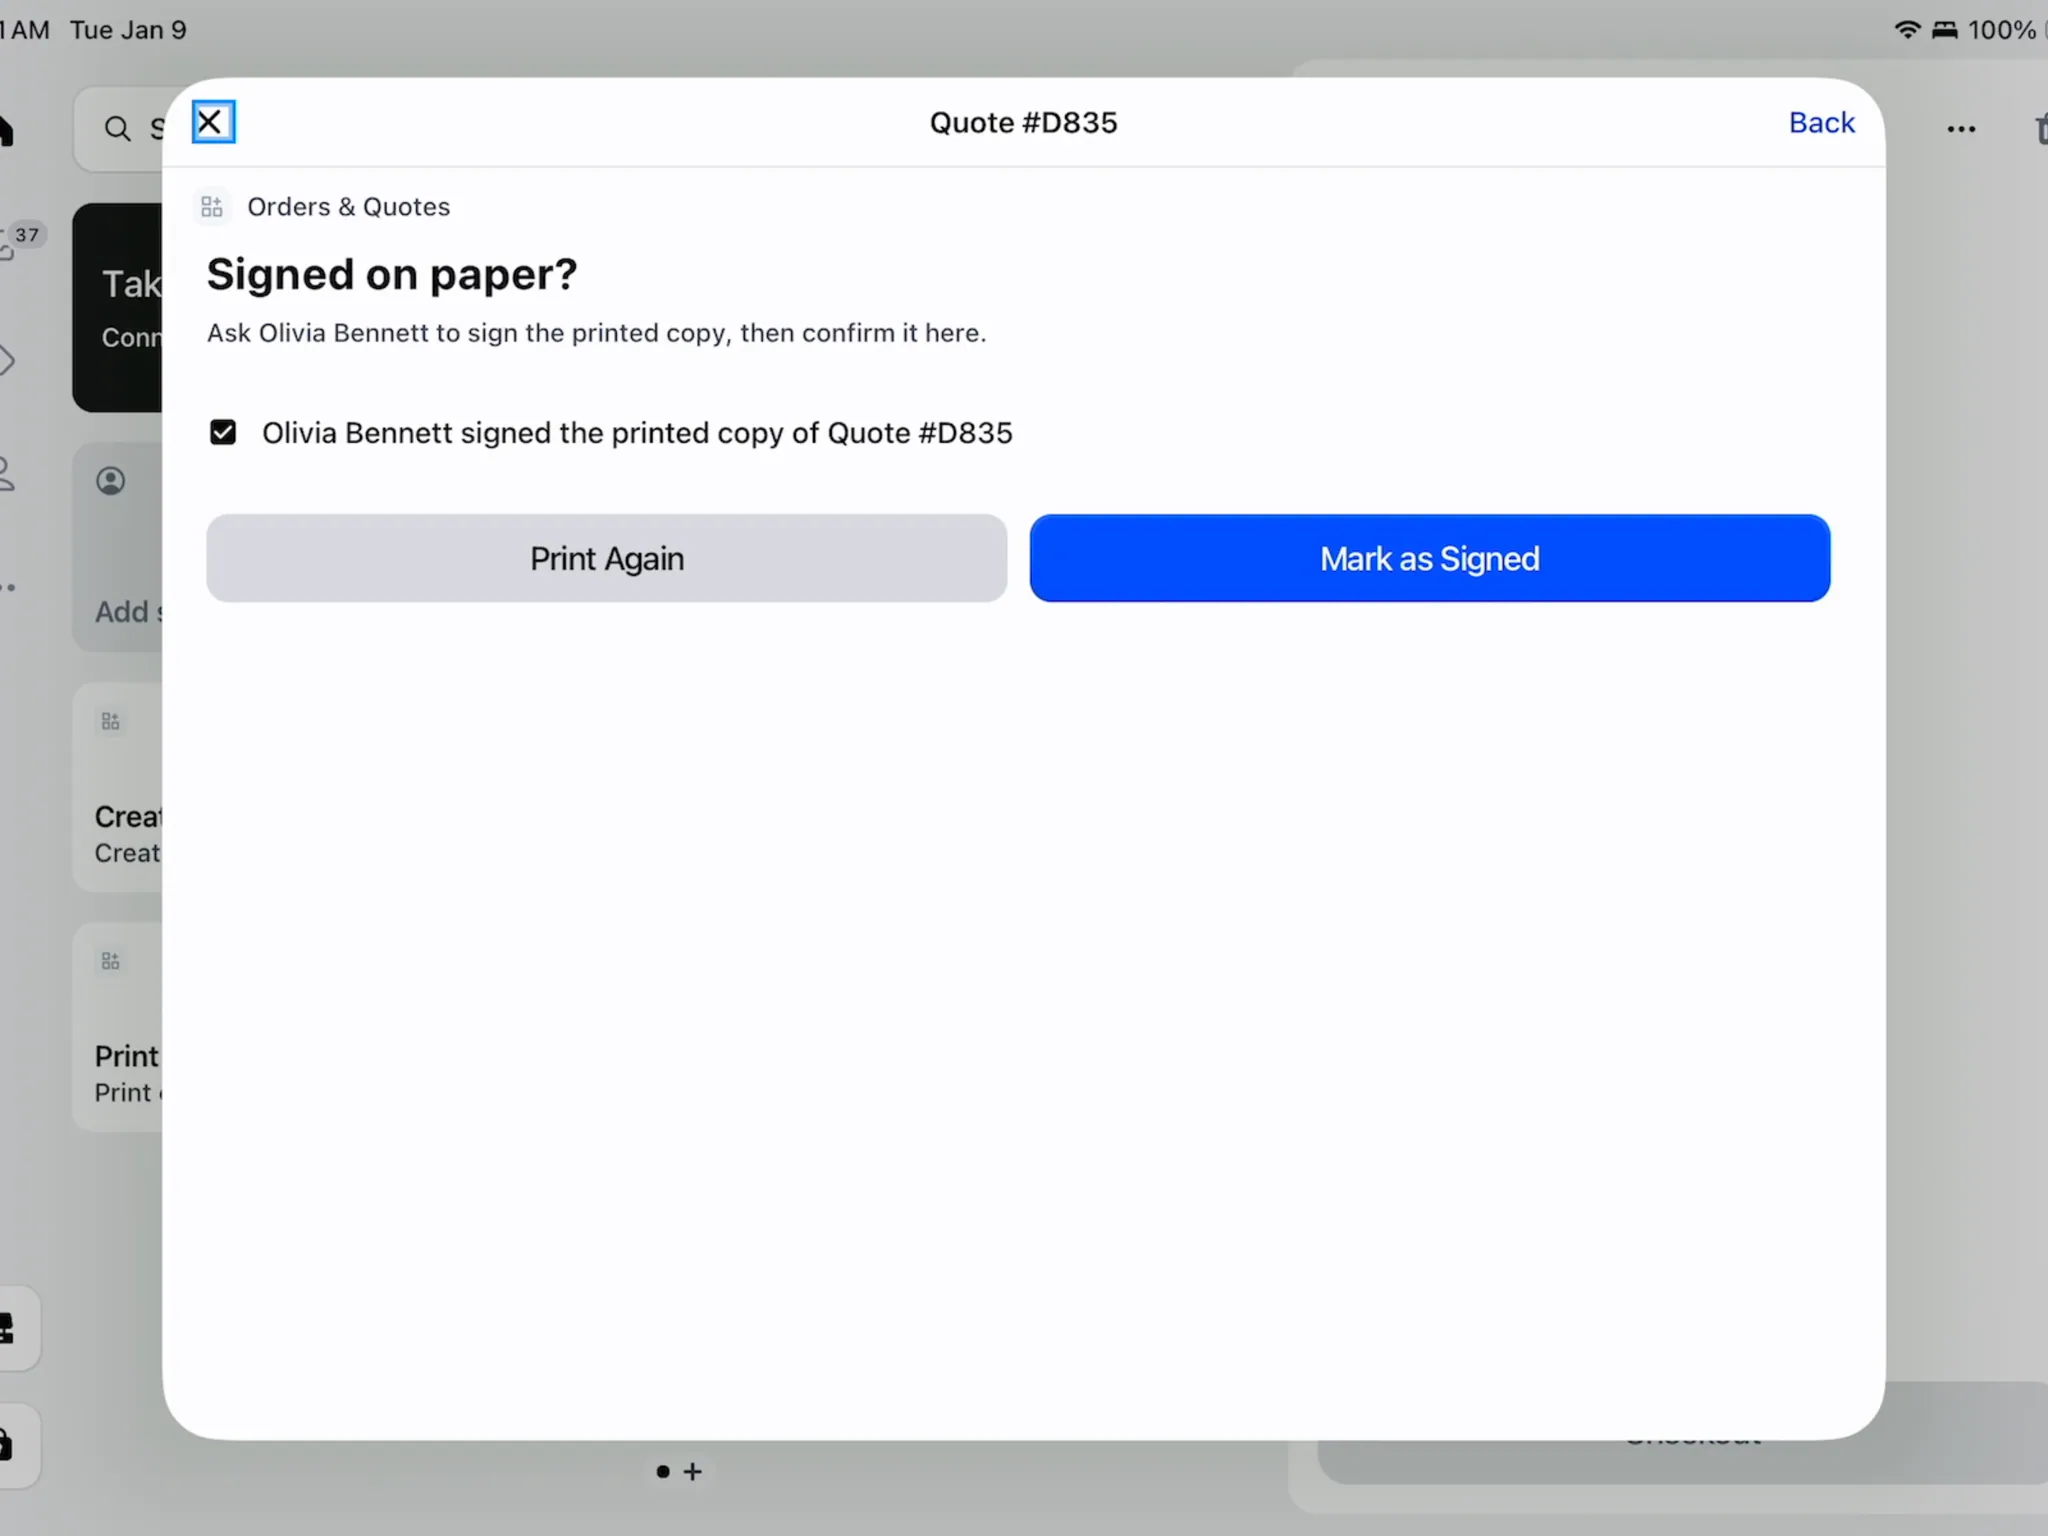
Confirm only after the customer signs the current printed copy.
What happens next
An electronic signature can email the frozen signed PDF to the customer and copy the salesperson when the signed-copy setting is enabled.
A paper signature leaves the electronic methods available. A later customer e-signature replaces the recorded paper signature.
Continue with Collect a payment after checking the current agreement and signature state.
Example: 3 customers, 3 routes
Example · Harlow & Finch Interiors
Match the route to the customer
Sam Ortiz handles 3 showroom sales.
- Olivia Bennett reviews her Linden Sofa on the iPad and chooses Script.
- Sam checks the completed signature before payment.
- Priya Shah scans her quote's QR and signs on her phone.
- Marcus Reed signs the current printed copy.
- Sam records Marcus's paper signature only after receiving it.
If something goes wrong
A signing method is missing
Read the access notice. Print to Sign also requires a supported register.
The signing page will not open
Go back and retry, or use the QR route if iPad signing is unavailable.
The quote changed
Let the customer review the updated document.
Email sending is blocked
Check permission, address and open questions or requests.
The location is not billed
Resolve subscription and location access.
Was this guide helpful?
Thanks. Tell us what was missing at support@meetorderpilot.com.