Set up your statuses and customer groups
Related guides
- How order statuses workStatuses and workflow · 6 min
- Connect statuses and add Next status buttonsStatuses and workflow · 5 min
- Test, publish and restore the status mapStatuses and workflow · 5 min
- Change an order’s statusStatuses and workflow · 5 min
- Choose which emails go out, and whenEmails and messages · 5 min
Add the stages your team uses, then group them into progress messages customers can understand. A status controls staff actions; its group controls the customer-facing milestone.
Start with How order statuses work if you need the difference between built-in movements and your own stages.
Before you start
Check access
You need Manage order and quote settings. Without it, the Statuses tab is view-only.
Check the limits
A store can have 50 statuses and 50 customer groups, including the supplied ones.
Plan customer wording
Decide which internal stages belong under the same customer message before adding more groups.
Open SettingsQuotes & ordersStatuses. The page separates Customers see from Staff see, with Not in a group yet last.
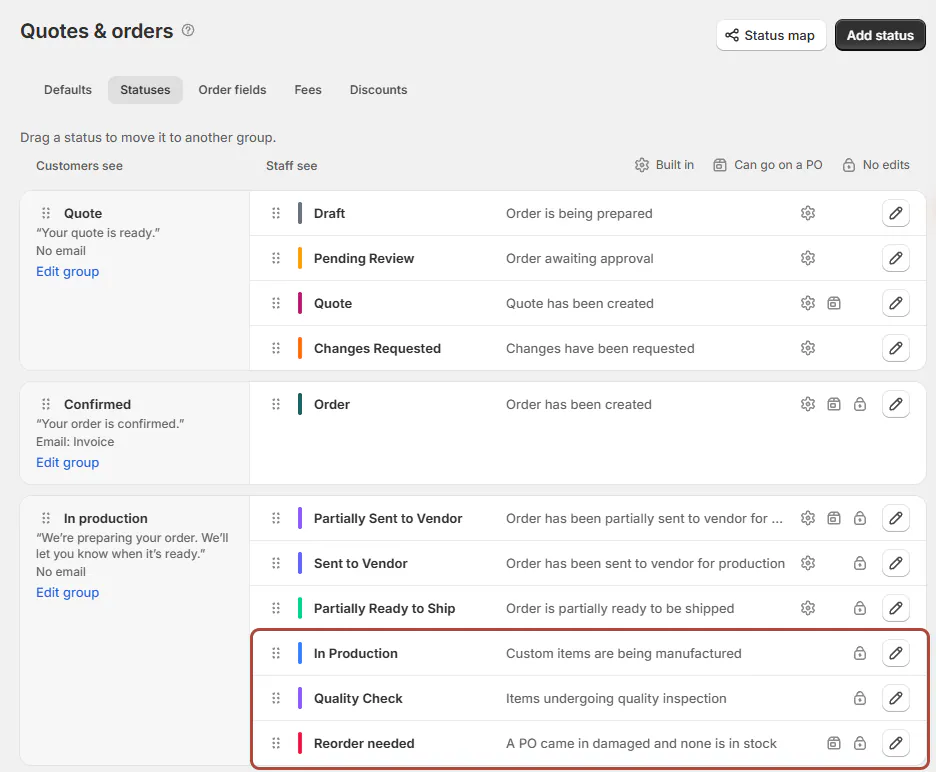
The row markers identify Built in, Can go on a PO and No edits. An Inactive badge identifies retired shop-created stages.
Add a status
Step 1: Name and describe the stage
Click Add status. Enter Name, choose Colour, and add Description when staff need an explanation.
For a custom color, enter a hex value and choose Use colour. The contrast preview shows whether white or dark text reads well.
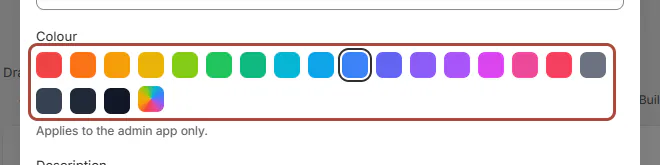
Colour field with swatches and the custom hex box Descriptions can contain up to 1,000 characters. Their help explains whether customers can read the text or see the group's message instead.
Step 2: Choose what customers see
Choose Group and review Visible to customers, which starts on for a new status.
A grouped status shows the group's wording. A hidden status leaves customers seeing their previous visible stage.
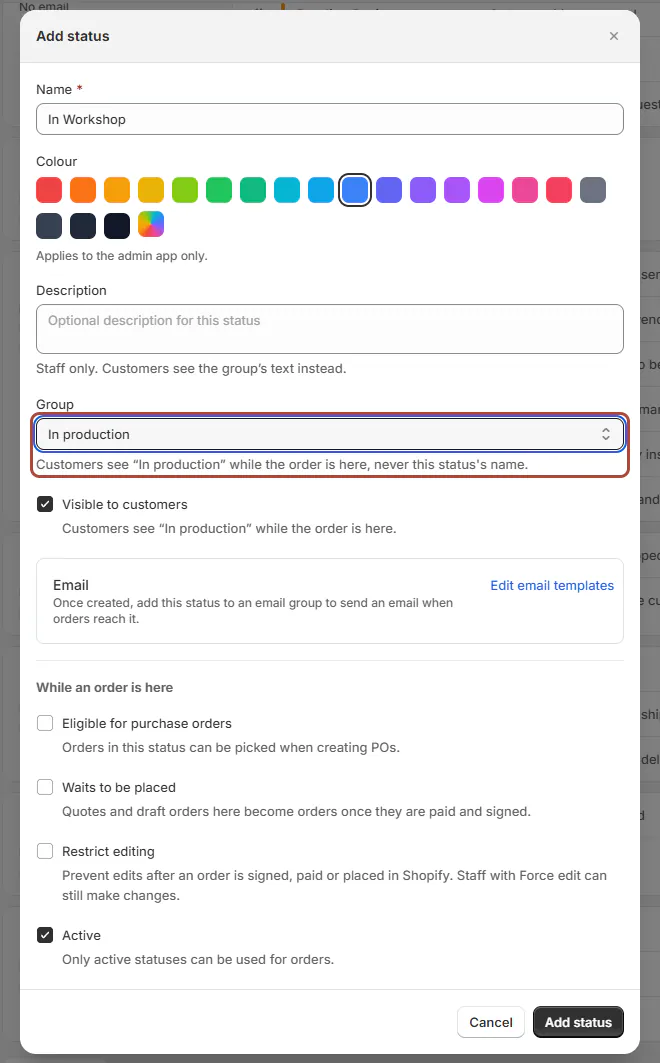
Add status dialog for In Workshop with Group, Visible to customers and the While an order is here toggles Step 3: Review notifications
In Email, check the summary and use Edit email templates to choose the email group. See Which emails go out.
Set Also send when an order or quote is created with this status only when wanted. It sends nothing until the group has a template.
In SMS notification, review Send SMS Notification and SMS template. Text messages explains that setup.
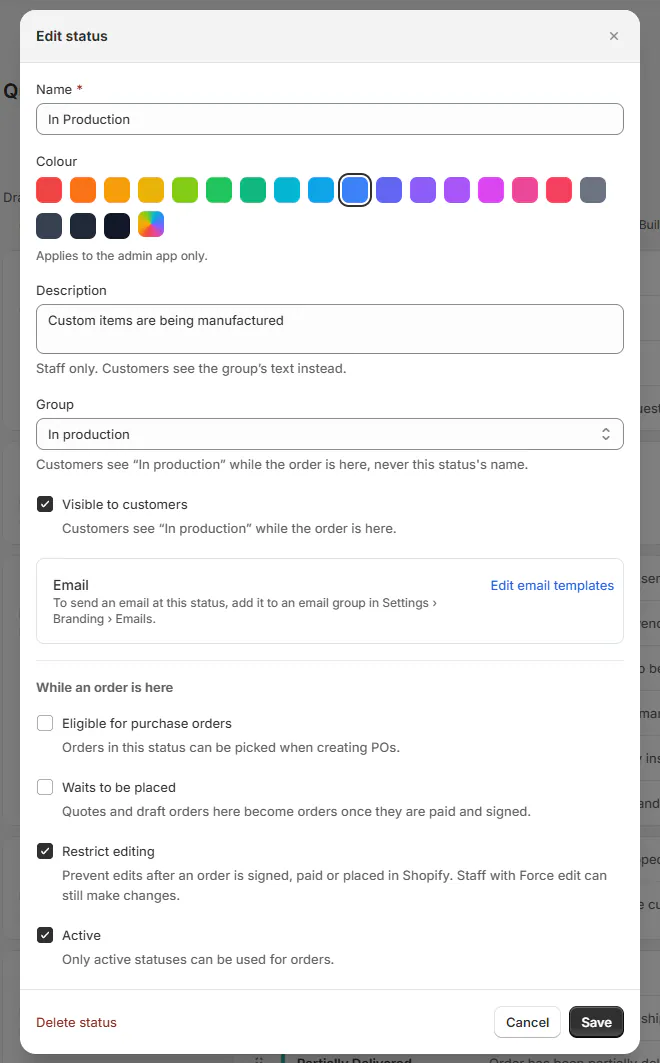
Edit status dialog for In Production with the Email and SMS boxes Step 4: Choose what the stage allows
Under While an order is here, set Eligible for purchase orders, Waits to be placed, Restrict editing and Active.
Click Add status. Status added confirms the save, and the status appears at the end of its group.
Restricting edits takes effect after an order is signed, paid or placed in Shopify. It does not lock every uncommitted draft.
A new status has no connections until you connect it on the map. Staff can pick it manually meanwhile.
Edit, reorder or retire statuses
Step 1: Edit an existing status
Click the status, update its fields and click Save. The app confirms Status saved.
Built-in names cannot change. You can change their color, description or group, but cannot deactivate or delete them.
OrderPilot also controls Waits to be placed for built-in statuses. Add your own status when you need to choose that behavior.
Step 2: Reorder or regroup
Drag a status by its handle within its group or into another group card. The change saves immediately.
For keyboard movement, use Space, the arrow keys, then Space again. A refused move returns the status to its previous position.
Wait for one move to save before starting another. Moving into a different group also changes the customer milestone for that status.
Step 3: Turn off an unused stage
Open a shop-created status, untick Active and save. It leaves the order picker and is no longer eligible for purchase orders.
Existing records retain their history. Decide where current orders should go before retiring a stage your team still uses.
Step 4: Delete an unused status
Move every order out of the status. Remove its map connections and publish that change.
Open the status and choose Delete status. Review Delete and the name before confirming; deletion cannot be undone.
Built-in statuses cannot be deleted. A status with current orders or live map connections is refused until those dependencies are removed.
Set up customer groups
Step 1: Edit the group's wording
On a group card, choose Edit group. Enter Name, up to 60 characters, and Customer message, up to 300.
Click Save. Customers see that name and message while their order is in a visible status belonging to the group.
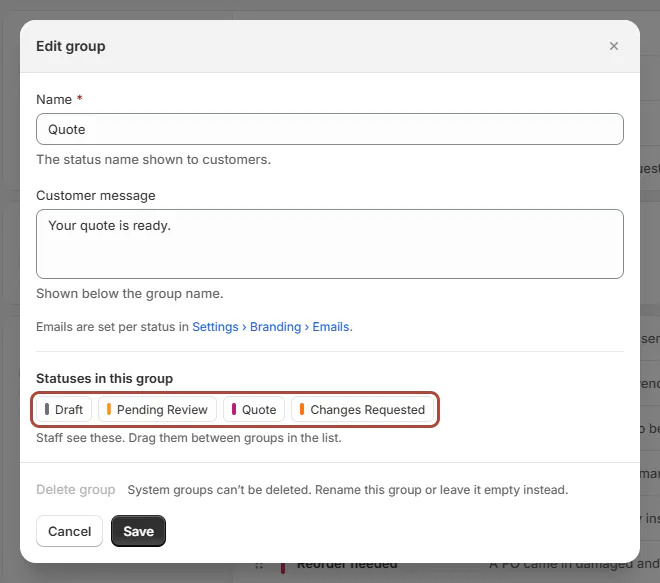
Edit group dialog for In production with Name and Customer message Step 2: Add and order groups
Use Add group for a new customer milestone. Drag the intended statuses into it.
Drag each group by its handle to arrange the customer progress track. Quote and Cancelled appear only while the order is in those groups.
A group you create uses the portal heading Here's your order. Built-in groups retain their own headings even when renamed.
Step 3: Remove an empty custom group
Move its statuses into other groups first, then delete the empty group.
Built-in groups cannot be deleted. Rename one or leave it empty when it is not part of your customer journey.
What happens next
Staff see status names across order screens and lists. Customers see the group's name and message instead of the internal name.
Connect the stages, then test and publish the status map. Creating a status alone does not automate its movement.
Edit an order at a restricted stage
The order shows Editing disabled. Staff with Force Edit locked orders can choose Force Edit, then Enable Force Edit, or keep it locked. A status-only change needs no Force Edit. Bulk changes skip locked orders; POS directs staff to an administrator.
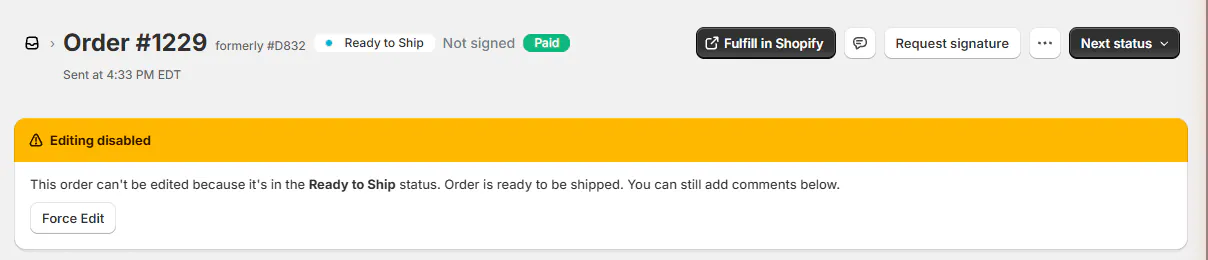
Read Edit locked and ordered orders before using that exception.
Example: a workshop stage
Example · Harlow & Finch Interiors
Keep internal detail behind a clear milestone
Nora Ellis adjusts Harlow & Finch Interiors' workflow.
- Add In Workshop to the In production group.
- Enable Restrict editing.
- Move it after Sent to Vendor.
- Rename the group In the workshop.
- Set its message to Your piece is being made by hand.
Marcus Reed's signed Linden Sofa order shows staff the editing restriction. His portal shows the workshop milestone.
If something goes wrong
The status name already exists
Names are compared without capitalization. Choose a distinct name.
Add status is greyed out
Enter a name, check access and check the 50-status limit.
Deletion is refused
Move current orders and remove live map connections, then publish before retrying.
A group will not delete
Empty it first. Built-in groups must be retained.
A drag fails
Wait for the previous move to save and retry after the error is resolved.
SMS is unavailable
Read the disabled reason. Draft cannot send status SMS, and texting needs its sending setup.
Was this guide helpful?
Thanks. Tell us what was missing at support@meetorderpilot.com.