Set up vendors
Related guides
- How the catalog fits togetherCatalog · 6 min
- Set up lead times for vendors and optionsCatalog · 5 min
- Create a product templateCatalog · 6 min
- Choose options and a vendor for each lineQuotes and orders · 6 min
- Send a purchase order to your vendorPurchasing · 6 min
A vendor is the business your store buys a product or component from. The vendor record holds purchasing contacts, the purchase-order email address, order minimums and lead times.
Assign vendors to templates and order lines so your team knows who should supply each item when preparing purchase orders. Keep unused vendors inactive so their history remains available.
Your store can use a different word, such as Supplier, across the web app. This guide uses the default Vendor wording.
Before you start
Check permissions
You need Manage vendors to change contacts, purchase-order email addresses and minimums. Changing vendor wording needs Manage purchasing settings.
Gather contact details
Each vendor holds 1 contact person. Have the purchasing email and any order minimums ready.
Check existing vendors
Installation brings vendor names in from Shopify. Search first so you do not add a record that already exists.
Vendors do not have their own product or SKU list. Assign them to templates and order lines where those products are sold.
Add a vendor
Step 1: Open the vendor dialog
Go to SettingsPurchasing & accountingVendors and click Add Vendor. The Add Vendor dialog opens.
Step 2: Enter the contact details
Enter Name, then Display Name, Email Address, Phone Number and Contact Person as needed. Address and Notes are optional.
The email address is where purchase orders go. Name, display name, email and phone must each be unique within your store.
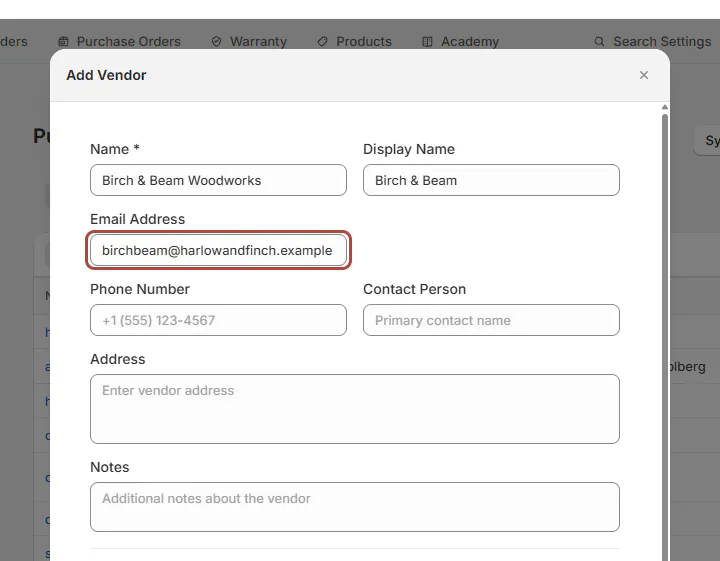
Keep the purchasing contact on the vendor record. Step 3: Set order minimums
Under Order minimums, enter Minimum quantity, Minimum order value, or both. Tick Enforce minimum quantity or Enforce minimum value when sending must be blocked.
Unticked minimums provide a warning without blocking. The form now shows whether your minimum is a rule or a hint.
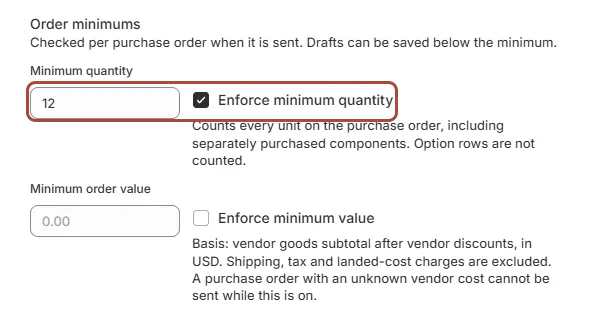
Enforce a minimum only when it must block sending. Note
Without View costs, the value minimum reads Costs hidden. Saving the vendor keeps that hidden value unchanged.
Step 4: Enter lead times
Under Lead time, enter Build time (days) and Transfer to us (days). Use whole calendar days from 0 to 3,650.
Leave an unknown value blank as Not set. The record distinguishes a known same-day value from missing information.
See Set up lead times for how these days combine with options and delivery.
Step 5: Save the vendor
Under Purchase orders, review Include SKU on PO items. It starts on and includes SKUs in this vendor's PDF, printout and email.
Keep Active Vendor on and click Save Vendor. The vendor appears in the list.
Choose a Commission code at the bottom of the dialog if needed; it saves as soon as you choose. That fallback applies when neither the line, template nor category sets one; see Commission.
Bring vendors in from Shopify
Step 1: Start the sync
On the Vendors tab, click Sync from Shopify. Wait for Vendors synced from Shopify.
If the message says the sync is still running, refresh in a moment to see the results. Your existing minimums and lead times are kept.
Step 2: Check the imported records
Choose the Shopify tab. The table separates All, Manual and Shopify records, with counts.
Open imported vendors to add missing purchasing contacts. Shopify names alone do not provide the email you need for a purchase order.
Names match after spaces and capitalization are normalized. Missing vendors become active Shopify records; matching records are reused.
A match can reset Display Name to Shopify's spelling. Choosing a Shopify product on a quote can also create its missing vendor.
Edit or switch off a vendor
Step 1: Open the existing vendor
Click its row to open Edit Vendor. Change the fields you need and click Update Vendor.
The table shows the saved details. Its default order puts the most recently updated vendor first.
Step 2: Make the vendor inactive
Turn off Active Vendor and click Update Vendor. The Status column changes to Inactive.
There is no delete control. To offer the vendor again, reopen it, turn Active Vendor on, and update.

Inactive vendors stay in the list with their history.
What happens next
Active vendors are available on templates and order lines. An inactive vendor disappears from pickers.
Its templates remain available, but new lines have no vendor until staff choose an active one. Product screens add (inactive) after its name.
When you send a purchase order, OrderPilot checks minimums per PO. Drafts can be saved below them.
The value minimum uses the goods subtotal, excluding shipping, tax and landed costs. An unknown cost blocks sending when that minimum is enforced.
A missing vendor email changes the send button to Mark as sent. Add the correct address when OrderPilot should email the purchase order.
Example: a 12-chair minimum
Example · Harlow & Finch Interiors
Complete Birch and Beam's minimum
Jo Park prepares a purchase order for Harlow & Finch Interiors.
- Set Birch & Beam Woodworks' minimum quantity to 12 and enforce it.
- Keep Include SKU on PO items on.
- Prepare a draft with 9 Mira Dining Chairs.
- Read Add 3 units in the minimum notice.
- Add the remaining 3 chairs before sending.
The draft can be saved at 9 units, but sending waits until the enforced minimum is met.
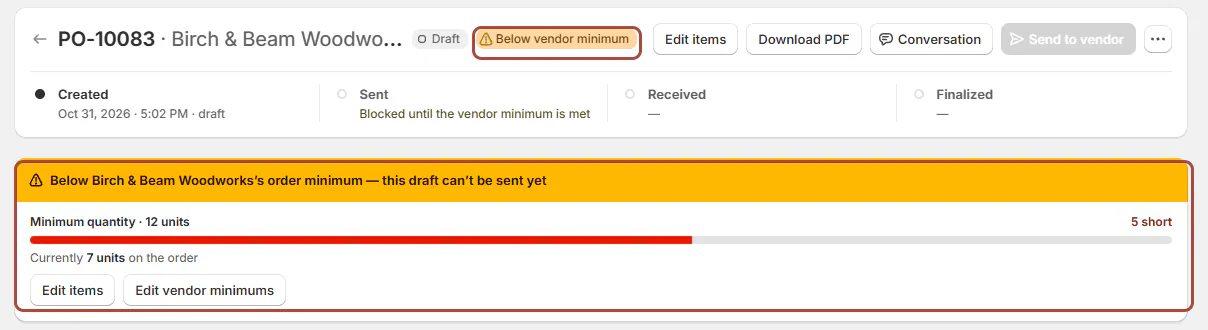
Important notes and tips
Call vendors by your own word
Below the vendor table, find Vendor wording. Choose Custom, enter Supplier, check Preview, then click Save in the unsaved-changes bar at the top. Default vendor restores Vendor / Vendors. The plural adds s, so check irregular words carefully. Shopify POS keeps Vendor.
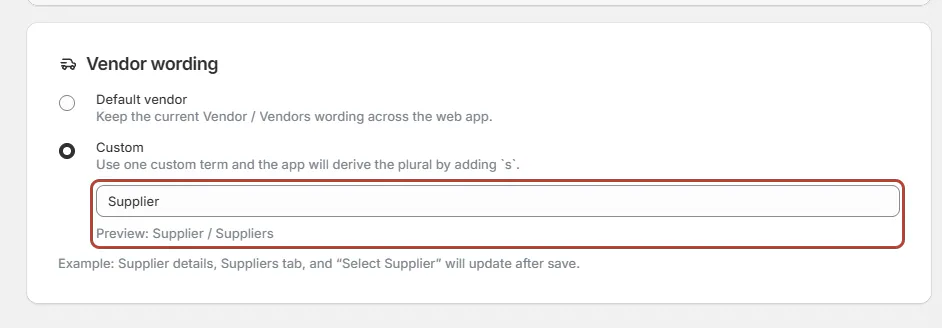
The vendor's Activity card offers earlier versions. Use History and restore when you need to inspect or undo a change.
If something goes wrong
A contact value is already used
Check the existing vendor before changing a name, display name, email or phone.
The email is rejected
Enter a complete email address or leave it blank.
A vendor appeared unexpectedly
A Shopify sync or a selected Shopify product can create it.
The display name changed back
Shopify matching can restore Shopify's spelling.
Send is greyed out
Hover for the reason. Use Edit items or Edit vendor minimums when an enforced minimum is unmet.
Custom wording will not save
Enter a custom vendor label before saving.
Was this guide helpful?
Thanks. Tell us what was missing at support@meetorderpilot.com.