Create a product template
Related guides
- How the catalog fits togetherCatalog · 6 min
- Manage product templatesCatalog · 5 min
- Set template locations, tax categories and servicesCatalog · 5 min
- How templates sync to Shopify productsCatalog · 5 min
- Import and export templates with a CSVCatalog · 7 min
A product template defines a product and the choices available when someone buys it. It brings together the product’s details, base price and options, with separate prices, costs and lead times for individual choices.
Use templates when you need more configuration than Shopify’s standard product options provide. Templates support more than three options, custom measurements and text, rules between choices, and controls for how options appear on your product page. They work for both made-to-order products and products sold in standard configurations.
We recommend starting with templates for products you manage in OrderPilot. They give you room to add more choices and configuration rules as your catalog grows.
Before you start
Prepare shared records
Add your vendors, categories, options and bundles.
Gather product details
Have a title, vendor, base price and product photo ready.
Check permissions
You need Manage the catalog. Selling prices need Change catalog selling prices; costs need Enter costs and charges.
You can create many templates through CSV import. Use the steps here to build and inspect one product first.
Add the template
Step 1: Enter the starting details
Open Products and click Add template. In Add product template, enter Title, choose a vendor and optionally choose Category.
Enter Base price and select Start from these bundles when shared options are ready. Bundles bring their values and rules with them.
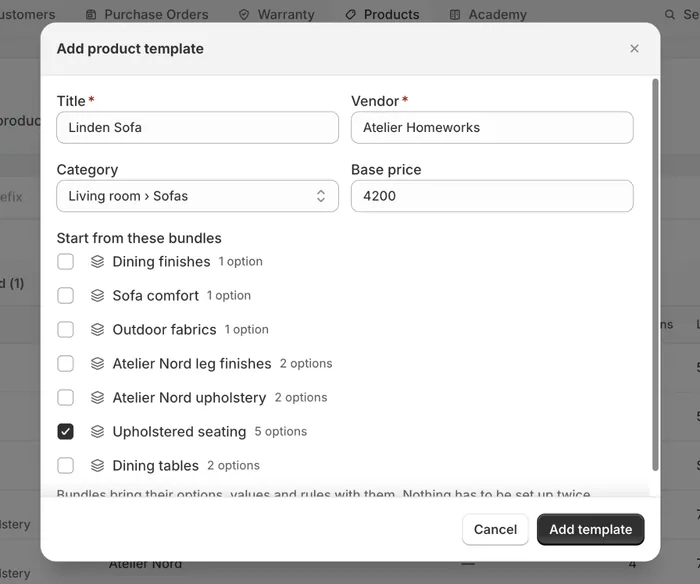
Add product template dialog filled for the Linden Sofa: title, Atelier Homeworks, Living room › Sofas, base price, the Upholstered seating bundle Step 2: Create the draft
Click Add template. The app confirms Draft template created and opens its page.
The handle is made from the title. If the button waits, read the footer for the missing title or vendor.
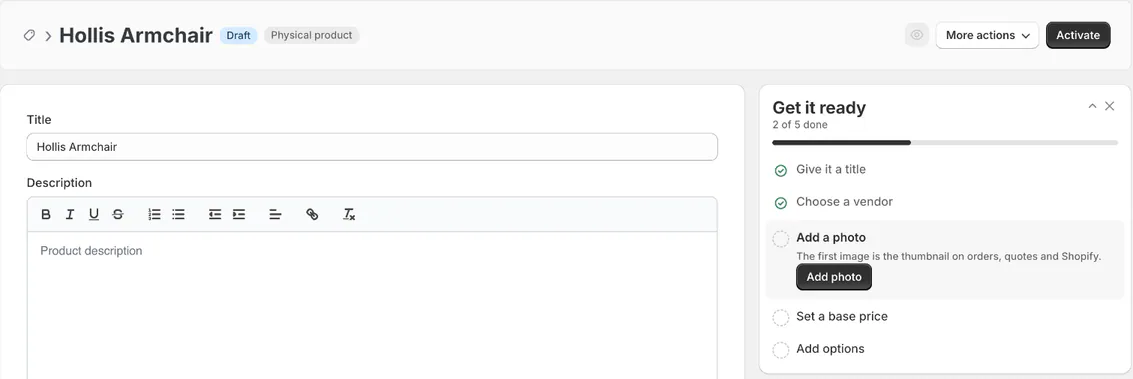
A new draft with Get it ready at the top of the right column, 2 of 5 done, Add a photo open Note
Creating a template from the quote or order picker makes it active immediately and creates its Shopify product. That route lets you add it to the current sale.
Add options and offered values
Shared option values provide starting prices, costs and lead times that several templates can use. A template override replaces one of those figures for this product only. Resetting an override returns that field to its inherited value.
Step 1: Attach a bundle or option
In Options, choose Use this bundle from a suggestion, or click Add option or bundle.
Under Bundles, click Attach. Under Options, tick choices and click Attach selected. Attached options appear in the card.
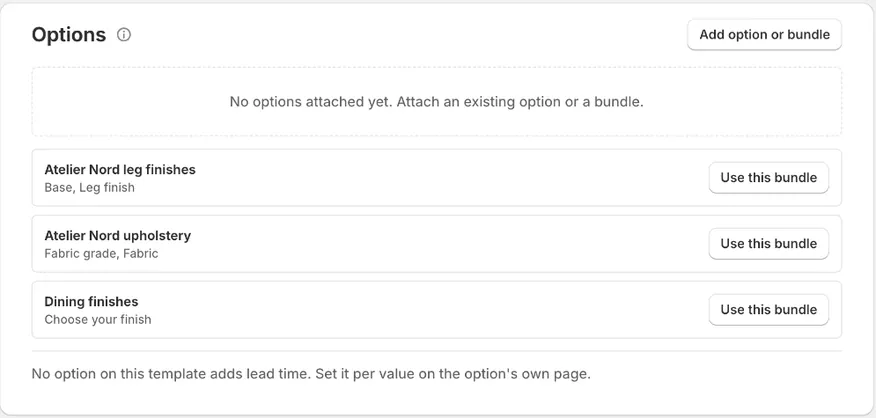
The empty Options card suggesting three bundles with Use this bundle The empty card suggests up to 3 bundles. Create new lets you add an option when the shared choice does not exist yet.
Direct options and bundles
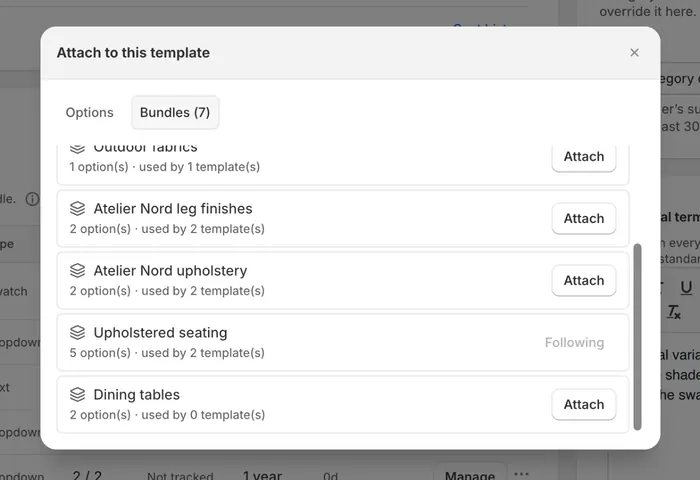
Options attached directly here belong to this template. To add them across products, put them in a bundle those products follow.
Step 2: Choose which values to offer
Click Manage on Fabric. Tick Offer beside the values available for this product, or use Offer all and Clear all.
Offer Sage Velvet and the other fabrics the Linden Sofa supports. The table shows this template's available values.
An option with no offered values never appears. Keep at least 1 when customers should be able to choose it.
Step 3: Set this template's figures
Enter Price, Cost and Lead time overrides where this product differs. Use the reset arrow beside an override (Reset to inherited) to return to the shared figure.
A zero price or cost is deliberate and displays Included or Free. Add value adds a shared value without leaving the template.
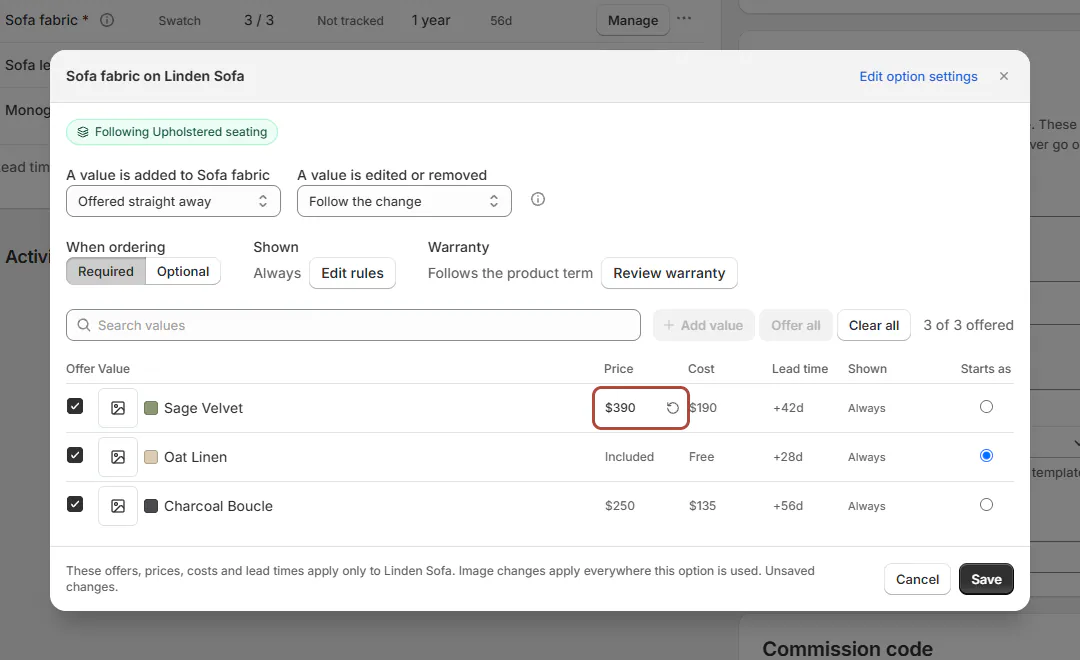
Manage dialog for Fabric on the Linden Sofa: Offer ticks, this template's price per value, Starts as, Required These overrides affect this template only. Image changes affect every use of the shared option, so review that wider consequence before replacing an image.
Step 4: Set ordering and visibility
Choose Starts as, When ordering and Shown. Use Required or Optional for the choice requirement.
For conditional visibility, click Edit rules; Shown then reads Conditional. See Option rules. Click Save to apply the option configuration.
Required behavior belongs on the bundle or template, not the shared option page.
Step 5: Arrange the choices
Use Move up and Move down to put options in customer order. Remove from template removes a direct choice.
Use a bundle chip's x to open Detach bundle, then review the confirmation. The card reflects the remaining choices.
For how attachments follow future changes, read Manage product templates.
Finish setup and activate
Step 1: Follow Get it ready
Use Get it ready to visit each unfinished field: Give it a title, Choose a vendor, Add a photo, Set a base price, Add options.
Each button takes you to its field. The count advances as the template meets those checks.
Only title and vendor are required to save. The base-price check completes above 0; zero is the new template's starting placeholder.
Step 2: Confirm vendors and images
Under Organization, choose the vendors staff can buy this product from. Offer all vendors, the first row of the vendor list, includes active vendors added later.
Add the product photos, up to 10. The first image becomes the thumbnail on quotes, orders and Shopify.
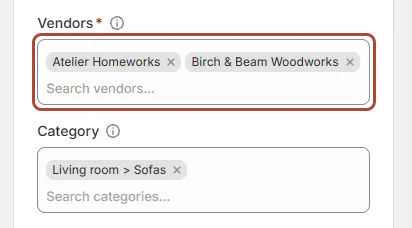
Organization card with Atelier Homeworks and Birch & Beam Woodworks chosen If you turn Offer all vendors off later, the previously chosen list remains. Inactive vendors leave new lines without a vendor until staff choose an active one.
Step 3: Save and activate
Save with the Save bar, then click Activate in the header. Unsaved changes must be saved or discarded first.
The badge changes to Active, and Quotes, orders and POS under Sales channels reads On.

Header with Draft and Physical product badges, More actions and Activate The online store has its own setup; see Put a template online. Locations, tax categories and services are covered in Template special cases.
What happens next
Draft templates do not appear on quotes, orders or POS, and nothing is sent to Shopify. Active templates become available in staff product pickers.
If a template offers several vendors, staff choose which vendor supplies that line. The Shopify product uses the first vendor by name.
Read Templates and Shopify products for what syncs. Existing saved lines keep their prices when catalog prices change.
After Activate, Template activated — publishing to Shopify appears, and a Syncing badge shows until the Shopify product is ready.
Example: activate the Linden Sofa
Example · Harlow & Finch Interiors
Prepare a sofa for showroom quoting
Nora Ellis sets up Linden Sofa at Harlow & Finch Interiors.
- Choose Atelier Homeworks and Living room > Sofas.
- Start from the Upholstered seating bundle.
- Offer the supported fabrics and set the Sage Velvet price for this template.
- Add Birch & Beam Woodworks as another vendor.
- Add a photo and base price, save, then activate.
Sam Ortiz can now add the sofa to Olivia Bennett's quote and choose the supplying vendor.
Important notes and tips
Hide or restore Get it ready
The x hides the card for this template in this browser. Use Undo in the message, or Show Get it ready at the right column's end. The card also disappears when all checks are done or the template is active.
New shared values follow this template's Offered straight away or Added but not offered rule. Check that setting before adding a value used across products.
If something goes wrong
Saving needs a vendor
Choose vendors or enable Offer all vendors.
Activate is greyed out
Save or discard current changes, then try again.
Get it ready is missing
Check whether it was dismissed, the template is active, or every check is complete. It appears only for editors.
Add options is not complete yet
Wait for options to finish loading before checking the count.
A salesperson cannot find the template
Check it is active and available at that person's location.
Was this guide helpful?
Thanks. Tell us what was missing at support@meetorderpilot.com.