Print and brand POS receipts
Where are you working?
Related guides
- Set up OrderPilot on your showroom iPadsShowroom (POS) · 6 min
- Download and print quote and order PDFsPayments and signatures · 5 min
- Review payments and invoices, and refund a paymentPayments and signatures · 5 min
- Set up your brand kitBranding · 6 min
- Branding settingsBranding · 4 min
Print an 80 mm receipt for a customer and choose the branding and terms it carries. Receipt printing happens on POS; the look and footer are set in the app.
The location's short receipt terms take priority over the shop's general receipt text. A terms QR code opens the location's full terms. A portal QR code has a separate purpose: opening the customer's order.
Before you start
Is the printer connected?
Connect a receipt printer to Shopify POS and finish POS setup.
Can you open the record?
Receipt printing needs View quotes and orders, and the order's location must be on the subscription.
Can you change the design?
Branding and location terms need Manage shop settings. Prepare your brand kit first.
Check the order and location before printing. A customer's receipt can carry a different location logo or terms from the shop defaults.
Print a receipt
Step 1: Find the order
Tap Print Receipt on the smart grid. Choose Mine or All, then enter a customer or order number in Search customer or order #.
The list contains orders only. Use Load more orders when the record is outside the current results.
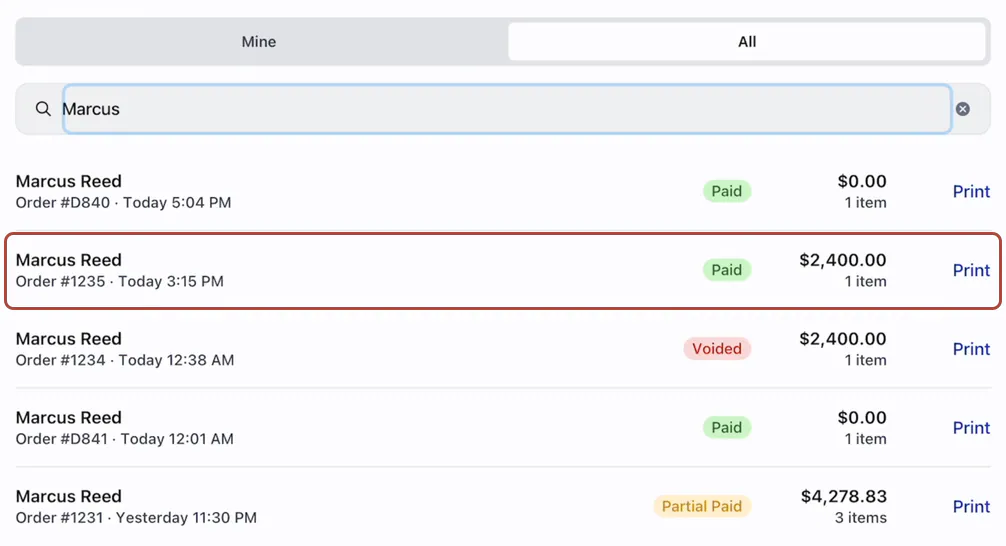
Print Receipt lists orders, with Mine and All tabs. Step 2: Send the receipt to the printer
Choose the order and tap Print. The action shows Printing…, followed by Receipt sent to printer.
Check the printed sheet before handing it over. Confirm the customer, items and payment information belong to the order you selected.
Step 3: Print from an open record
On the order screen, tap Print, then Print Receipt. OrderPilot saves on-screen edits before printing.
A draft saved only in OrderPilot prints its current content. To print a quote, open it through Orders & Quotes; it is absent from the Print Receipt tile's list.
Print Quote or Print Order prints the full document instead. Use quote and order PDFs when you need that format.
Set the receipt's look and text
Step 1: Open the receipt design
Go to SettingsBrandingPOS receipt. The receipt editor and sample show the settings for printed receipts.
Use Branding settings when you also need to change other customer documents.
Step 2: Choose the brand details
Set Logo, then check Store name and Slogan. The receipt centres the logo above the store name.
The logo prints in black. A location's own logo takes priority, followed by the square mark and then the logo fallback.
The sample lets you inspect the identity before changing the footer.
Step 3: Enter general receipt text
Enter Receipt text, up to 2,000 characters. This text prints under the total when the location has no short receipt terms.
Use it for wording that applies wherever the default is used. If a showroom needs its own terms, set those separately in the location's terms.
The preview shows how the text fits on the narrow receipt.
Step 4: Choose the portal QR code
Under QR code, choose Portal link or None. Portal link lets the customer open their order.
If Portal link is greyed out, turn on the portal through portal access. Then return to the receipt editor.
Check the sample and save. The saved design supplies the next receipt's shop-level choices.
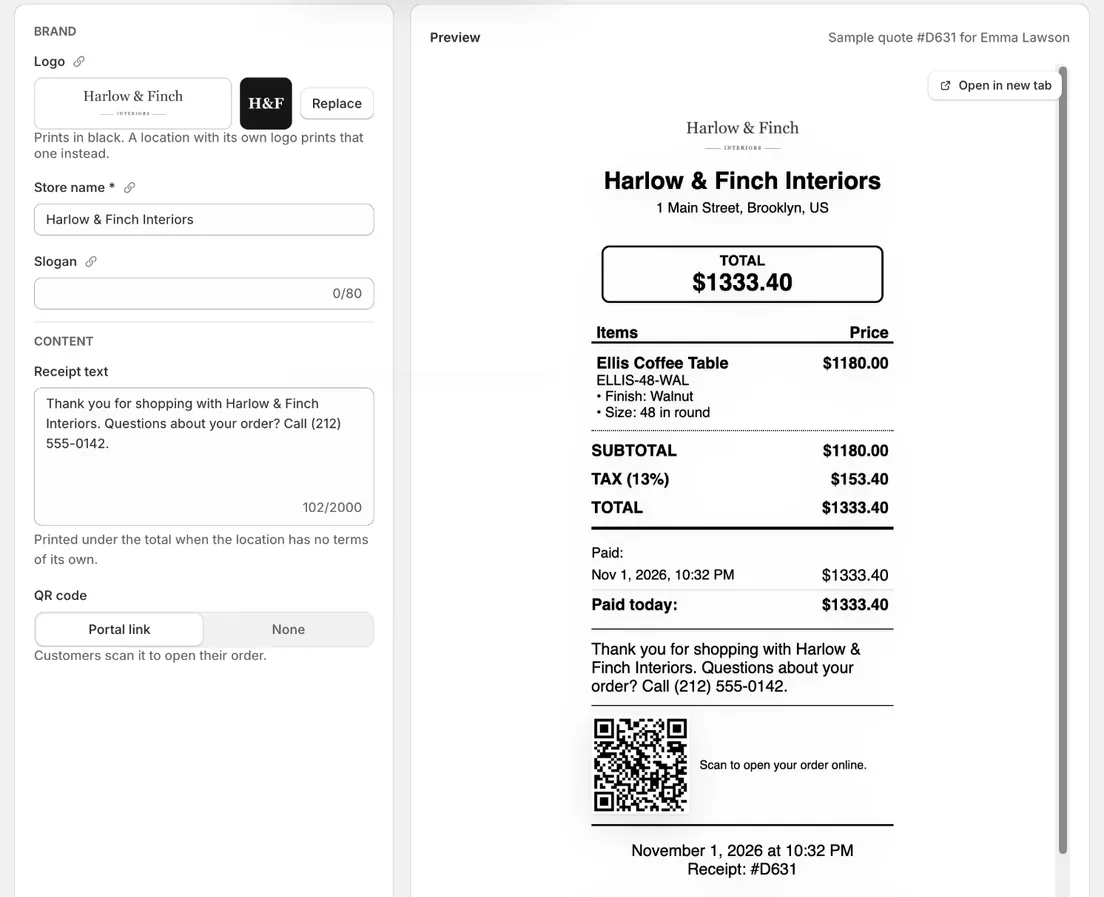
The preview shows the logo, receipt text and portal choice.
Add a location's receipt terms
Step 1: Open the location's terms
Go to SettingsBusiness & locationsTerms & payments. On the showroom location's row, click Edit and choose Edit terms & conditions.
The location controls its own short receipt wording and full terms. See business details and documents for the wider location setup.
Step 2: Enter the short terms
Fill Receipt terms (short) with the wording your store has chosen for the printed footer. Keep the full terms in the location's terms.
The short text prints on the 80 mm receipt. When full terms are saved, their QR code identifies the location, rather than a particular order.
Step 3: Save and check the footer
Save the location terms, then check the next receipt printed for that location.
Its short terms replace the general Receipt text. With full terms alone, the footer still shows their link and QR code.
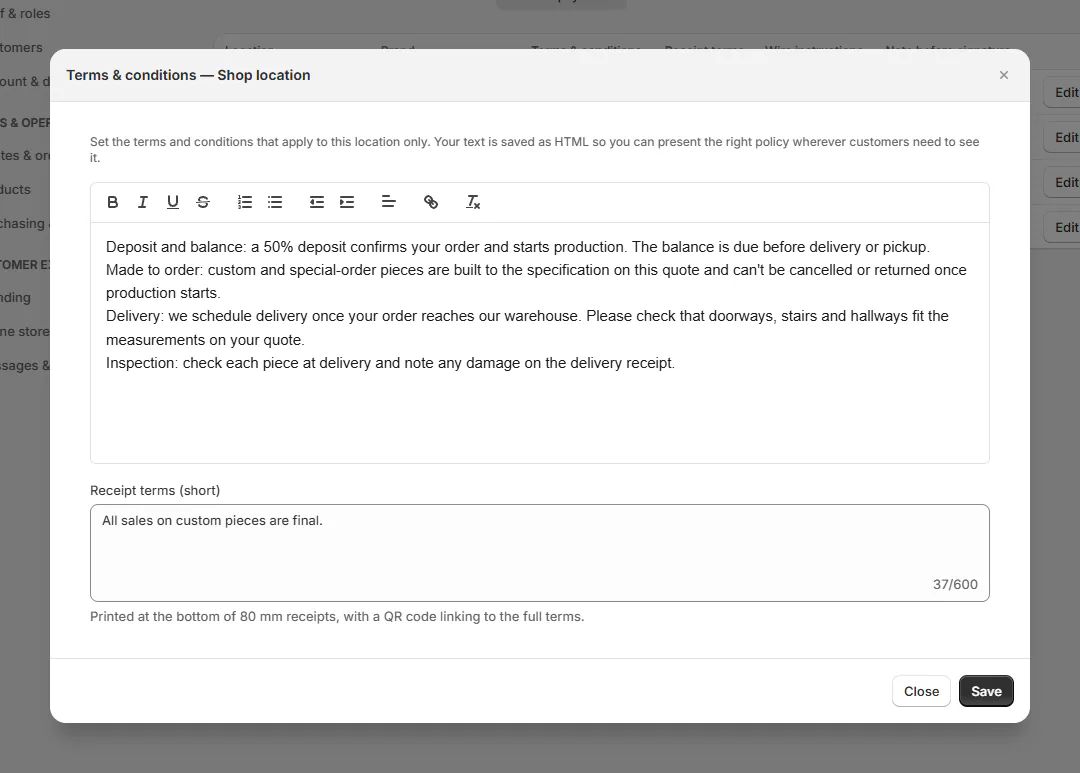
Location terms take priority over the general receipt text.
What happens next
A receipt includes store identity, items, totals, payment information, the footer and date. Quotes are headed Quote; orders are headed Receipt.
The terms QR and portal QR answer different customer questions. Check each destination when reviewing the design: one explains the location's terms, while the other opens the order.
Printing confirms that the receipt was sent to the printer. It does not create a new payment or change the balance. Review payment history if the amounts need checking.
Example: Marcus's showroom receipt
Example · Harlow & Finch Interiors
A receipt with location terms
Marcus Reed collects his paid order at Harlow & Finch Interiors.
- Nora Ellis saves the showroom's short receipt terms.
- Sam Ortiz opens Print Receipt and searches for Marcus.
- Sam prints the paid order.
- Marcus reads the short terms and scans the terms QR for the full location terms.
If something goes wrong
Couldn't print the receipt. Try again.
Check the printer connection and Wi-Fi, then retry the print action.
A quote is missing from the list
Open it from Orders & Quotes and use Print > Print Receipt.
Portal link is unavailable
Enable the customer portal in Settings before choosing a portal QR.
The receipt has no terms
Check the location's short terms and the shop's Receipt text.
Printing is refused for a location
Check subscription coverage.
Was this guide helpful?
Thanks. Tell us what was missing at support@meetorderpilot.com.