Group locations into brands
Related guides
- Bring in your locationsSettings and integrations · 6 min
- Business details and what each location printsSettings and integrations · 6 min
- See what changed and restore an earlier versionGet started · 4 min
- Create email templates and assign brand designsEmails and messages · 4 min
- Download and print quote and order PDFsPayments and signatures · 5 min
A brand groups locations that trade under the same business identity. Use brand grouping when parts of your business operate under different names and need their own customer-facing presentation.
Each brand can have its own color and image, and its locations appear together in pickers. A location belongs to one brand or remains Unassigned.
The brand kit holds shared visual details for customer pages and documents. Brand grouping organizes locations; the kit controls the shared appearance of customer-facing materials.
Before you start
Bring in locations
Follow Bring in your locations.
Check permission
Brand setup needs Manage shop settings.
Plan the grouping
Decide which locations belong together before taking orders under the new structure.
The limit is 200 brands. Brand color is used in the portal and customer emails, with the shop color as the fallback.
The brand image can print on purchase orders and specification sheets for locations without their own logo. Keep that fallback in mind when checking location document details.
Turn on brand grouping
Step 1: Open the location settings
Go to SettingsBusiness & locationsLocations. Find the Brand grouping card and Enable brand grouping.
Step 2: Enable and save
Tick Enable brand grouping, then click Save in the save bar. The tab becomes Brands and locations and displays the board.
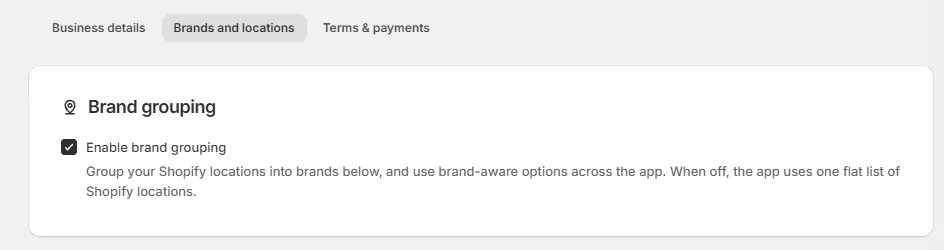
Once saved, the tab reads Brands and locations. The top-bar picker reads All Brands. The grouping switch uses the save bar, while individual board changes save immediately.
Create a brand and add locations
Step 1: Open the brand form
Click + Add brand and enter Name. Choose Brand color, or use Use the shop's color to inherit it.
Step 2: Add the brand image
Use Add a brand image for an optional PNG, JPG, or WebP up to 5 MB. Use Reframe to fit the document header, then review the image.
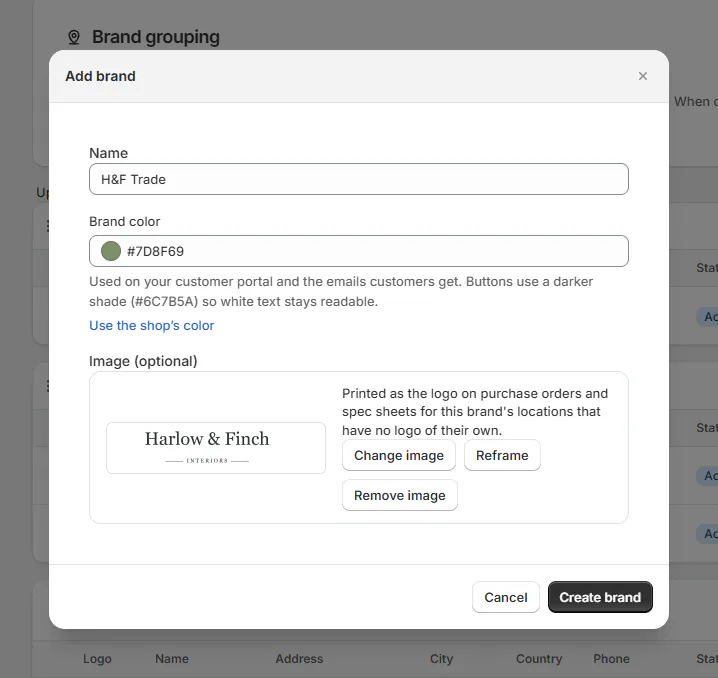
Add brand dialog filled in. Step 3: Create the brand
Click Create brand. Brand created confirms it, and the brand appears on the board. At 200 brands, the add control is unavailable.
Step 4: Move a location into it
Drag a location row from Unassigned or another brand onto the intended brand. The move saves where you drop it.
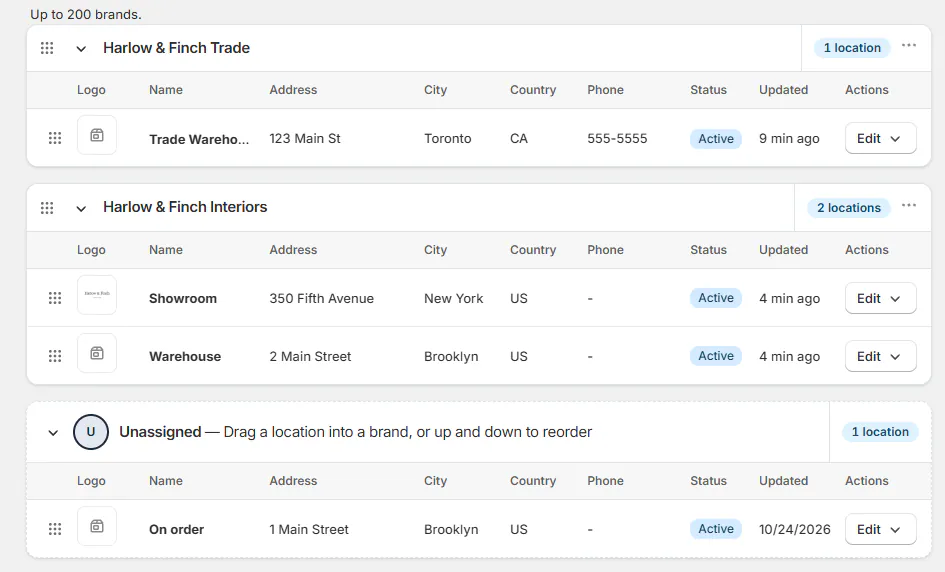
A location belongs to one brand at a time. A failed save restores the earlier order and shows an error. Check the final board before assuming the location moved.
Edit or delete a brand
Step 1: Open the brand menu
Open the brand card's menu and choose Edit brand. Change its name, color, or image, then click Save. Brand updated confirms the change.
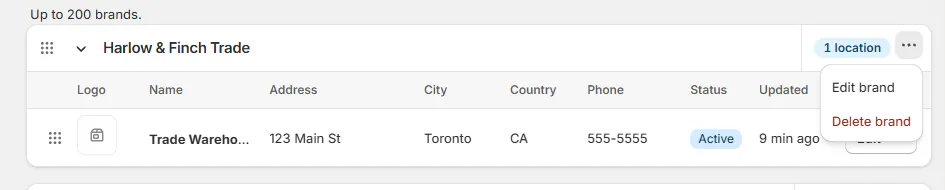
Brand card menu with Edit brand and Delete brand. Step 2: Delete an unused brand
Choose Delete brand and review the confirmation. Click Delete to remove it. Its locations become Unassigned, and Brand deleted confirms the result.
The brand's Activity retains its history. Restoring a version doesn't restore its former position in the list; see history and restore.
What happens next
Location pickers group locations beneath brands. Brand-specific email designs and PDF themes can provide the matching document appearance.
Check each location's own details and logo alongside the brand. A brand image is a fallback for the relevant documents, not a reason to remove a valid location logo.
Example: add H&F Trade
Example · Harlow & Finch Interiors
Separate trade and showroom locations
Nora Ellis organizes Harlow & Finch Interiors.
- She enables brand grouping and saves.
- She creates H&F Trade with a Sage color and its own image.
- She moves Warehouse into H&F Trade.
- Showroom stays under Harlow & Finch.
- She checks the trade purchase-order and specification-sheet appearance.
If something goes wrong
Brand name is required
Enter a name before creating the brand.
The image can't be reframed
Use the original image or upload the file again.
The drag didn't save
The earlier order returns after a failure. Retry after checking the error.
Add brand is unavailable
Check whether the store has reached 200 brands.
Was this guide helpful?
Thanks. Tell us what was missing at support@meetorderpilot.com.