Set up the Customers page and customer fields
Related guides
- Find and edit customersCustomers and portal · 5 min
- How Settings is organizedSettings and integrations · 5 min
- Find your way around OrderPilotGet started · 7 min
- Set up order reviewsQuotes and orders · 4 min
- Set up trade customers and order taxQuotes and orders · 4 min
Choose whether Customers appears in the menu, add the information your team keeps on each customer, and decide which fields appear on orders.
Customer fields save to Shopify customer metafields. An editable field on an order card changes the customer, so choose visibility with that shared use in mind.
Before you start
Read the customer workflow
Customers in OrderPilot explains profiles, addresses, and the order card.
Check your permission
Manage shop settings is required to change the setup. Other roles can see field setup read-only.
Choose the information you need
Decide whether a field belongs on the profile, on orders, or in the tags beside the name.
Turn the Customers page on or off
Step 1: Open the menu setting
Go to SettingsCustomersCustomers page. The card explains whether Customers is in the menu.
Step 2: Set menu visibility
Turn the switch on or off. It saves immediately and shows Saving… while the change is being saved. With it on, Customers appears in the app header and Shopify sidebar.
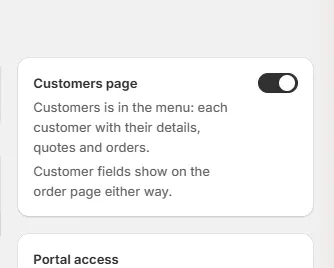
Customers page card switched on. Turning it off hides those menu entries and the tour. Customer pages still open from links, and customer fields still appear on order pages. The switch doesn't remove the customer data.
Add a customer field
Step 1: Open a new field
Go to SettingsCustomersCustomer fields and click Add field. The field dialog opens with Name and Type.
Step 2: Define the information
Enter a clear name and choose the type. Supported information includes text, URL, number, date, yes/no, choice lists, and images. For a Choice list, use Add choice to supply the allowed choices; Profile section then starts at Classification.
Step 3: Choose where it appears
Choose Profile section for its place on the customer profile. Under On quotes and orders, choose Not shown, Shown, or Shown, editable.
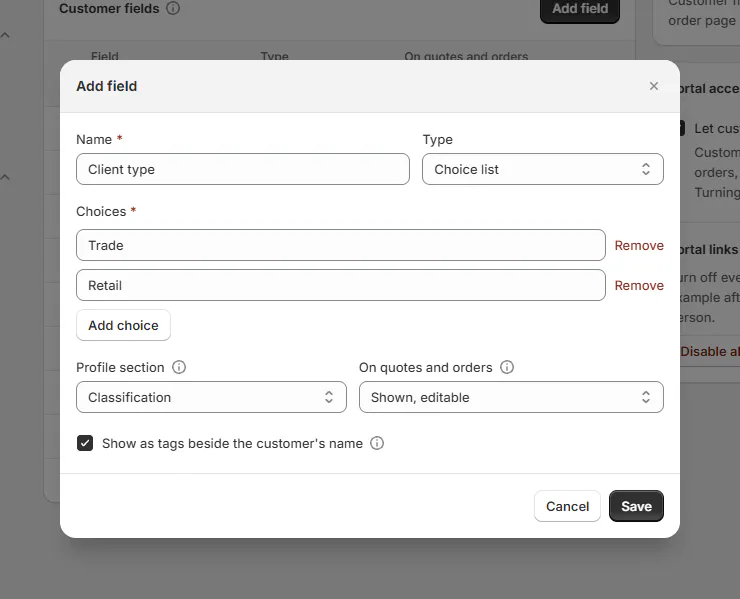
Field dialog with Type, Profile section, On quotes and orders and Show as tags. Shown, editable lets staff save changes to the customer from an order's customer card. Use Shown when the team needs to read the value while preparing a quote.
Step 4: Save and arrange the field
Click Save. Your field appears under Your fields, separate from Standard fields supplied by OrderPilot. Drag fields to set their order.
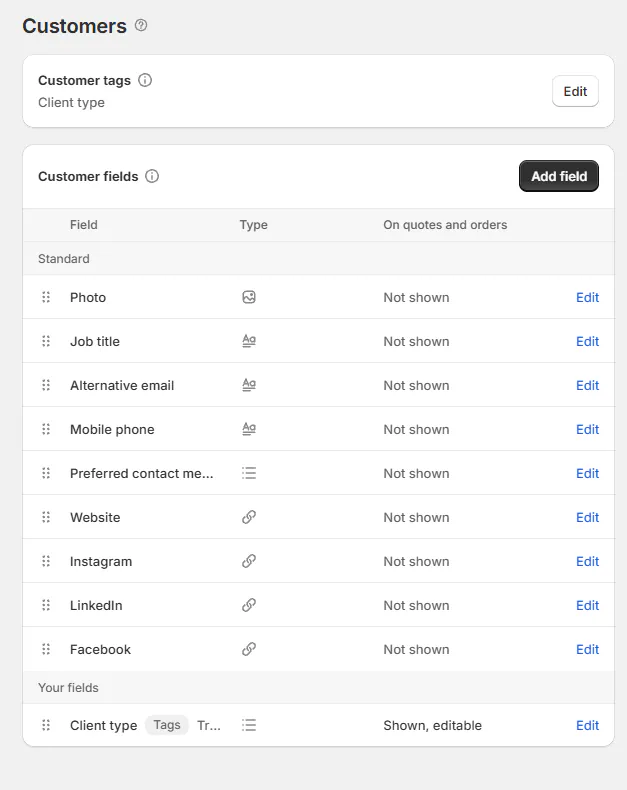
Settings › Customers › Customer fields with Standard and Your fields.
Show a list as tags
Step 1: Select the tag list
In the field dialog, tick Show as tags beside the customer's name for the list you want. Alternatively, open SettingsCustomersCustomer tags and choose the list under Show beside the customer's name.
Only one list shows as tags. Choose None when you don't want a customer list displayed this way.
Step 2: Check the customer views
Open a cast customer's profile and an order containing that customer. The selected list's values appear beside the name, including on the Customers list and order card.
Add the standard fields
Step 1: Add missing standard fields
In Customer fields, click Add standard fields. The message reports Added N fields or Already added, and the button goes away once every standard field is there.
The standard fields include photo, job title, alternative email, mobile phone, preferred contact method, website, Instagram, LinkedIn, and Facebook. Use this action for a shop missing those fields.
What happens next
Your team uses the fields on profiles and wherever you chose to show them. Editable order-card values save to the Shopify customer. Turning the Customers menu off doesn't stop those fields from appearing.
Example: label trade customers
Example · Harlow & Finch Interiors
Show Priya's client type
Nora Ellis wants sales staff to recognize trade customers.
- She adds a choice list named Client type.
- She adds Trade and Retail as choices.
- She selects Shown, editable for quotes and orders.
- She selects this list for tags beside the customer's name.
- Priya Shah's selected Trade value appears on her profile and quote card.
The tag describes the customer. Use tax and resale settings to establish any actual exemption.
If something goes wrong
The field needs a name
Enter a value in Name, then save again.
The choice list won't save
Add at least one choice and complete any empty choice.
The setup is read-only
Your role needs Manage shop settings to change it.
Another list no longer appears as tags
Only one list can supply those tags. Select the list your team needs.
Was this guide helpful?
Thanks. Tell us what was missing at support@meetorderpilot.com.