Set up warranty claims and staff access
Related guides
- Handle a warranty claimWarranty and service · 6 min
- Book repair visits and print job sheetsWarranty and service · 4 min
- Replace, refund or credit a claimWarranty and service · 6 min
- How warranty coverage worksWarranty and service · 5 min
- How roles and permissions workTeam and permissions · 6 min
Set the claim numbers, reasons, email defaults, repair rules, and staff access your service team will use. Claims follow the original order and the units affected by the reported problem.
Claims are managed in the OrderPilot app. They don't have POS screens, and each person's order access also limits the claims they can see.
Before you start
Read the daily workflow
Handle a warranty claim explains the report and decision.
Understand coverage
How warranty coverage works explains the terms checked at report time.
Check setup access
The Claims tab needs Manage shop settings.
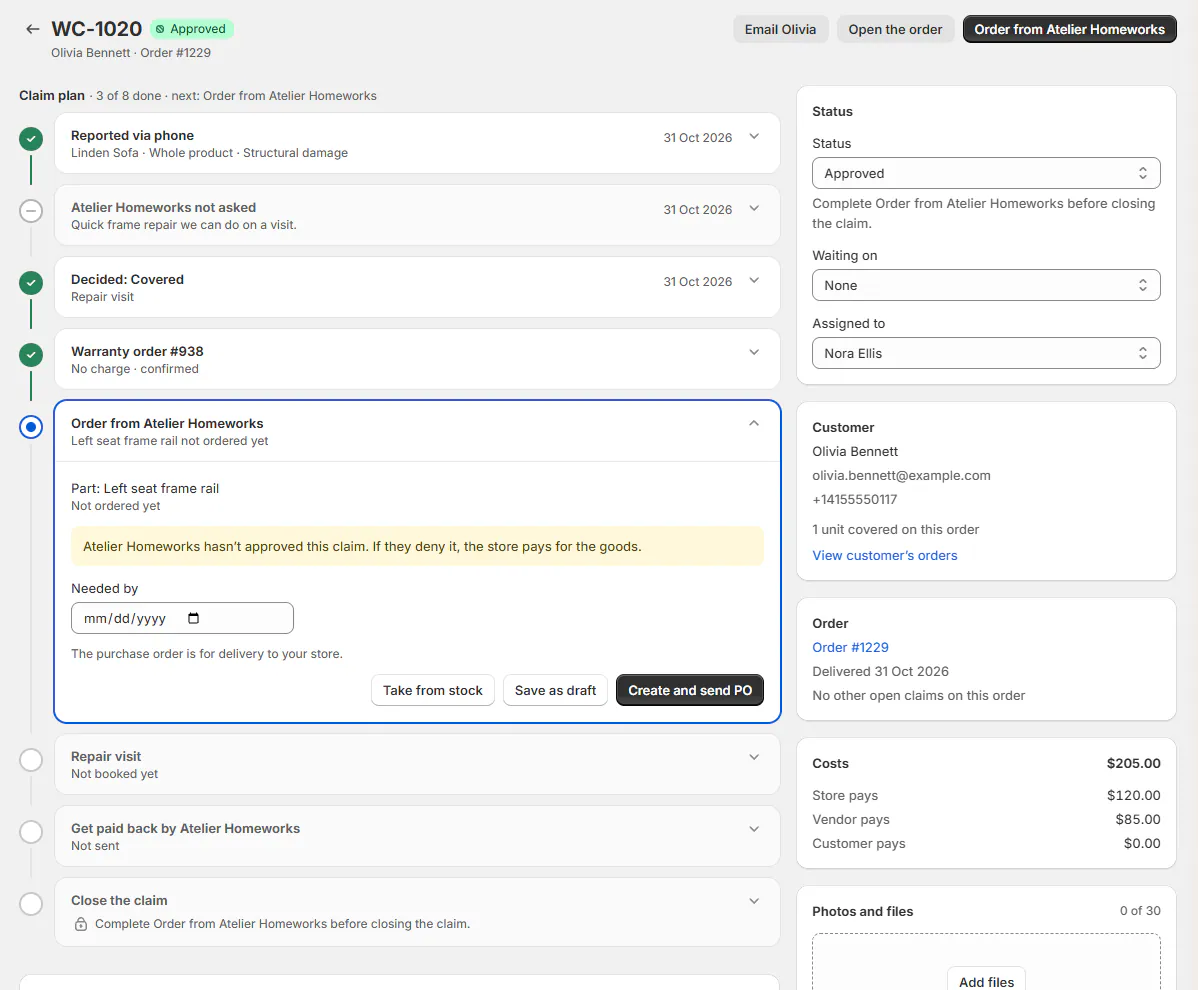
How a claim runs
- 1ReportIdentify the units and problem.
- 2Vendor and decisionAsk the vendor if needed, then decide coverage and who pays.
- 3Warranty orderCreate the order or customer quote for the work.
- 4FixArrange parts, replacement, repair, or money back.
- 5RecoveryRecord what the vendor pays back.
- 6CloseComplete the steps and resolve the claim.
The primary button names the next action, such as Review the report, Decide, or Book the repair visit. Coverage is checked as of the report date.
Statuses, waiting, and decisions
Statuses are New, In review, Approved, In progress, Resolved, and Declined. A New claim moves to In review, then advances through Decide.
Approved and In progress can move between each other before resolution. Resolved claims reopen through Reopen claim; declined claims use Change decision.
Waiting on can be None, Customer, Vendor, Part, Repair visit, or Delivery to customer. Decisions are Covered, Covered in part, Goodwill, Paid repair, or Declined.
A no-charge warranty order needs no customer signature. A customer contribution can require a signed quote and deposit before work starts.
Set claim numbers and reasons
Step 1: Open Claims settings
Go to SettingsProductsClaims. Review Prefix and Next number. The defaults are WC- and 1001, with a preview of the next claim number.
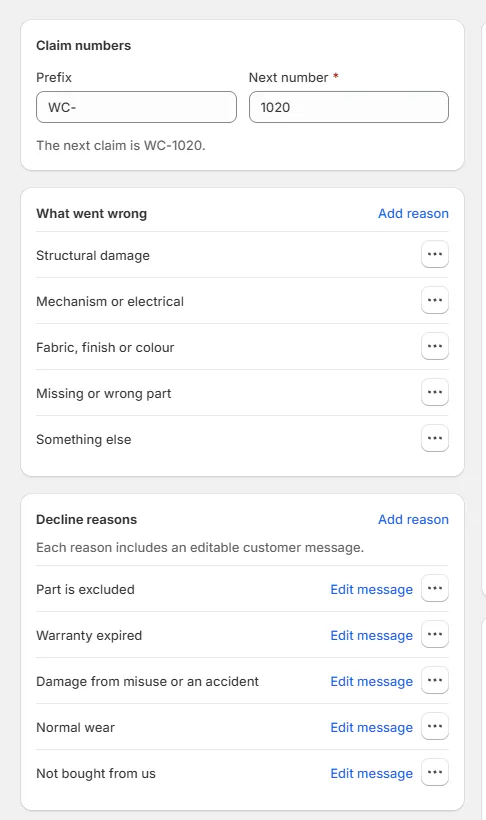
Claims settings tab with numbering and reasons. Step 2: Set problem and decline reasons
Edit What went wrong and Decline reasons. Reason menus offer Rename, Move up, Move down, and Remove. Decline reasons also offer Edit message.
Default problem reasons cover structural damage, mechanisms or electrics, fabric or finish, missing or wrong parts, and something else. Keep at least one reason in each list.
Step 3: Write the customer message and save
Under Message to the customer, use the supported details for customer first name, product, failed part, claim number, and coverage end date. Click a detail to change or remove it, or type / to insert one. Click Save in the dialog; the reason saves straight away.
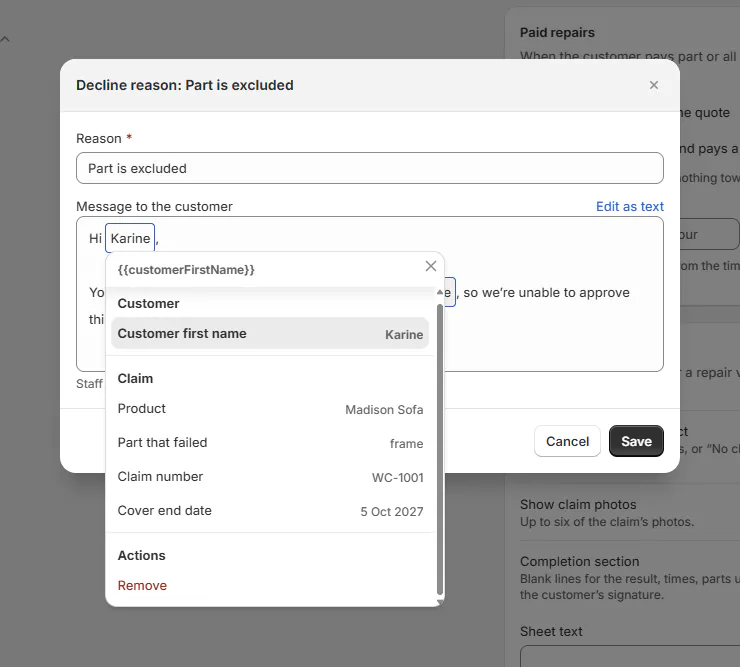
Decline reason dialog with Message to the customer and the token picker. Reasons allow 120 characters; messages allow 5,500. Staff can edit the message before sending. Removed reasons retain their names on existing claims.
Choose which claim emails go
Step 1: Review the email defaults
In Claim emails, choose which messages should start selected on a claim. Review the trigger for each before changing it.
Email When it is used Claim received When a claim starts. Information request When staff request more information. Claim approved When the claim is approved. Repair visit booked When a visit is booked. Claim resolved When the claim is resolved. Claim declined After staff review a decline message. Delivery booked When delivery is booked. Arrange a time When arranging a time with the customer. Claim received, Claim approved, Repair visit booked, and Claim resolved start on. Information request, Claim declined, and Arrange a time have no switch: they read From the claim, because staff write and send them there. Staff can change the choice on an individual claim.
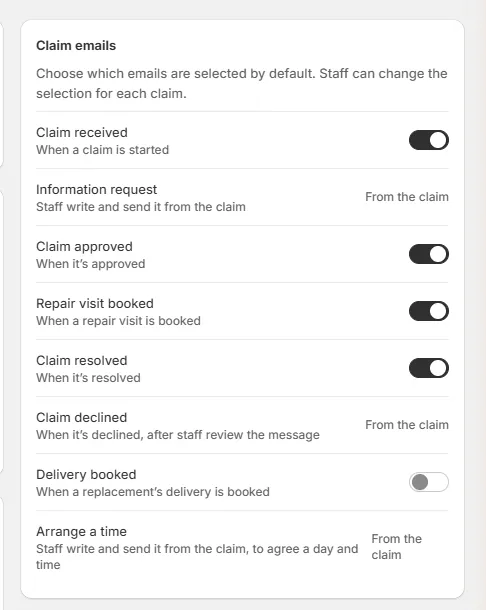
Claim emails card with the four default emails on. Step 2: Save the defaults
Save the Claims settings. These messages are composed emails recorded on the order. The customer needs an email address in Shopify to receive them.
Set replacement, paid repair and job sheet rules
Step 1: Choose replacement coverage
Under Replacement warranty, choose the original expiry, the original expiry with a minimum period, or a full warranty from delivery. The minimum-period choice starts at 90 days and accepts 1 to 3,650.
Step 2: Choose paid-repair requirements
Under Paid repairs, choose a signature alone or a signature plus deposit. The deposit accepts 1% to 100% and starts at 50%.
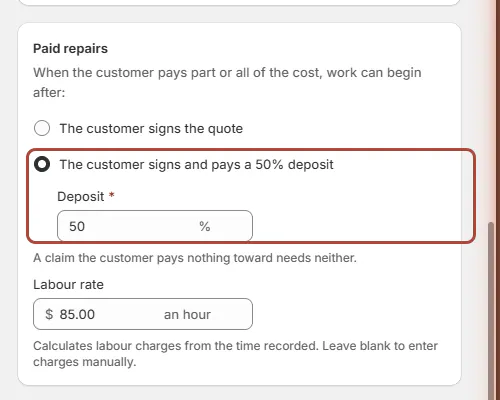
Replacement warranty and Paid repairs cards with the deposit option. A claim with no customer contribution needs neither. Labour rate calculates labor charges from recorded hours; leave it blank for manual charges.
Step 3: Set job sheet content
Choose Show the amount to collect, Show claim photos, and Completion section. All start on. Sheet text allows 2,000 characters.
The amount never prints for staff without cost access. Up to 6 photos can print. Themes live under SettingsBrandingQuote PDF; see repairs and job sheets.
Give staff the right claim permissions
Review roles under SettingsStaff & rolesRoles using role management.
| Permission | Claim work it allows |
|---|---|
| View warranty claims | Read claims, files, job sheets, and warranty analytics within order scope. |
| Manage warranty claims | Start and work claims, notes, files, actions, and waiting states. |
| Approve and decline warranty claims | Decide, decline, and reopen. |
| Override warranty coverage | Goodwill and covered decisions for entirely uncovered units. |
| Add and edit serial numbers | Record or correct unit serials. |
| Manage shop settings | Configure claim defaults. |
The fix still needs its ordinary permission. Parts need purchasing access; vendor emails need Send and cancel purchase orders; receiving needs Receive items.
A no-charge replacement needs Create and edit quotes and orders and Override prices and give discounts. Costs need Enter costs and charges; vendor recovery needs View costs.
Customer emails need Email customers. Store credit needs Refund payments. Paper signatures need Bypass signature and deposit requirements, plus the applicable order-placement access.
Starter Store administrator, Operations, and Salesperson roles hold all 3 claim rights. Sales manager has View and Manage; Read-only auditor has View. Review your actual roles instead of assuming a job title limits decisions.
What happens next
New claims use the next number and default email choices. Existing reasons remain readable on claims that used them. Staff follow the claim's next-action button through the work.
Example: reserve decisions for the owner
Example · Harlow & Finch Interiors
Prepare Harlow & Finch's service team
Nora Ellis configures the claim process.
- She keeps WC- and sets Next number to 2001.
- She adds a Recliner mechanism reason.
- She enables Delivery booked and a 50% paid-repair deposit.
- She sets the labor rate.
- She gives the service role Manage access while keeping decisions with the owner's role.
If something goes wrong
Claims settings are read-only
Check Manage shop settings.
Staff see Coverage instead of claims
Their role needs View warranty claims and the underlying order access.
Decide is unavailable
Hover for the missing decision or override permission.
The last reason cannot be removed
Add another reason first.
Was this guide helpful?
Thanks. Tell us what was missing at support@meetorderpilot.com.