Edit and publish your email designs
Related guides
- Create email templates and assign brand designsEmails and messages · 4 min
- Email blocks and merge fieldsEmails and messages · 4 min
- Choose which emails go out, and whenEmails and messages · 5 min
- Set up your brand kitBranding · 6 min
- Emails aren’t reaching customersEmails and messages · 4 min
Edit an email's subject, layout, and order details, then preview and publish it. Customers continue receiving the published version while you work on a draft.
Publishing makes the design available for future sends. It doesn't email customers by itself.
Before you start
Check your permission
You need Manage shop settings.
Start in Branding
Templates live at SettingsBrandingEmails.
Prepare the brand
The logo and brand color come from your brand kit.
Use email templates and brands when creating groups or assigning designs to brands. Use this guide for editing and releasing the actual message design.
Choose the default email theme
Step 1: Open the theme choice
In Branding's Emails tab, open Default email theme. Choose Ledger, Gallery, Summary, Paper, Statement, or Minimal. The dialog shows the available looks.
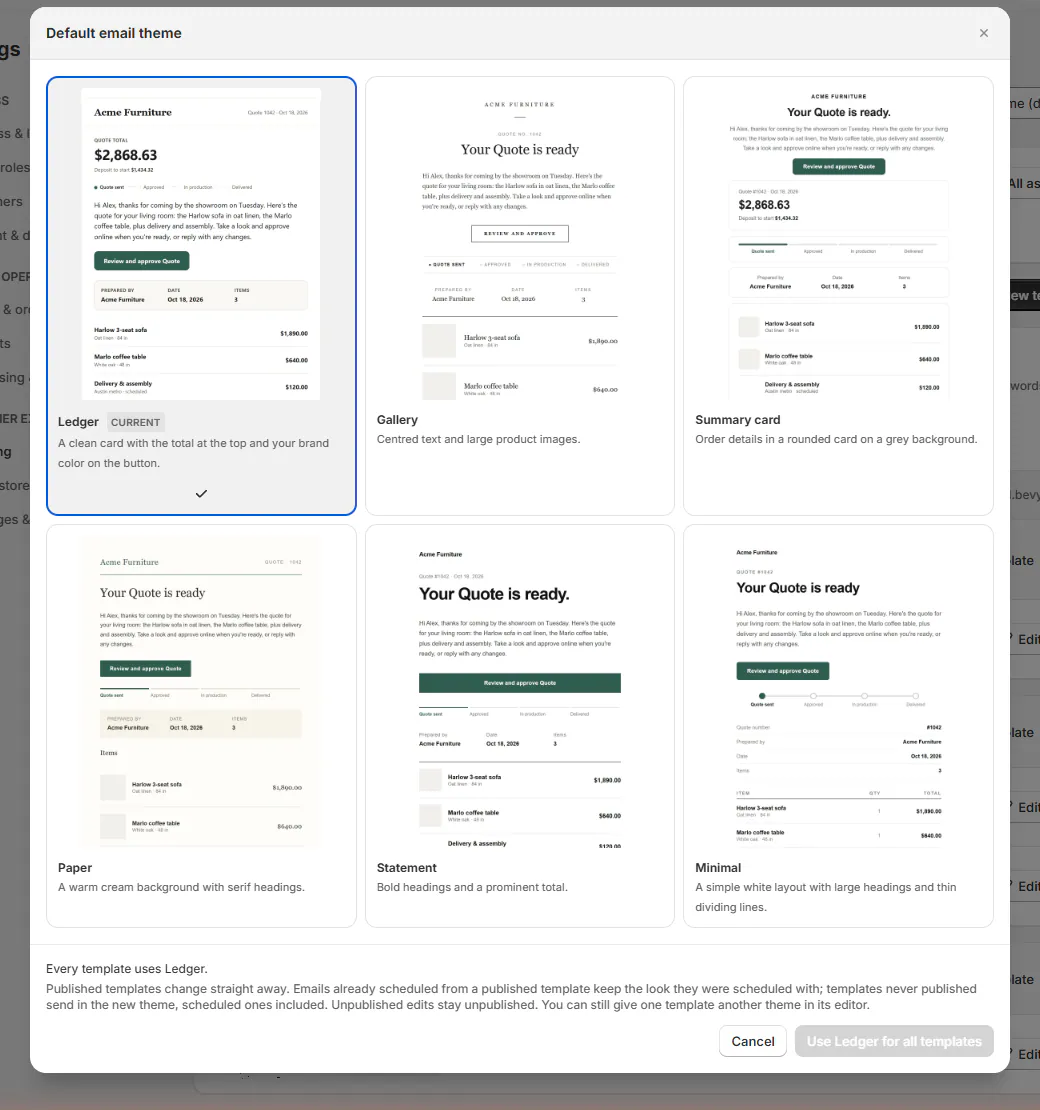
Default email theme dialog with the six themes. Step 2: Confirm the store-wide change
Review the effect and confirm your choice. Every active customer and vendor template is restyled, including defaults and brand versions.
Blocks, wording, and subjects stay. Template colors are replaced. Live templates on another theme receive a new published version, while unpublished edits remain unpublished.
Warning
The default theme changes existing designs
This action affects all active templates, not only the row you last opened. Check whether your store needs a shared change before confirming.
Scheduled emails retain their scheduled design. New templates start with the default theme. A store with more than 100 templates must reduce that scope before this change can proceed.
Edit a template
Step 1: Open the template details
Click Edit on the template row. In Details, review Name, Group, Brands, and Subject line. The editor opens the template's draft.
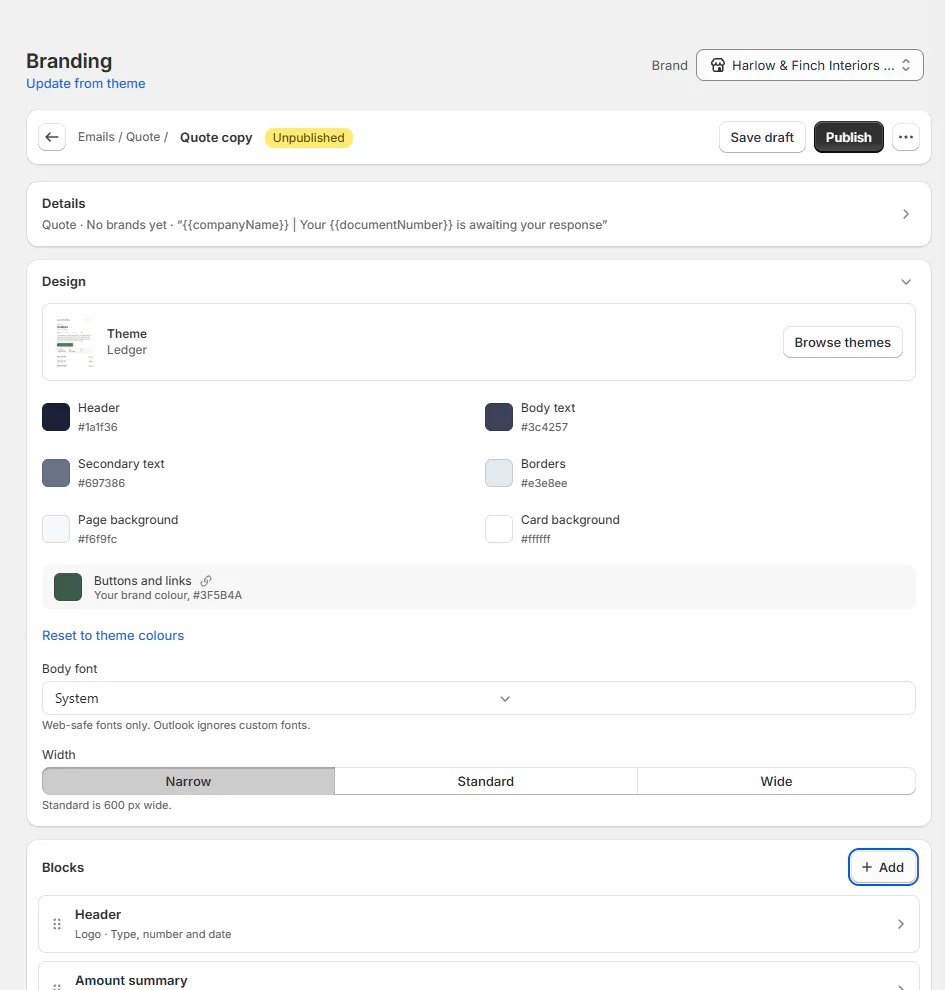
Blocks and the preview follow further down the page. Write the subject in sentence case and identify the document clearly. Keep the subject useful even before the customer opens the email.
Step 2: Choose the design
In Design, choose the theme, palette, body font, and email width. Theme changes offer Keep my blocks or Use theme defaults. Reset to theme colours restores the theme palette.
Widths are Narrow, Standard, and Wide. The body font picker uses web-safe fonts because Outlook ignores custom fonts.
Step 3: Edit and arrange the blocks
Open a block to change it, add blocks you need, and drag to reorder them. Keep exactly one Message block for the message staff enter when sending.
For the available block settings, use email blocks and merge fields. Choose content that helps the customer understand or act on this order.
Step 4: Insert an order detail
Type a slash or click Insert detail where supported. Choose a detail such as Customer first name, Document number, or Customer portal link.
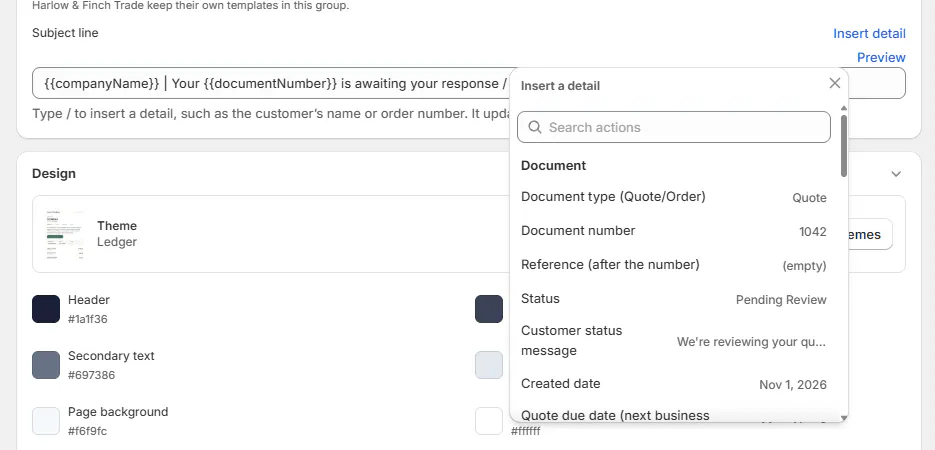
Type / to insert a detail; each row shows its sample value. The editor displays preview values as chips. Real customer sends use the portal link while the portal is on, otherwise the signing link. The PIN is added beside the portal link automatically.
Step 5: Preview the email
Under Email preview, choose Desktop or Mobile. Preview against Sample order or a recent quote or order. Unsaved edits appear in the preview.
Check Olivia Bennett's Linden Sofa quote for long item names, option details, and a clear next action. A sample preview alone may not show every detail your store includes.
Step 6: Review warnings and save
Read warnings below the subject, on blocks, and above the block list. Correct relevant issues, then click Save draft. The saved-draft message confirms your work is retained.
Warnings identify excessive capitals, repeated punctuation, spam phrases, shortened links, bare IP links, missing alt text, promotional designs, and image-heavy content. They don't block saving or publishing.
Keep links to those the customer needs. More than 6 links prompts a warning. Shorten an email that triggers the Gmail clipping-size warning.
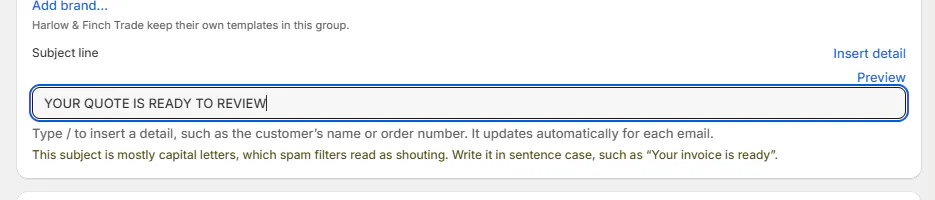
Warnings identify content to review before publishing.
Test, publish or restore
Step 1: Send a test
Choose Send test email from the row or editor menu. Enter your address in Send to, then click Send test. Check the sample email in your inbox.
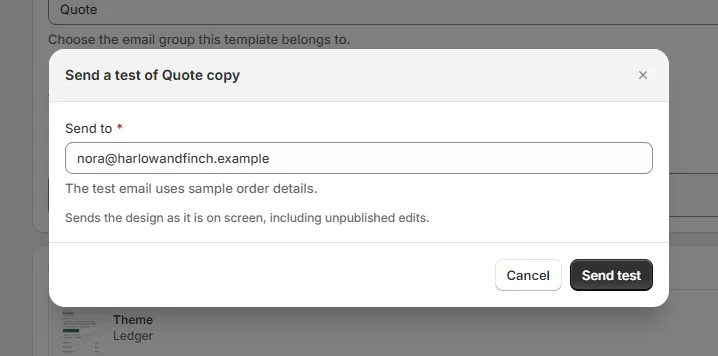
Send test email dialog with Send to. The test uses the draft subject and design with sample order details. It isn't threaded and doesn't include a real portal link. A real-order preview doesn't change those test-send rules.
Step 2: Publish the draft
Save your draft, then click Publish. The template becomes available for customer sends. Check the resulting live state before leaving.
Live · unpublished changes offers See what changed and Discard changes. Discarding asks for confirmation and removes those unpublished edits.
Step 3: Restore an earlier version when needed
Open Version history, choose an older version, and click Restore as draft. Review the restored subject and design, then publish when ready.
Restoring doesn't publish or add a history entry by itself. The current live version has no restore action. Scheduled emails keep the version selected when they were scheduled.
What happens next
Composers, status emails, and reminders use the published version. Editor previews and tests use the draft. Leaving a saved draft isn't enough to change customer emails.
The Live · publish again state offers Publish again. Use the live banner to understand whether another publication is needed.
Example: revise Harlow & Finch's quote email
Example · Harlow & Finch Interiors
Publish a clearer quote email
Nora Ellis updates the Quote template.
- She chooses Ledger and reviews the store-wide theme effect.
- She adds Document number to the subject.
- She previews Olivia Bennett's quote on Mobile.
- She resolves a capital-letter warning and sends herself a test.
- She publishes the reviewed draft.
If something goes wrong
Publish asks for a Message block
Add one. If there are several, remove extras so exactly one remains.
Discard isn't available
The template needs a first publication before it has a live version to discard back to.
A template keeps its theme
Resolve its compilation issue and retry the theme change.
A theme update asks you to retry
Another change may conflict. Reload the current state before trying again.
Was this guide helpful?
Thanks. Tell us what was missing at support@meetorderpilot.com.