Choose options and a vendor for each line
Where are you working?
Related guides
- Create a quote or orderQuotes and orders · 6 min
- Add fees, shipping and discountsQuotes and orders · 5 min
- Set option prices and track separate stockCatalog · 5 min
- Set up a Dimensions option for custom sizesCatalog · 4 min
- Set up vendorsCatalog · 5 min
Choose the customer's options and the vendor that will supply each line. Then check any price, description or image changes before saving the sale.
Options come from the product template. The saved line keeps its option prices even if someone later changes the template.
Before you start
Start the sale
Add the product using Create a quote or order. Templates supply their available options and vendors.
Check price access
Changing prices needs Override prices and give discounts.
Know your vendor rule
Require vendor selection determines whether a final save can leave the vendor undecided. Drafts can still save.
Your shop can rename “vendor” in the app. POS always uses Vendor.
Configure the line in the app
Step 1: Choose the required options
Open Options on the line. Choose values such as Sage Velvet and Feather Blend.
The panel shows how many options are present and their added total. Values show an added price or Included.
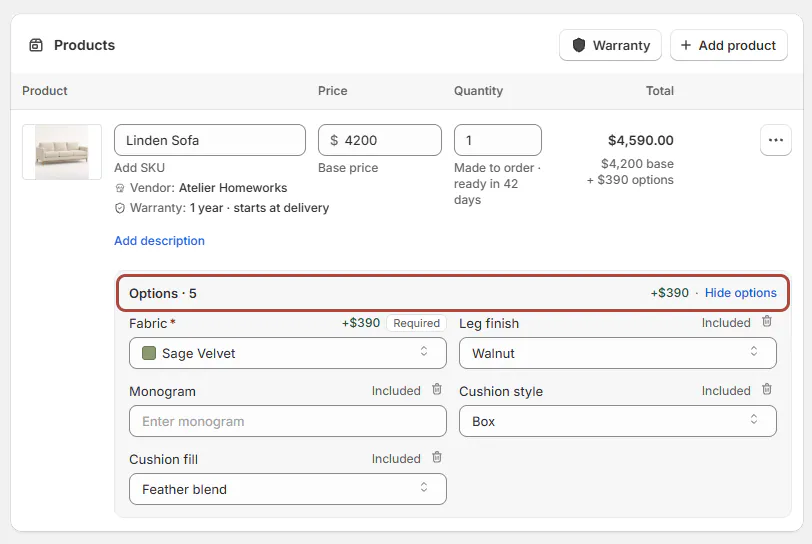
The line shows the chosen options and their additions. Step 2: Add optional fields
Click Add field, then choose from Field to add. Fill the newly added option.
Use the trash control to remove an optional field. Required options cannot be removed; Hide options and Show options control the panel's display.
Step 3: Choose the vendor
A template with 1 vendor fills it automatically. With several vendors, answer Which vendor is this line bought from?
To fix it later, click the amber chip (Skipped Vendor after Skip, Vendor required when the line has no vendor at all), search in Select Vendor for Product, then click Update vendor. The chosen vendor appears on the line.
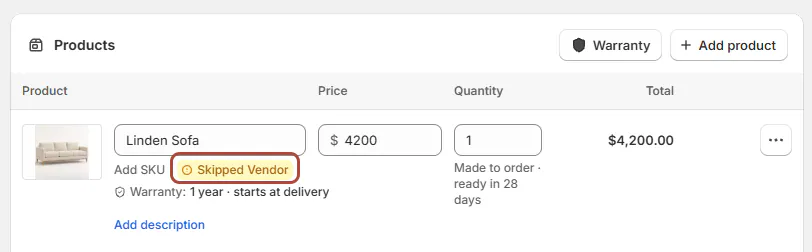
Resolve the missing vendor before final creation when required. Step 4: Review the line price
Open the line's ••• menu and choose Pricing. Change an allowed figure for this order, or choose Reset to the template-derived price.
The line price reflects that choice. Option pricing and stock explains how option amounts are calculated.
Note
A finished stock configuration shows Modify in the app. Check the finished-unit message before changing its options.
Configure the line on POS
Step 1: Open each option group
On Add item or Edit item, tap an option group. Up to 6 values appear as buttons; larger groups open a searchable list.
Choose Sage Velvet for Fabric. The group summary updates, and the required-fields count shows what remains.
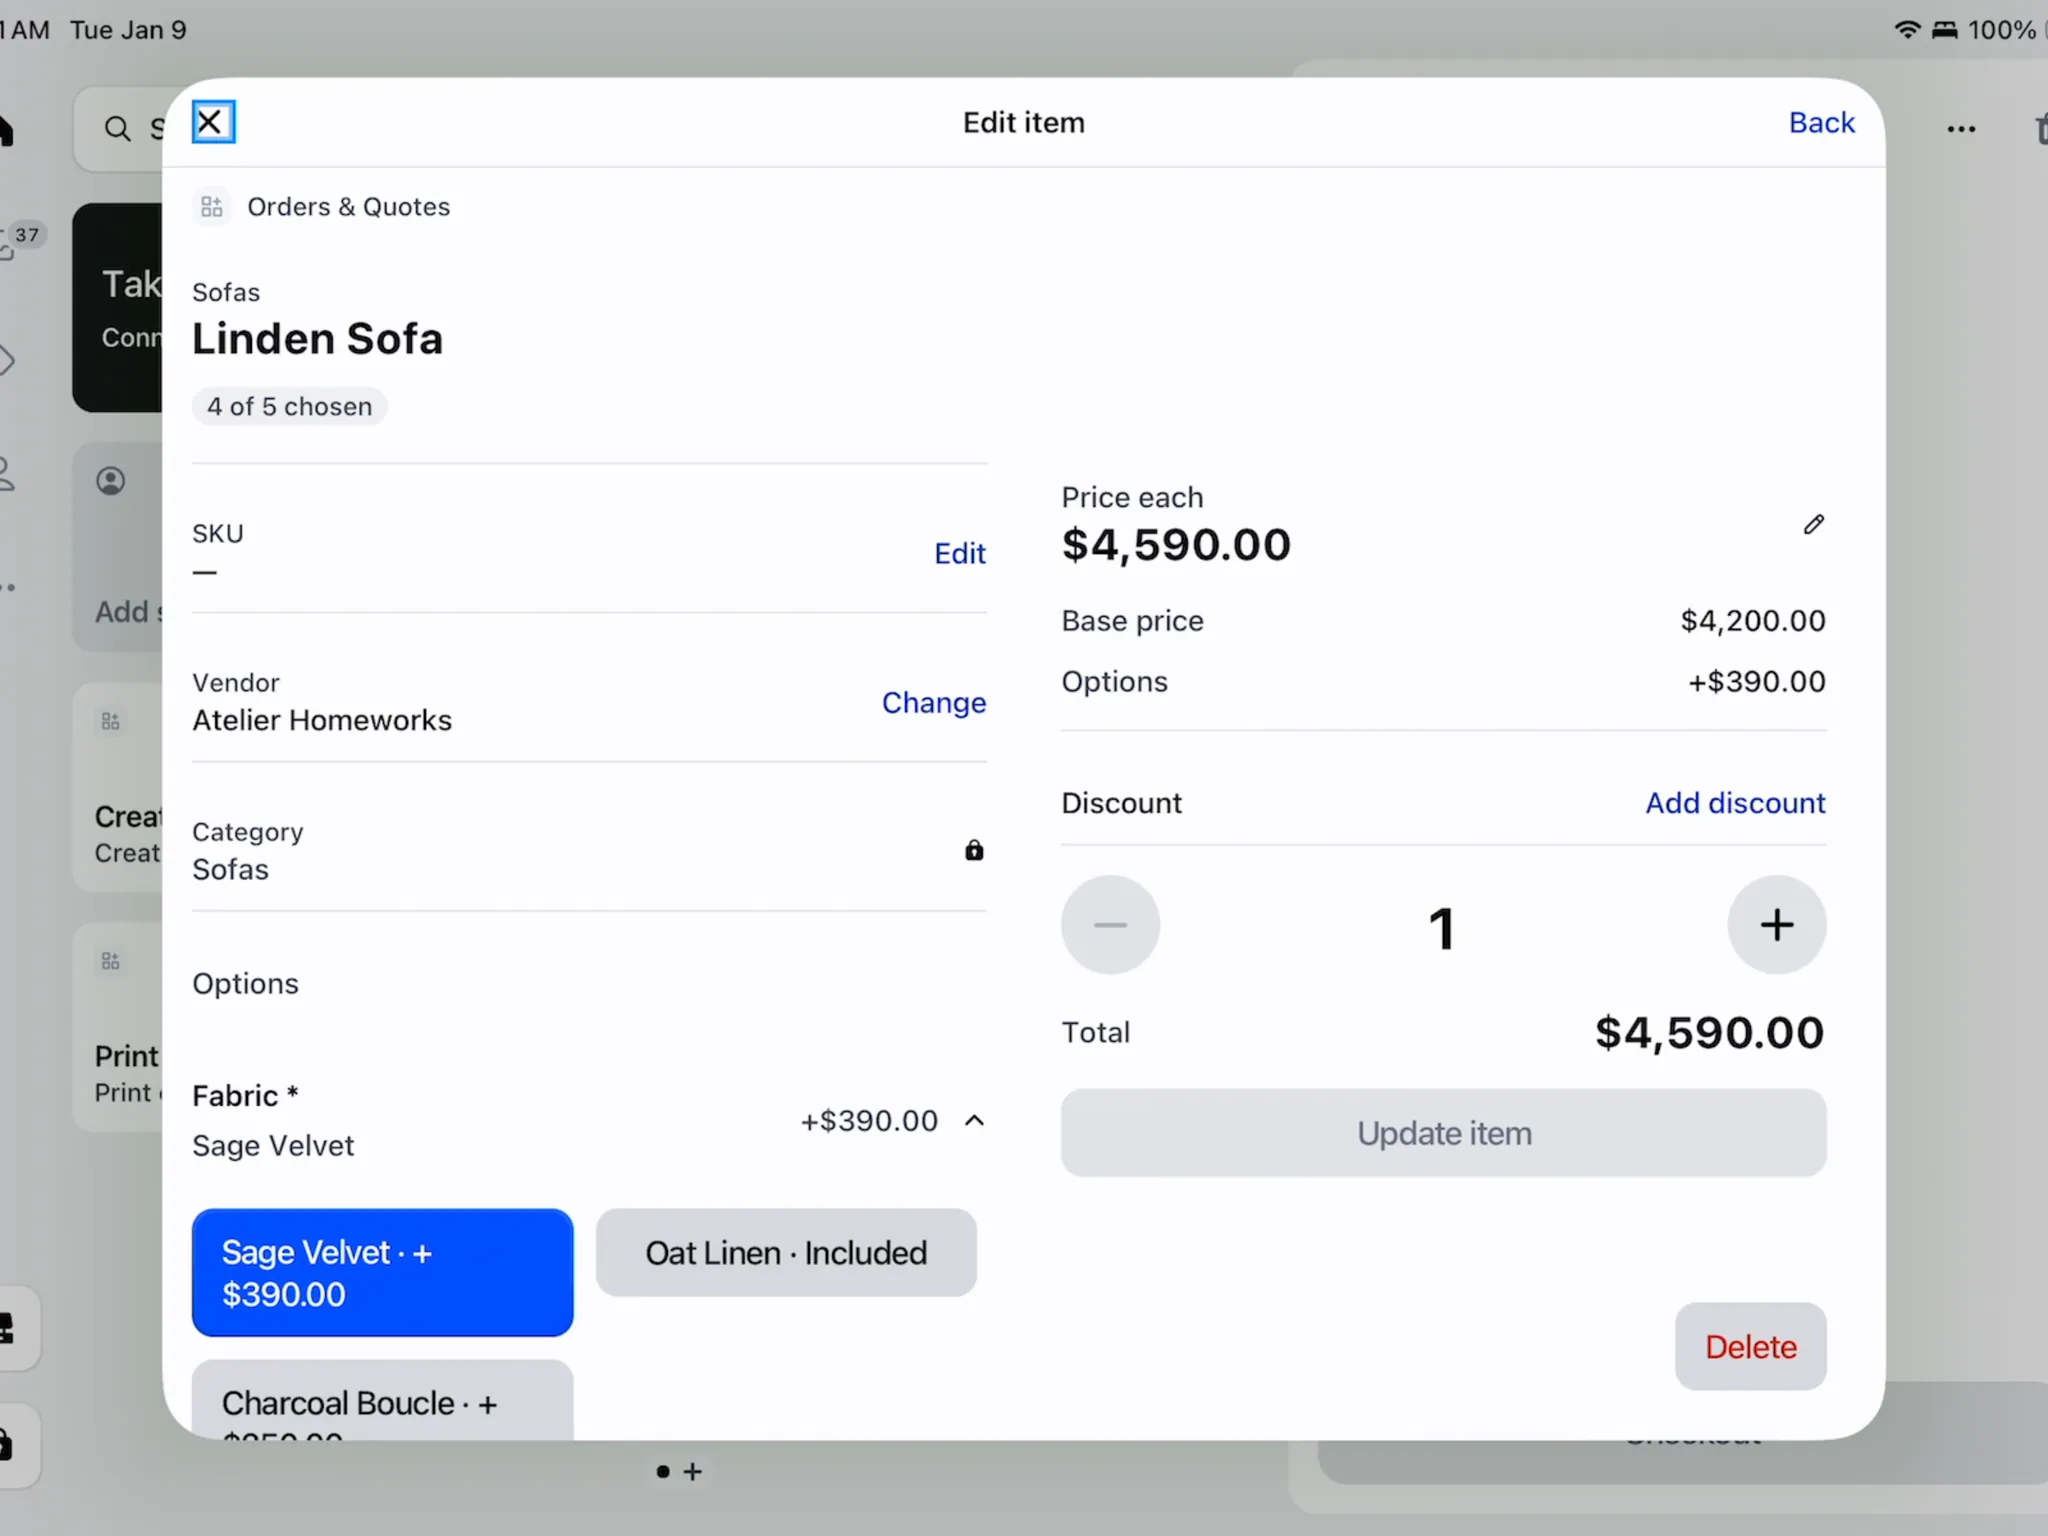
Required choices are counted on the item screen. Step 2: Complete larger and optional groups
Search larger value lists to find the intended choice. Optional groups appear after required ones.
For Dimensions, enter each part within its range and step. The item updates its completion count.
Step 3: Set the vendor
Tap Change beside Vendor. Choose from Vendors on this product template, or use Show more vendors when available.
Decide later saves the item without a vendor. Pick the vendor, then check it on the item.
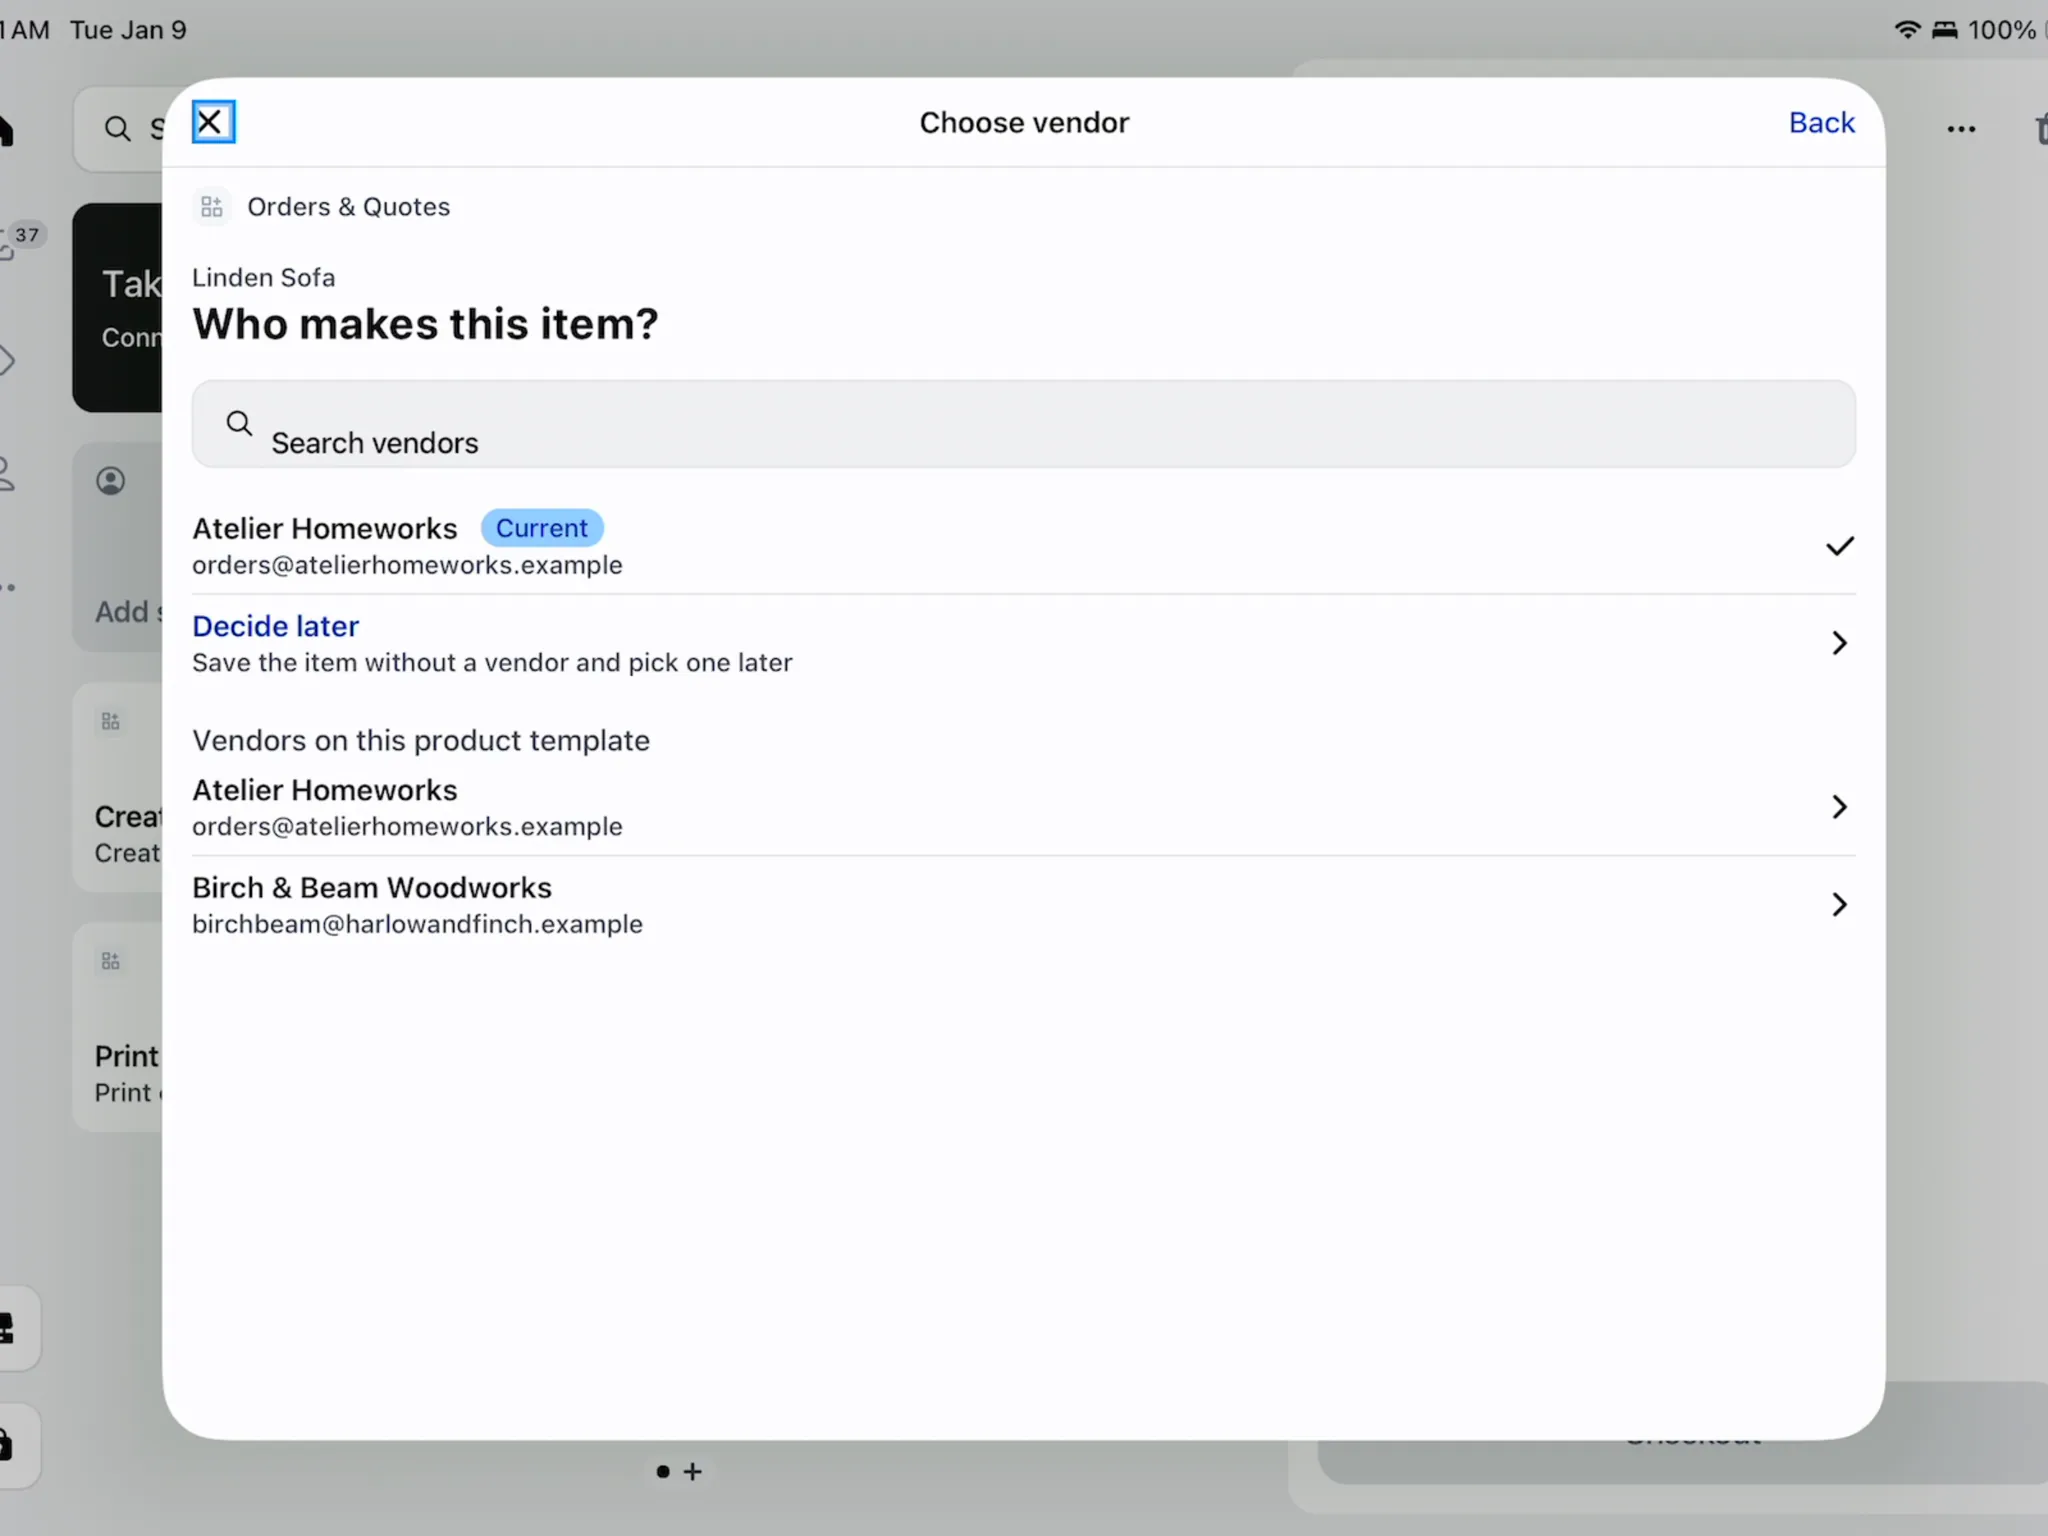
Choose who makes this item. Step 4: Check quantity and price
Set Quantity and review Price each, Base price, options and Total. Use Edit only when the price is editable.
Tap Add to quote, Add to order or Update item. If choices are missing, the button names what you must complete.
A placed Shopify catalog item's price is fixed. Use an allowed discount to lower it.
Customize the app line
Step 1: Edit its description
Click Add description, or Edit beside the existing description. Enter the wording in Edit description.
Turn on Sync to Shopify (the toggle reads Don't Sync to Shopify while off, its starting state) only when you intend to update the Shopify product description, then save. Other orders retain their own saved descriptions.
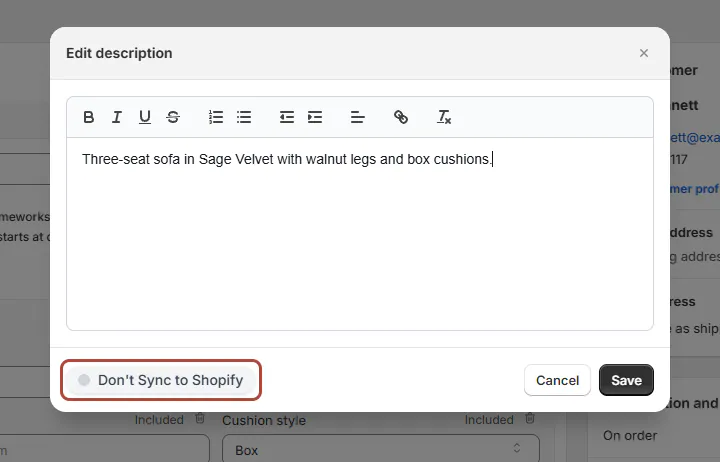
Choose whether the description also updates Shopify. Step 2: Choose the image
Click the line image to open Media (up to 10, the first is primary), then click + to open Add media. Search the Shopify media library or upload the intended image.
Click Done. A changed catalog-line cover is applied to that Shopify variant on the next sync.
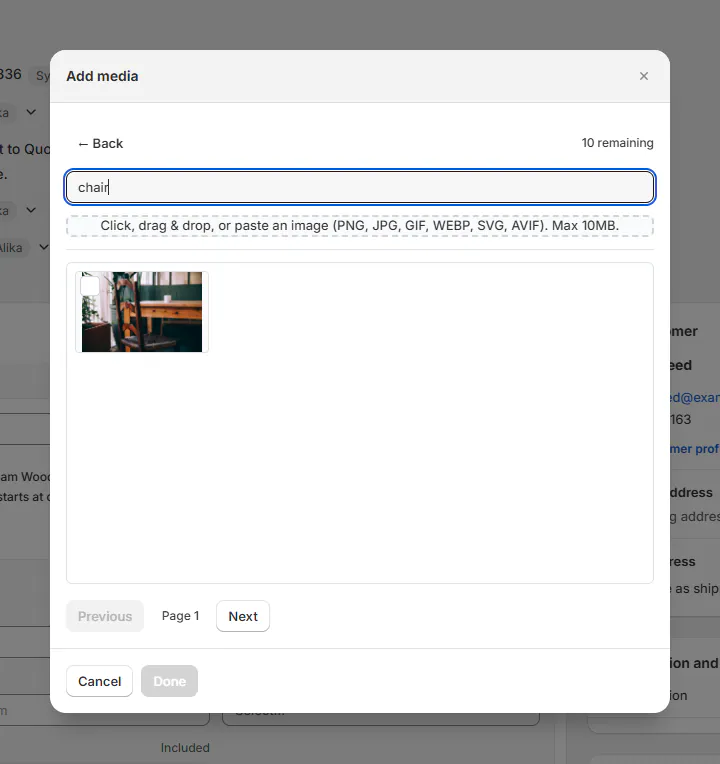
Choose media for the line. Step 3: Mark a service when appropriate
For an eligible template line, choose •••, then Mark as service (no delivery or pickup). The line displays its service designation.
Use Mark as physical product to reverse it before placement. A line with a tracked option cannot be a service.
What happens next
Save the sale after reviewing the configured lines. The vendor determines purchase-order routing and contributes build and transfer days to the delivery promise.
Without a real vendor, build and transfer time are not counted. The promise warns that some figures are missing.
Services never go on purchase orders and require no handover. Service-only orders have no ship-to block on documents.
Example: options for Olivia
Example · Harlow & Finch Interiors
Save the intended configuration
Olivia Bennett chooses a Linden Sofa from Atelier Homeworks.
- Sam Ortiz selects Sage Velvet and Feather Blend.
- Sam checks the vendor already filled from the template.
- Sam reviews the line price and description.
- Sam saves the configured quote.
Example: Marcus's vendor choice
Example · Harlow & Finch Interiors
Choose the maker on the iPad
Marcus Reed selects an Arden Dining Table.
- Sam Ortiz opens the table's item screen.
- Sam completes the required options.
- Sam chooses Birch & Beam Woodworks under Vendor.
- Sam updates the item and checks the saved line.
Important notes and tips
Skipped vendors, stock and service restrictions
Skip vendor appears only when the shop permits it. POS uses Decide later, then displays Not chosen yet or Vendor not chosen.
When the vendor is required, POS can add the item without one for a draft. Creating the order waits until you choose a vendor.
A purchased line cannot change vendor or be deleted on POS. Use Edit locked and ordered orders for back-office changes.
POS does not display swatch colors. Shopify product specifications from metafields are read-only, and finished stock configurations require Modify in the app.
Images can be PNG, JPG, GIF, WEBP, SVG or AVIF, up to 10 MB. Once placed, a line cannot switch between service and physical.
If something goes wrong
The product is missing
Clear filters and check the view. A template must be active, and its Who can add it settings must allow the staff member and location.
A Shopify product is missing on POS
Check that it is active and on the POS channel. If already added, change its existing quantity.
The template's Shopify product is refused
Add the template with its options. Template and option products cannot be sold as ordinary base-price lines.
Vendor sync failed
Choose an active vendor on the line.
No vendor is available
Add or activate a vendor on the template. Ask the catalog administrator if your role cannot do this.
Approval is greyed out
Assign vendors to the required lines before review approval.
Was this guide helpful?
Thanks. Tell us what was missing at support@meetorderpilot.com.