Replace, refund or credit a claim
Related guides
- Handle a warranty claimWarranty and service · 6 min
- Set up warranty claims and staff accessWarranty and service · 6 min
- Book repair visits and print job sheetsWarranty and service · 4 min
- Get a quote signedPayments and signatures · 5 min
- Send a purchase order to your vendorPurchasing · 6 min
Complete an approved claim by sourcing the part or replacement, arranging delivery, recording money back, and recovering costs from the vendor.
Follow the claim's work tiles. Each tile opens when its prerequisites are met, including the warranty order and any customer signature or deposit.
Before you start
Approve the fix
Start with Handle a warranty claim.
Check the vendor
The original product line needs an active vendor before its warranty order can be made.
Check order access
Claim work also follows your access to the original order and its location.
Every fix needs Manage warranty claims plus the permission for that action.
| Action | Additional permission |
|---|---|
| Prepare and send a PO | Prepare purchase orders; Send and cancel purchase orders. |
| Receive goods | Receive items. |
| Correct a receipt | Correct receipts. |
| Create a no-charge replacement | Create and edit quotes and orders; Override prices and give discounts. |
| Issue store credit | Refund payments. |
| View vendor recovery | View costs. |
| Enter recovery amounts or costs | Enter costs and charges. |
Get the warranty order ready
Step 1: Review the warranty order tile
Open Warranty order (named Warranty quote while the customer still has to sign). It identifies the warranty quote or order and either No charge · confirmed or the customer's amount owed.
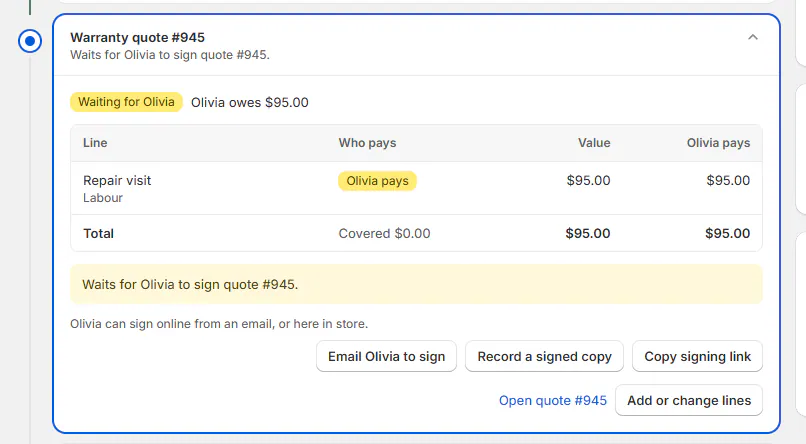
Warranty quote tile waiting for the customer's signature. A no-charge order with lines can show Paid and carries the Warranty Claim tag. That status doesn't mean the customer paid money for the replacement.
Step 2: Complete customer approval when required
Email the repair quote for signature from the claim, or record an authorized paper signature. Paper recording asks for Signed by, Signed on, How, and confirmation that you hold the signed copy.
Emailing needs Email customers. Paper recording needs Bypass signature and deposit requirements and the relevant order-placement permission.
Step 3: Open the ready order
Open the quote or order from the tile (Open quote #…). Its banner links back to the claim with Open claim and identifies the decision.
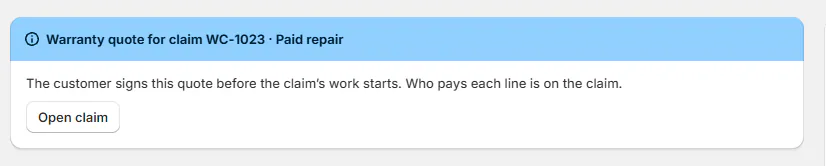
Order page banner 'Warranty quote for claim WC-… · Paid repair'. Work waits for the warranty order, signature, or deposit when required. Use Get a quote signed rather than skipping a customer approval requirement.
Order a part or replacement
Step 1: Choose the sourcing action
Open Order from the vendor and set Needed by. Choose Take from stock, Save as draft, or Create and send PO.
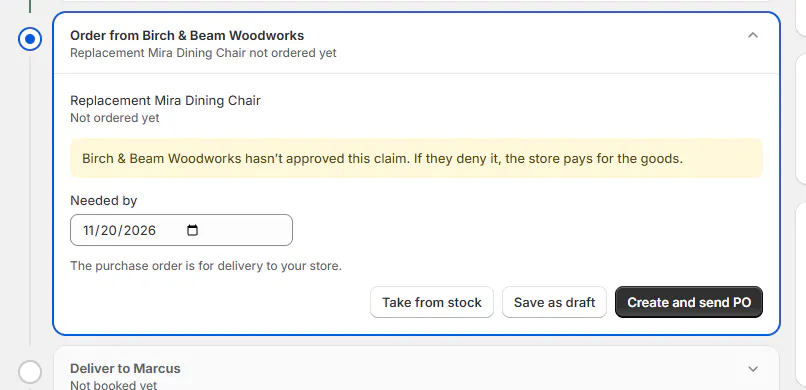
Order from Birch & Beam Woodworks tile with Needed by and the sourcing choices. Take from stock records goods as sourced and clears the part wait where applicable. It doesn't move inventory by itself.
Step 2: Review and send the PO
Review the vendor notes before sending. They identify the warranty part or replacement, claim, original order, product, and serial. The customer name remains in internal notes.
Use Send to the vendor for a saved draft. See sending a purchase order for the send review.
Step 3: Record arrival or a problem
When goods arrive, use Mark received. For arrived damaged or wrong, choose the applicable issue, such as Damaged in transit or Wrong item or colour.
The problem can be emailed on the same PO. Correcting receipts needs its permission, and emailing the vendor also needs Send and cancel purchase orders. Follow receiving problems.
Deliver a replacement
Step 1: Book the delivery
Open Deliver to the customer. Enter Date, Time window, Who delivers, and Notes for the delivery. Choose whether to pick up the old unit on the same trip.
Step 2: Confirm the booking message
Tick Email followed by the customer's name the delivery time if they should get it, then click Book delivery. It was delivered already records a past delivery instead. Use a job sheet for the driver when the date and window are set.
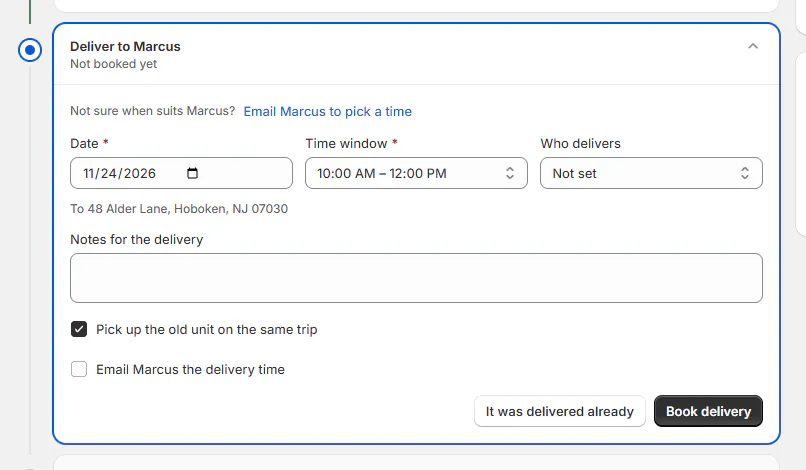
Deliver to Marcus tile ready to book. Step 3: Record the completed handover
Enter Delivered on and what happened to The old unit: returned to the vendor, disposed of, kept by the store, or not picked up.
The replacement's coverage starts under the configured replacement rule. It carries the original terms and sold plan at no charge, while the replaced unit's coverage stops.
If the tile offers Finish setup, complete the failed replacement setup before recording delivery. The claim cannot close while a replacement remains open.
Give money back
Step 1: Record an actual refund
Issue the refund in Shopify first. In Refund or store credit, choose Refund and record Amount, Reference, and Note.
Recording a refund here doesn't move money. Check the Shopify transaction before describing the refund as paid.
Step 2: Issue or record store credit
Choose Issue store credit now or Record credit already issued. Enter the amount, optional expiry and note. A blank expiry means the credit doesn't expire. When issuing now, Shopify emails the customer about the credit unless you untick it.
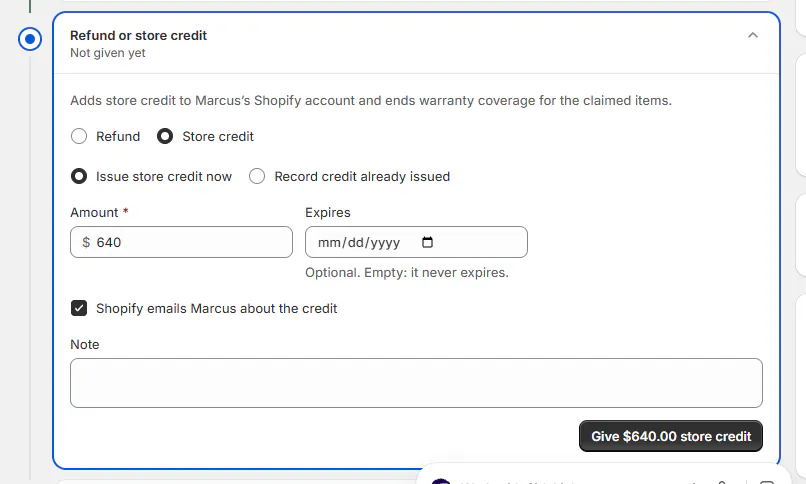
Refund or store credit tile with Store credit chosen. Shopify emails the customer about issued credit. Don't issue another credit when recording one that already exists.
Warning
Claim money back ends coverage
Recording the refund or credit ends warranty coverage for the claimed units. Confirm the remedy and affected units before saving.
Get paid back by the vendor
Step 1: Prepare the reimbursement request
Open Get paid back and choose Email the claim to the vendor. Select costs under Ask for and supporting material under Send with it.
Options include Photos (link), Technician's notes, and Their reference. Click Send claim, or use Record a reimbursement request for a request made separately.
Step 2: Record the vendor outcome
Use Mark approved when they agree, or go straight to Record credit: Record the vendor's credit takes Amount credited and How, and marks it approved. Use Mark denied when the vendor refuses.
The amount requested is fixed once sent. A shortfall shows Store covers with the remaining amount. Warranty analytics tracks recovery.
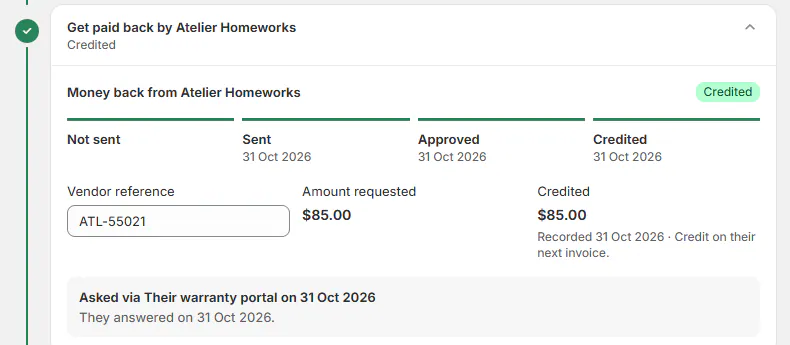
Get paid back tile with a sent claim and the credit recorded.
What happens next
The claim, warranty order, and purchase order link to each other. Once every step is done, return to claim closure.
Example: replace Priya's chair
Example · Harlow & Finch Interiors
Complete a covered replacement
Priya Shah's Mira Dining Chair has a cracked leg.
- The claim is approved for replacement.
- Birch & Beam Woodworks receives the linked purchase order.
- Jo Park records receipt and books Friday delivery.
- The new chair is delivered and the old chair returned to the vendor.
- The vendor's credit is recorded before the claim closes.
If something goes wrong
The warranty order cannot be made
Assign an active vendor on the original product line.
Nothing is left to source
The goods are already ordered or recorded as taken from stock.
Store credit is unavailable
Check Refund payments.
Get paid back is hidden
Check View costs.
The replacement shows Paid
A no-charge order with lines counts as paid without a customer payment.
Was this guide helpful?
Thanks. Tell us what was missing at support@meetorderpilot.com.