Edit or cancel a purchase order
Related guides
- Send a purchase order to your vendorPurchasing · 6 min
- Split or attach one order's purchase linesPurchasing · 5 min
- Correct costs after goods arriveInventory and costs · 4 min
- See what changed and restore an earlier versionGet started · 4 min
- Talk to vendors and record what you pay themPurchasing · 5 min
Change a purchase order's remaining quantities, delivery details or notes, and decide whether the vendor needs an updated copy. You can also attach supporting files or cancel a PO before receiving starts.
Saving a sent PO keeps its status. The vendor continues to have the earlier version until you send the update.
Before you start
Have you found the right PO?
Search Purchase Orders by PO number, vendor or item name. Check the app's location picker if results are missing.
Can you edit it?
Prepare purchase orders controls editing. Enter costs and charges is also needed for Unit Cost, Tax and Shipping.
Has anything arrived?
Received or rejected units place a minimum on the line quantity and prevent cancellation.
Is it finalized?
Reopen it before permitted changes. Use cost corrections for received costs.
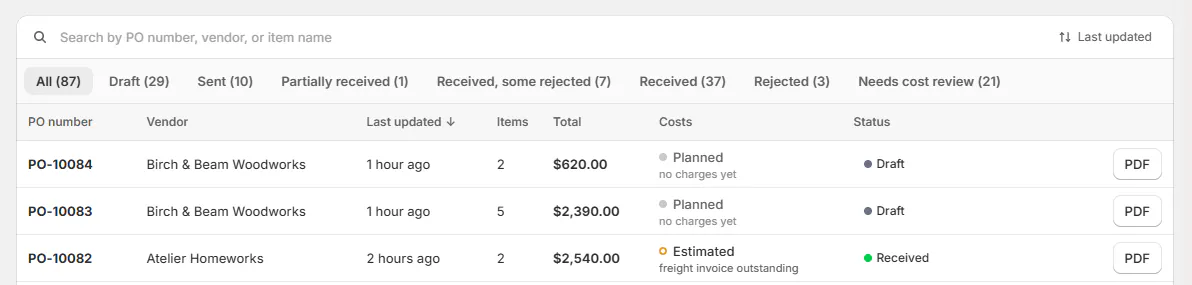
The list has All and status tabs, with 30 rows per page. Every search word must match the PO number, vendor, item name or SKU.
The default sort is Last updated, newest first. Total can read Incomplete when a cost is missing, or Costs hidden without cost access.
There are no bulk actions on this list. Use cost review for the separate Needs cost review filters.
The PO page at a glance
The heading combines the PO number and vendor. Status and cost badges sit beside progress through Created, Sent, Received and Finalized.
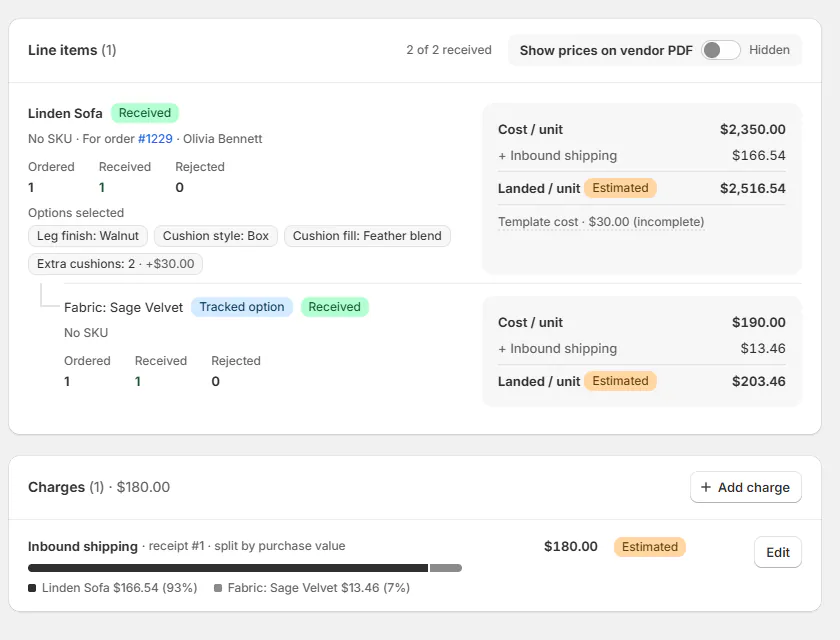
The page contains Line items, Charges, Landed cost, Vendor, Vendor payments, Delivery, Attachments and Activity. QuickBooks appears when connected.
Line details distinguish the customer order, ordered and received quantities, rejection information and estimated or final costs. The vendor note is marked as printed on the PDF.
Edit a purchase order
Step 1: Open the edit page
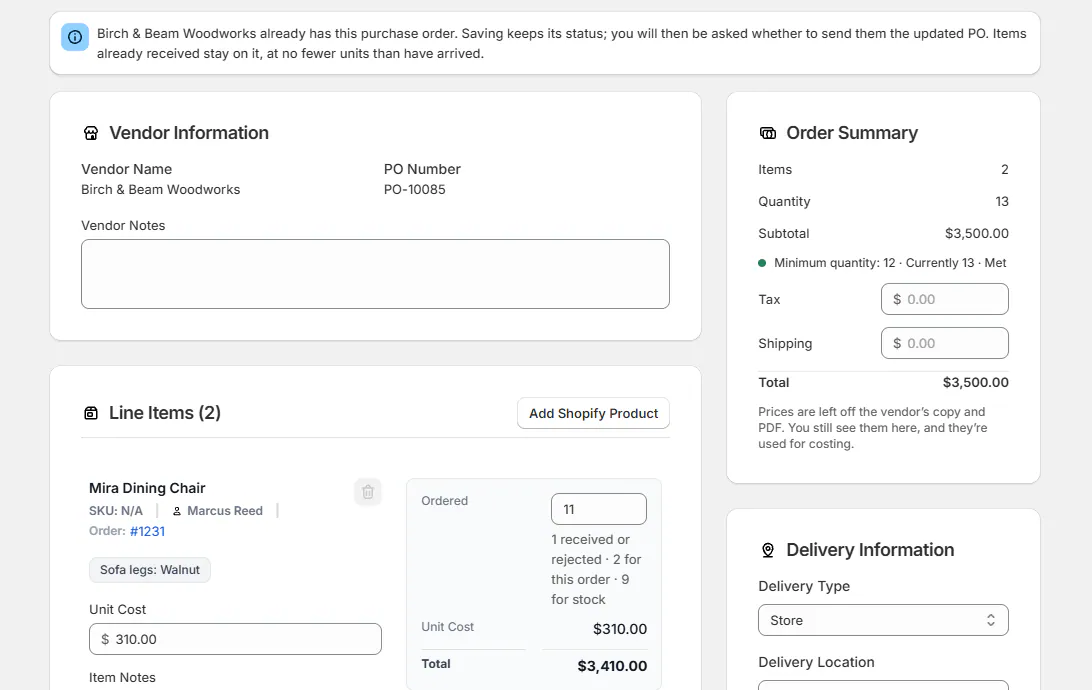
Click Edit items, or choose Edit purchase order from the PO menu. The edit page opens with vendor information and line items.
Draft, Sent, Partially received and Received, some rejected POs can be edited unless finalized. Sending, Received, Rejected and Completed POs do not allow normal item editing.
Step 2: Update the lines
Change Ordered, Unit Cost or Item Notes where permitted. On a line for a customer order, ordering more than the order needs shows the split, such as 4 for this order · 2 for stock. Use Add Shopify Product for another existing product.
A removed line can be restored before saving. A line with received or rejected units must stay on the PO, at no fewer than those accounted-for units.
Use Attach PO when the new line belongs to a customer order and needs that link.
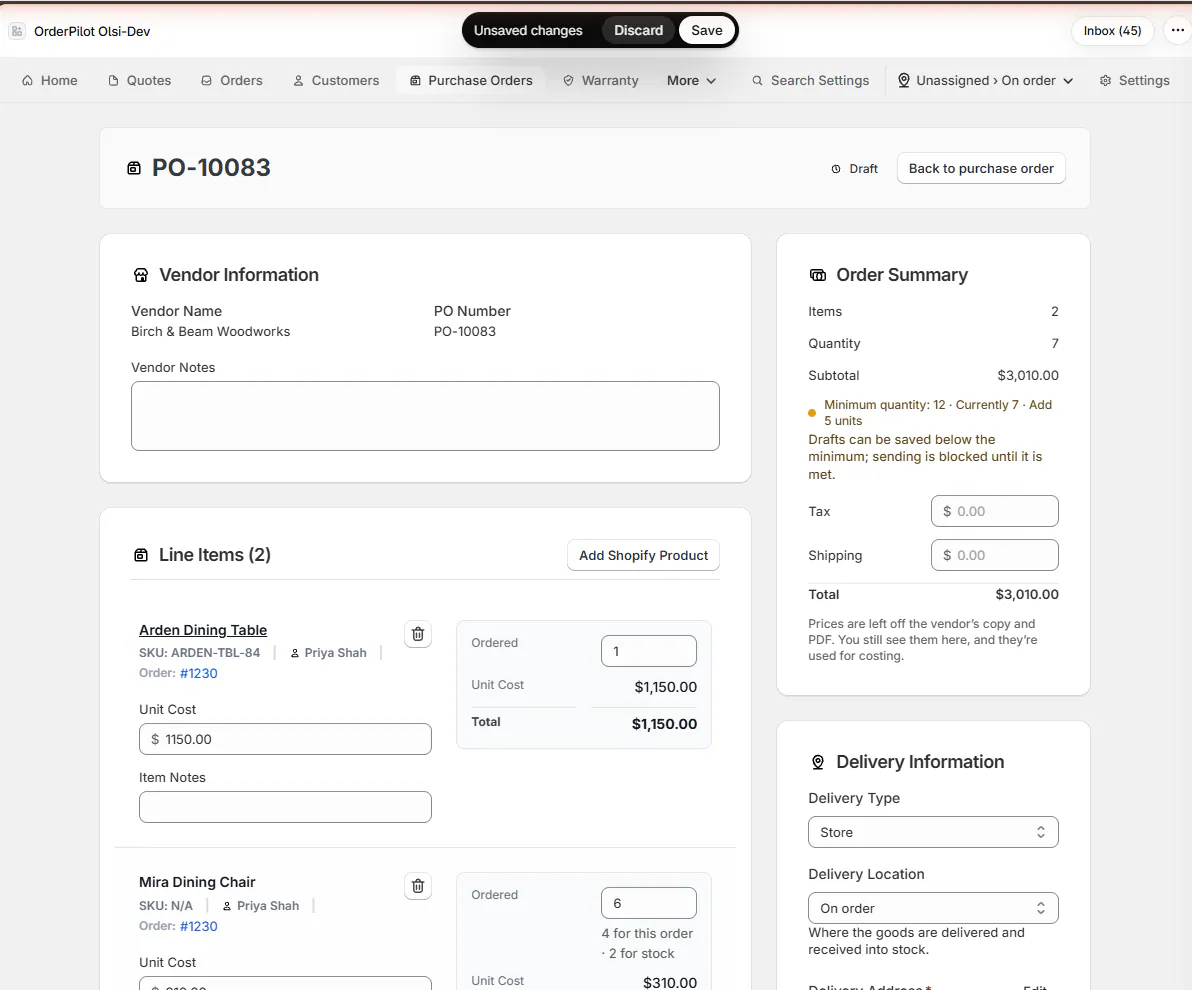
The save bar appears after you change the purchase order. Step 3: Check delivery and notes
Review Delivery Information, including the type, location and required address. Sending a PO explains customer and dropship destinations.
Check Vendor Notes, Side Label and Internal Notes. Vendor notes print on the PDF; the other fields are not substitutes for instructions the vendor must receive.
Costs can remain visible internally while prices are hidden on the vendor's copy.
Step 4: Save the change
Click Save in the save bar. Discard abandons the unsaved edits instead.
A successful save confirms that the PO was updated. A sent or partly received PO keeps its status, and units already accounted for remain protected.
If another person changed the PO, use Reload purchase order before deciding which changes are still needed.
Step 5: Decide whether to send the update
When asked Send the updated PO to the vendor, choose Send updated PO… to review the email before anything goes, or Not now to leave it unsent. Resend email stays on the purchase order for later.
An enforced vendor minimum can block resending until the minimum is met. Without a vendor email, download the PDF and share the update through your normal process.
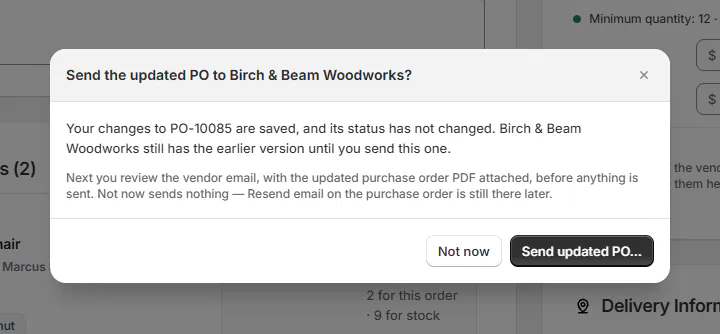
Saving and sending an updated PO are separate actions.
Attach supporting files
Step 1: Add the files
On the PO page, find Attachments and use Add files, or drop the files into the card.
Any file type is accepted, up to 20 MB per file and 50 files per PO. Each uploaded file shows its name, size, date and uploader.
Attachments can be managed in every status, including after finalization.
Step 2: Open or remove a file
Click a filename to open it. PDFs, common images and plain text open in a new tab; other formats download.
Removing a file asks Delete attachment? before deleting it. The PO's activity records attachment additions and removals.
Cancel a purchase order
Step 1: Check cancellation is allowed
Confirm that the PO is Draft, Sending or Sent, with nothing received or rejected and no vendor payments recorded.
Use vendor payments to review payment records. Do not remove a valid payment record merely to bypass a cancellation restriction.
Step 2: Confirm cancellation
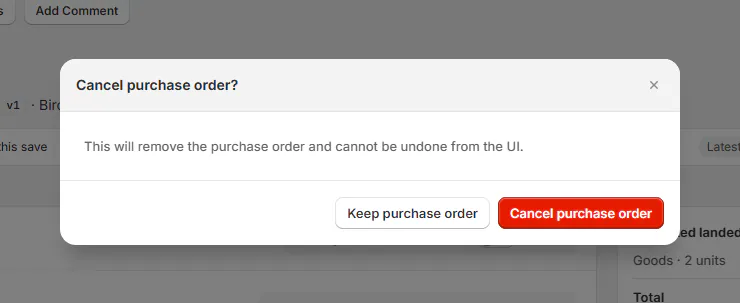
Open the menu and choose Cancel purchase order. Read the confirmation, then choose Cancel purchase order or Keep purchase order.
Cancelling removes the PO and returns you to the list.
Warning
Cancellation removes the PO and its stored attachments and cannot be undone from the app. It sends no email, so tell the vendor separately.
Screen reference
What happens next
Saved edits appear in the PO's activity and version history. Resend email remains available on eligible sent POs.
Cancellation adds Purchase order cancelled. to linked customer orders and frees their lines for purchasing again. The status map can return a record with no remaining PO to Order or Quote.
Example: Marcus adds more chairs
Example · Harlow & Finch Interiors
An updated quantity reaches the vendor
Jo Park prepares Birch & Beam Woodworks PO-10002 for Marcus Reed.
- Change the draft from 4 Mira Dining Chairs to 6.
- Save and send the PO through the normal sending flow.
- After Marcus adds another chair, increase the allowed quantity to 7.
- Save, then choose Send updated PO to share the new document.
- Attach Atelier Homeworks' Sage Velvet specification to its separate PO-10001.
If something goes wrong
Edit items is greyed out
Hover for the reason. Wait for Sending to finish, reopen a finalized PO or use the received-cost correction route.
A line cannot be removed
Received or rejected units must stay recorded; lower the quantity only to the displayed minimum.
Save asks for a line or address
Keep at least 1 positive-quantity line and complete the delivery address.
A product cannot be replaced
Add the new product as its own line.
An attachment will not open
Allow this page to open a new tab and retry.
Location subscription required appears
Ask the owner to check the delivery and source-order locations before editing.
Was this guide helpful?
Thanks. Tell us what was missing at support@meetorderpilot.com.