Collect a payment
Where are you working?
Related guides
- How payments workPayments and signatures · 5 min
- Take a depositPayments and signatures · 5 min
- Set payment terms and place pay-later ordersPayments and signatures · 5 min
- Review payments and invoices, and refund a paymentPayments and signatures · 5 min
- Take some items home and deliver the restQuotes and orders · 5 min
Send the customer a payment link, record money already received, or open Shopify POS checkout. Choose the route that matches how the money will be paid.
The app's recording actions do not charge a card or collect a bank transfer. How payments work explains the difference.
Before you start
Save the sale
Create the quote or order and let Shopify catch up before payment.
Check delivery
Delivery items need an address. Resolve the order's tax choice before placing a charge-tax draft.
Check request access
Sending needs Request payment and Email customers.
Check recording access
Recording payments and applying store credit need Record payment and Mark as paid.
On POS, taking payment on a quote needs Convert quotes to orders. For a draft order, either conversion permission or create-and-edit permission permits payment.
POS also waits for tax and required signatures. A local draft saved only in OrderPilot must be created before payment.
Ask the customer to pay
Step 1: Open the payment request
Click Request payment in the header. If the header shows the signature action instead, use the ••• menu.
The email composer opens with the Request payment template and Invoice PDF attached.
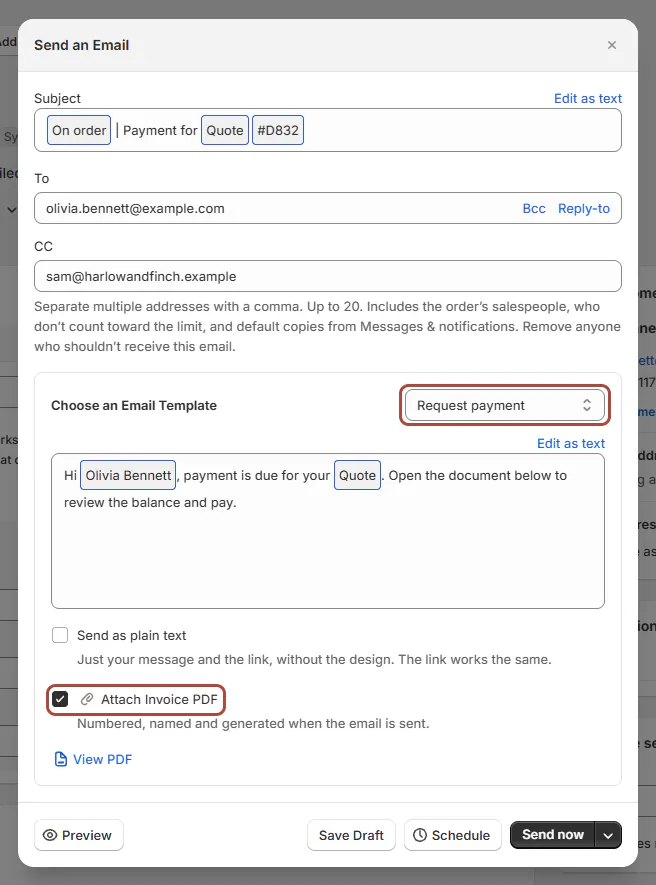
Review the customer and invoice before sending. Step 2: Send or copy the link
Check the recipient and message, then click Send now. The customer's email offers Pay now.
Alternatively, use Copy Invoice Link, or Copy Pay Link for a split sale. Sending a request or copying this link enables customer payment on the record.
Step 3: Manage when payment is enabled
If your shop restricts customer payment, use Customer payment in the summary. It reads Not enabled for customer until you click Enable payment, then Enable or Enable & send payment request. The dialog names the amount the customer will be asked to pay. Once enabled, the row shows Enabled with who turned it on and when.
To stop customer payment, choose Disable, review open requests and confirm Disable payment. The row shows the resulting state. Payments already received stay, and a Shopify checkout link the customer already has can't be withdrawn.
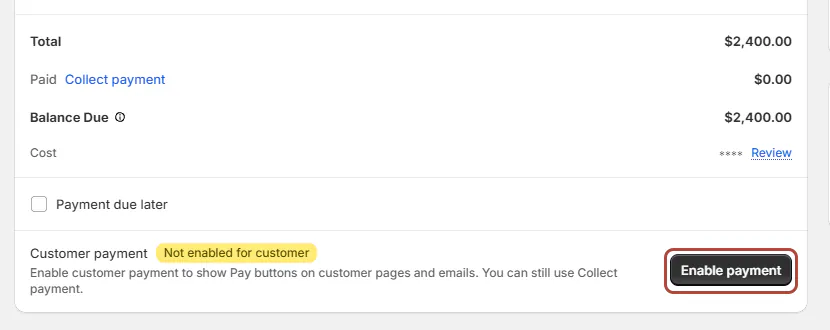
Customer payment can be enabled separately on the record. Set the shop's customer-payment rule
Under SettingsQuotes & ordersDefaultsQuotes, Customers can pay only after payment is enabled on the order starts off.
When it is on, customer payment surfaces wait for each record to be enabled. The customer sees a message saying the store will advise when payment is ready.
The restriction does not prevent staff from recording money already received in the app.
Record received money or store credit
Step 1: Open the recording action
Click Collect payment beside Paid, or use the ••• menu. Read the dialog for this record's state.
For a draft without terms, choose Mark as paid. Collect payment explains that the action records received money and creates the Shopify order.
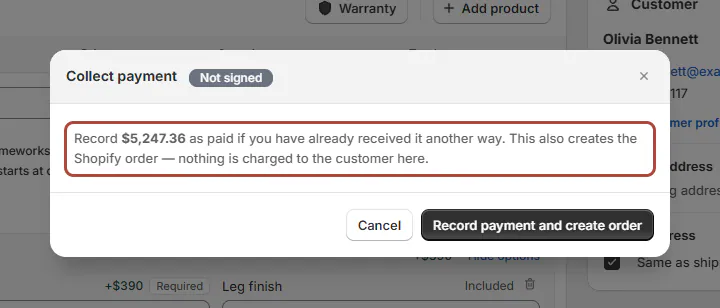
This action records received money and creates the order. Step 2: Record the correct received amount
Check that the money has actually arrived. Confirm Record payment and create order when the draft's full payment is ready to record.
With Deposit orders enabled, choose the whole balance or deposit route, then Already paid and the received method. Check the resulting payment record.
Step 3: Use the placed-order dialog
On Shopify Plus, Record payment allows full or partial recording with Amount, Type and Note.
Without Plus, Mark as paid records the whole outstanding balance. Confirm only the amount actually received.
Shopify Plus
Manual partial payments on an already placed order require Shopify Plus. Use Take a deposit for eligible pre-placement deposit routes.
Step 4: Apply existing store credit
Choose •••, then Apply store credit. Read Store credit available and enter an amount no higher than that or the balance due. The amount comes off the balance due right away.
Click Apply store credit. Check the confirmation and allow time for the amount to appear under Paid.
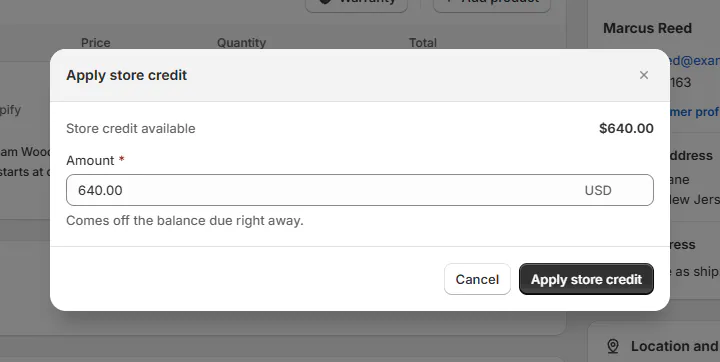
Apply only the available amount allowed for this sale. A draft can use partial credit through a separate payment order, without enabling Deposit orders. A placed order allows partial credit on Plus.
Without Plus, store credit on a placed order must cover the whole balance. A split order collects payment separately for each part.
Take payment at the register
Step 1: Check the balance
Open the created sale and read Balance due. Tap Take Payment, or Take Deposit when only a native deposit is due.
Unsaved edits are saved first. The route opens the relevant handover, signature or payment screen.
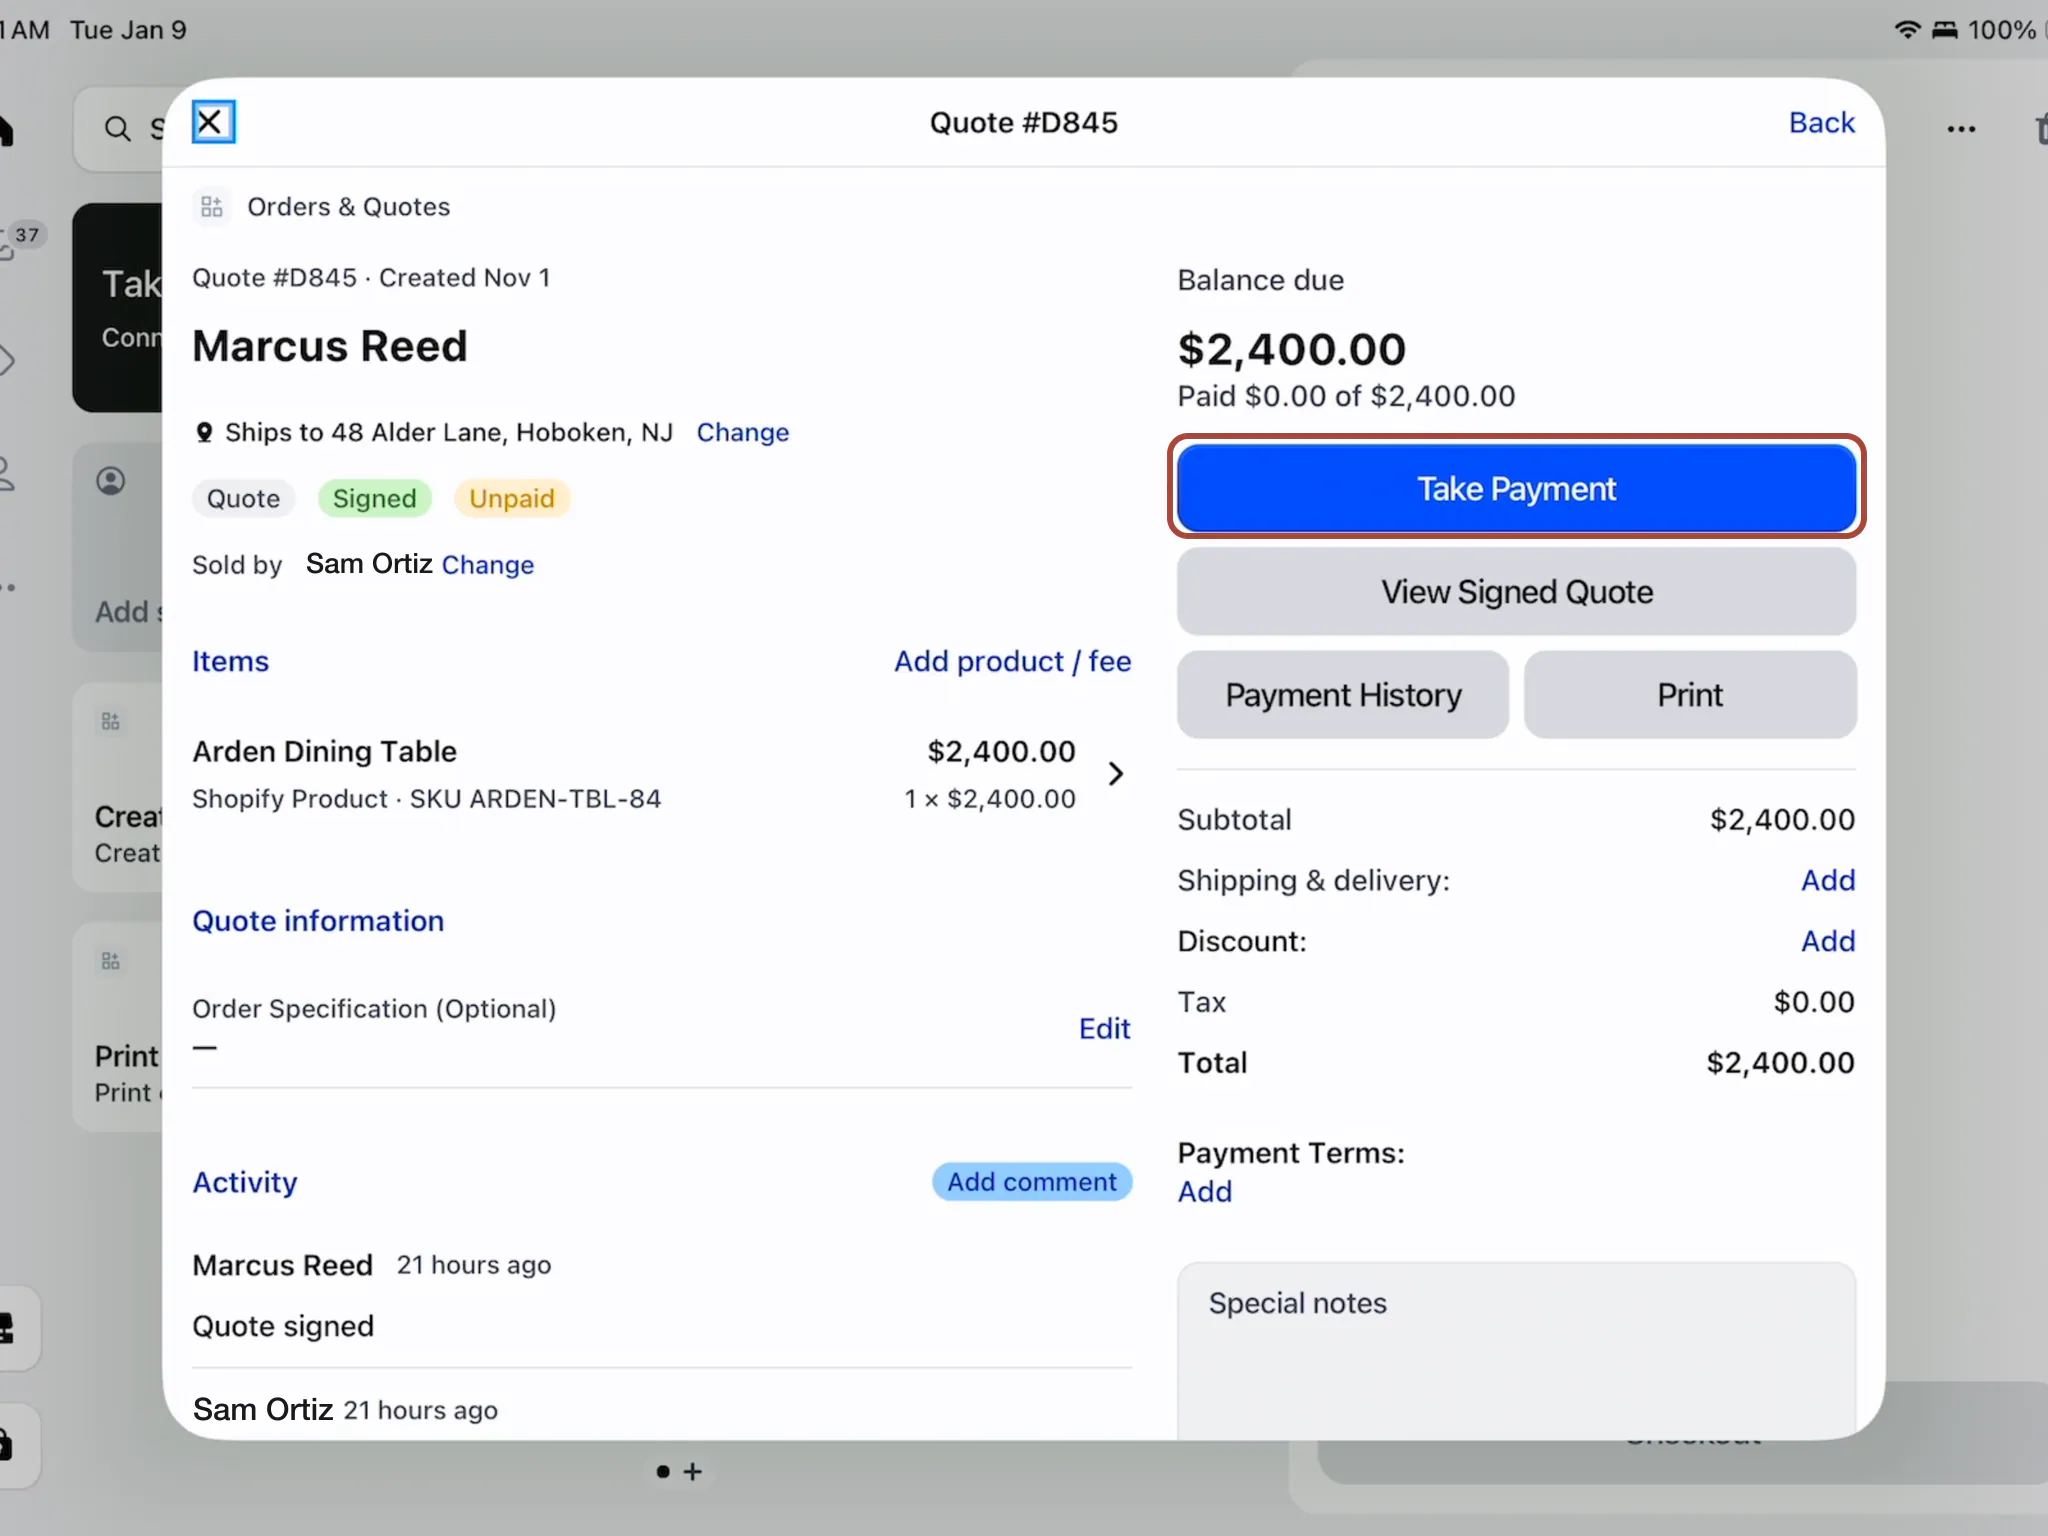
Check the amount due before starting checkout. Step 2: Choose what leaves
On Pickup or Delivery?, choose each unit's method and review Due now. Use Split orders for goods leaving at different times.
Tap Continue to Payment. If no handover choice is needed, the route can go directly to signature or payment.
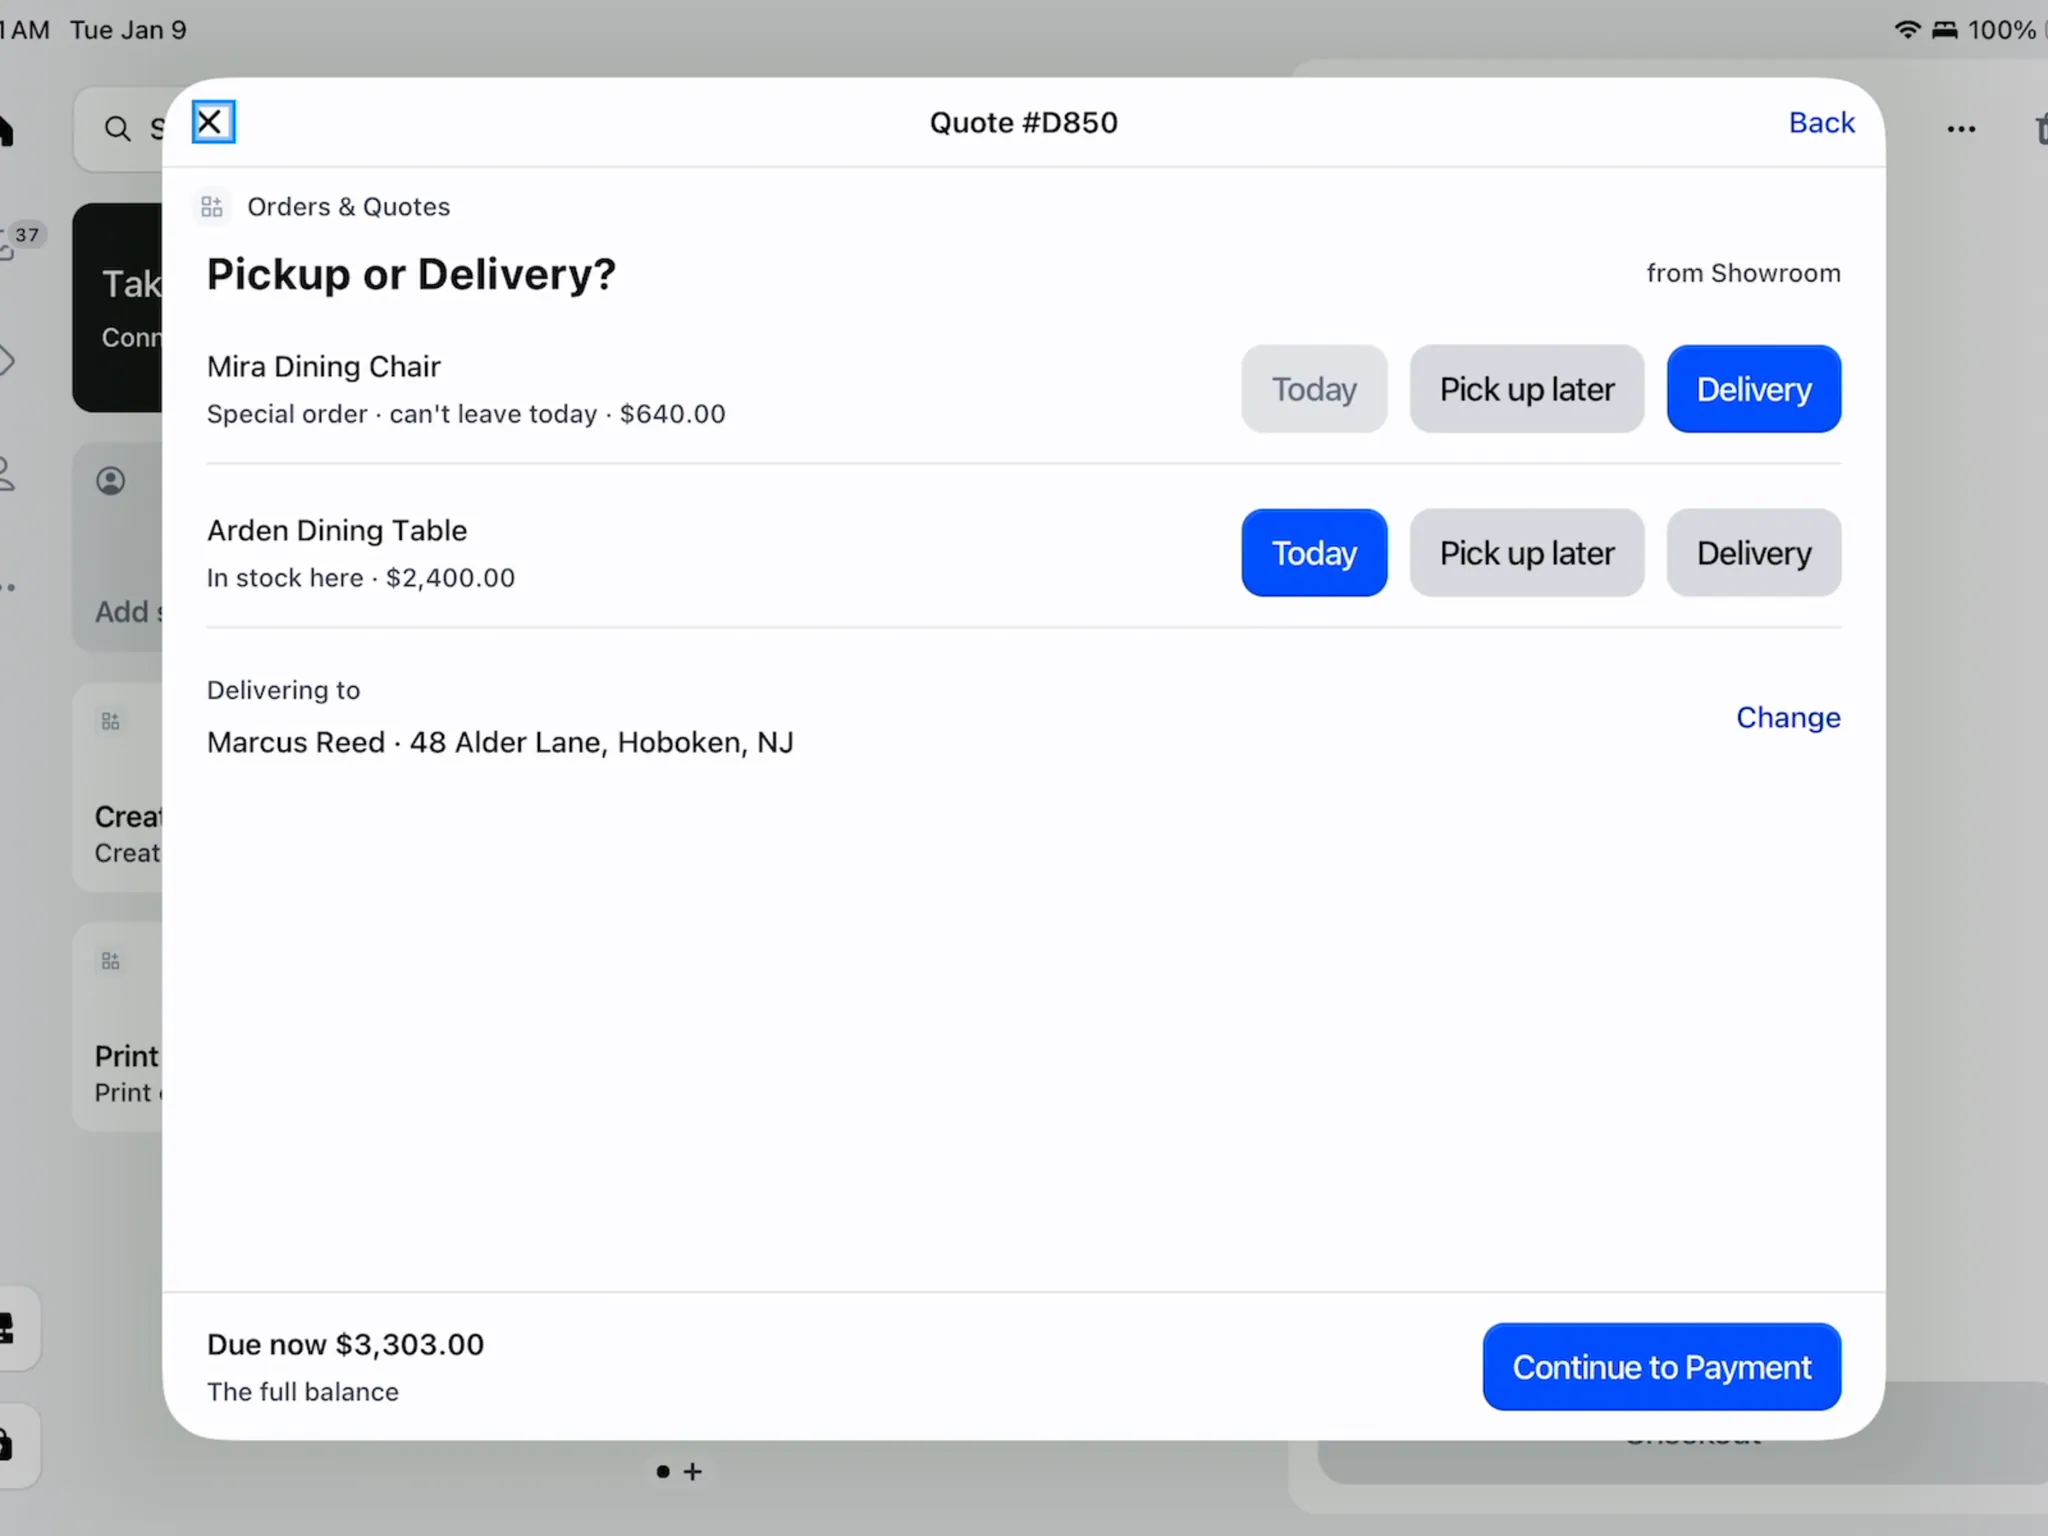
Due now reflects the selected handover. Step 3: Complete any required signature
If Customer signature appears, follow Sign in the showroom. The continuation action waits until signing is complete.
Continue after the signature confirmation. Read any update message while Shopify prepares the order.
Step 4: Take the payment in Shopify
Use Shopify POS's Collect payment screen to take the selected tender. Return to OrderPilot afterward.
Check the updated paid amount and balance. Eligible Today units are fulfilled after payment, and you can print the receipt.
What happens next
The Shopify order is created or its payment state changes. OrderPilot updates the badge, Paid row and Activity after receiving the result.
Use Refunds and payment history to inspect what was recorded. A requested payment is different from a completed payment.
Example: Priya's bank transfer
Example · Harlow & Finch Interiors
Record money already received
Priya Shah pays for Mira Dining Chairs by bank transfer.
- Sam Ortiz checks that the transfer arrived.
- Sam opens Priya's draft quote and chooses Collect payment.
- Sam reviews Mark as paid and confirms Record payment and create order.
- Sam checks the placed order and recorded payment.
Example: Marcus pays on POS
Example · Harlow & Finch Interiors
Collect through Shopify
Marcus Reed takes chairs today and has a table delivered later.
- Sam checks the created sale's balance.
- Sam taps Take Payment and reviews each handover choice.
- Sam checks Due now and continues.
- Marcus pays through Shopify, and Sam checks the result in OrderPilot.
If something goes wrong
Request payment is greyed out
Check unsaved changes, sync, delivery address, tax placement and open customer questions.
An older payment request blocks recording
Review it under Payments and Invoices and cancel the request if appropriate.
A placement warning appears
Store credit was not applied
Read the error and check the current payment state before retrying.
POS waits on tax or checkout
Read its information reason and use Fix problems on POS.
The record says Paid in full
Nothing remains to collect, including a valid zero-total sale.
Was this guide helpful?
Thanks. Tell us what was missing at support@meetorderpilot.com.